Blog

  • Best Air Fryer Garlic Parmesan Wings Recipe

    Best Air Fryer Garlic Parmesan Wings Recipe

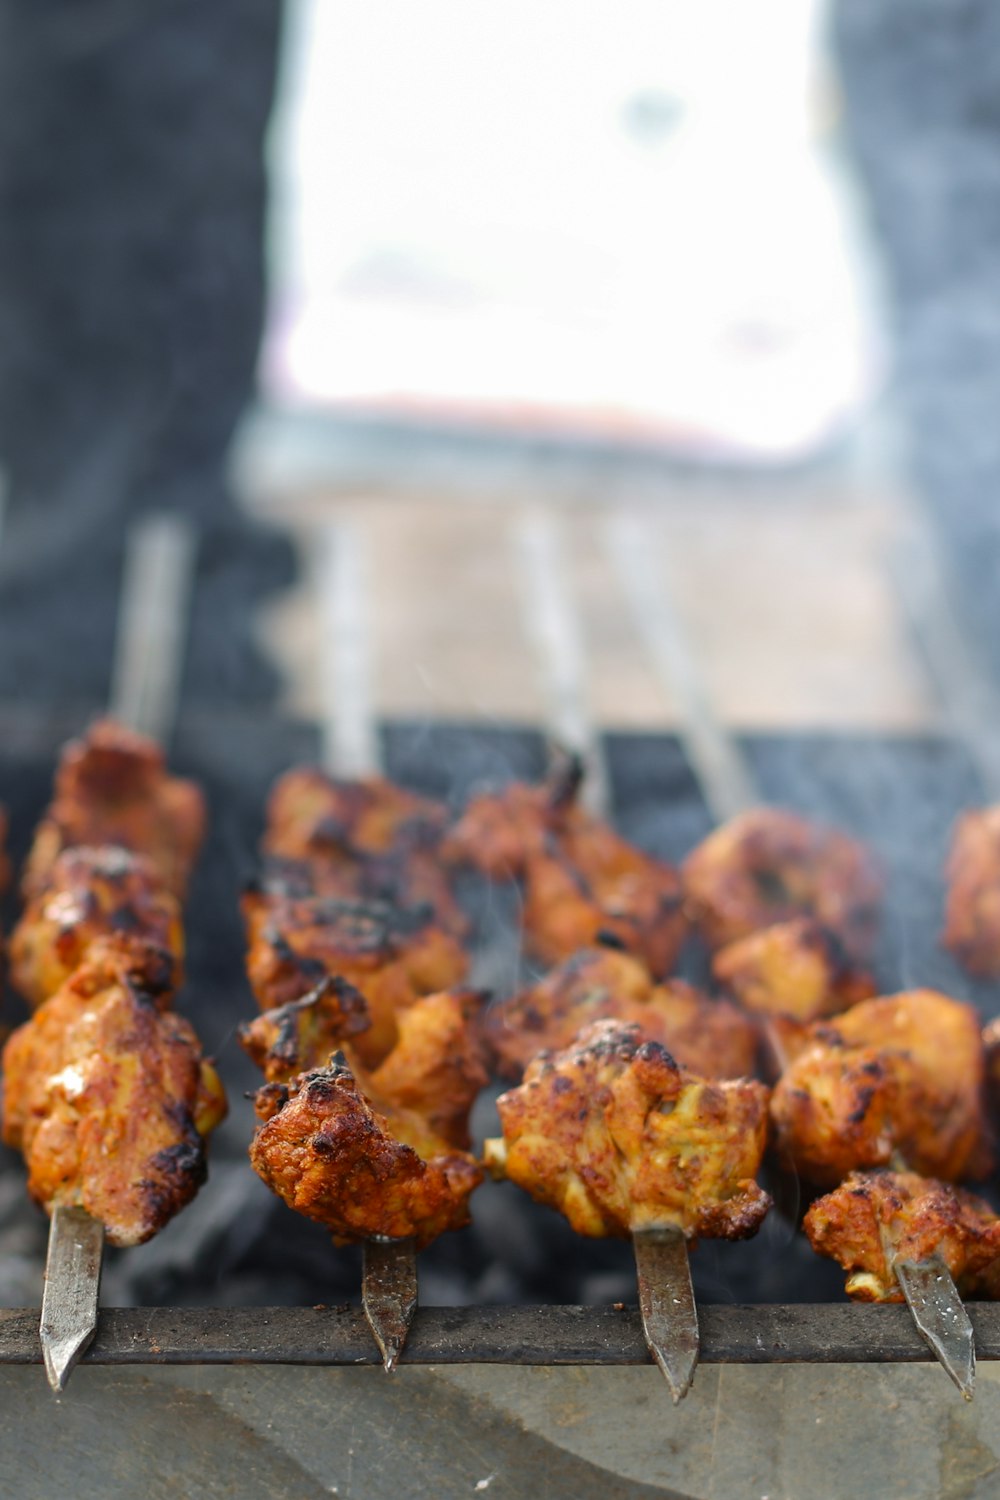
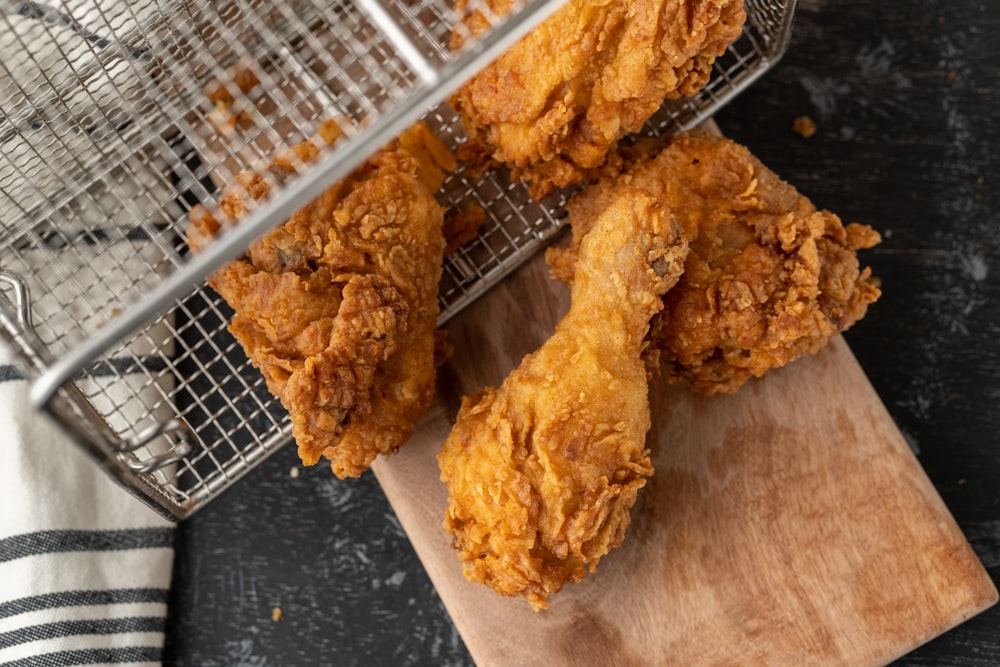
    Best Air Fryer Garlic Parmesan Wings Recipe (2026 Guide). This recipe has gone viral for a reason: it’s quick, easy, and incredibly delicious.
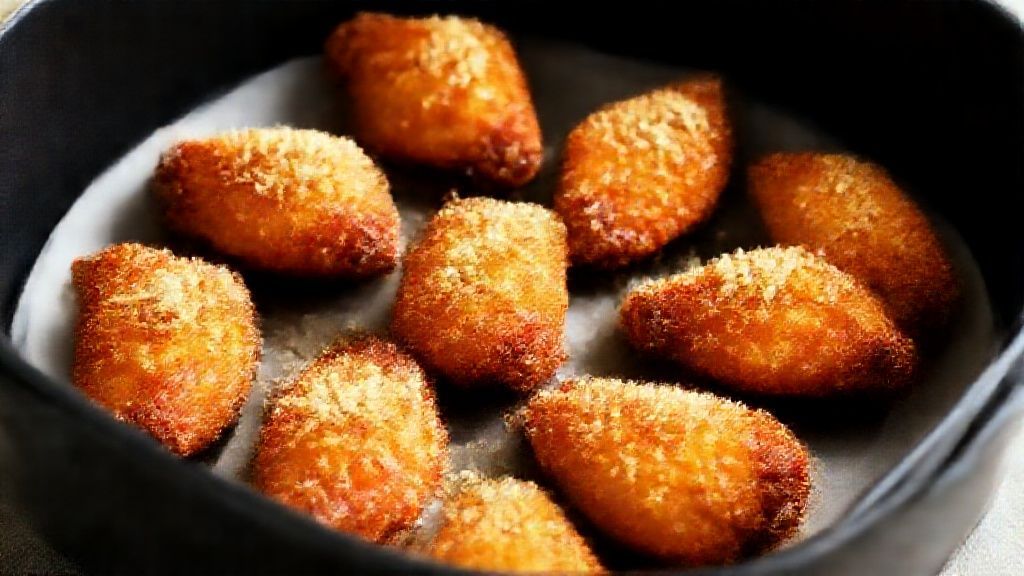
    Best Air Fryer Garlic Parmesan Wings Recipe (2026 Guide)

    Below you will find the step-by-step instructions to make this amazing dish at home.

    Air Fryer Garlic Parmesan Wings
    💡 Tip: For more recipes, visit Snapytasty Home.


    Air Fryer Garlic Parmesan Wings

    Introduction

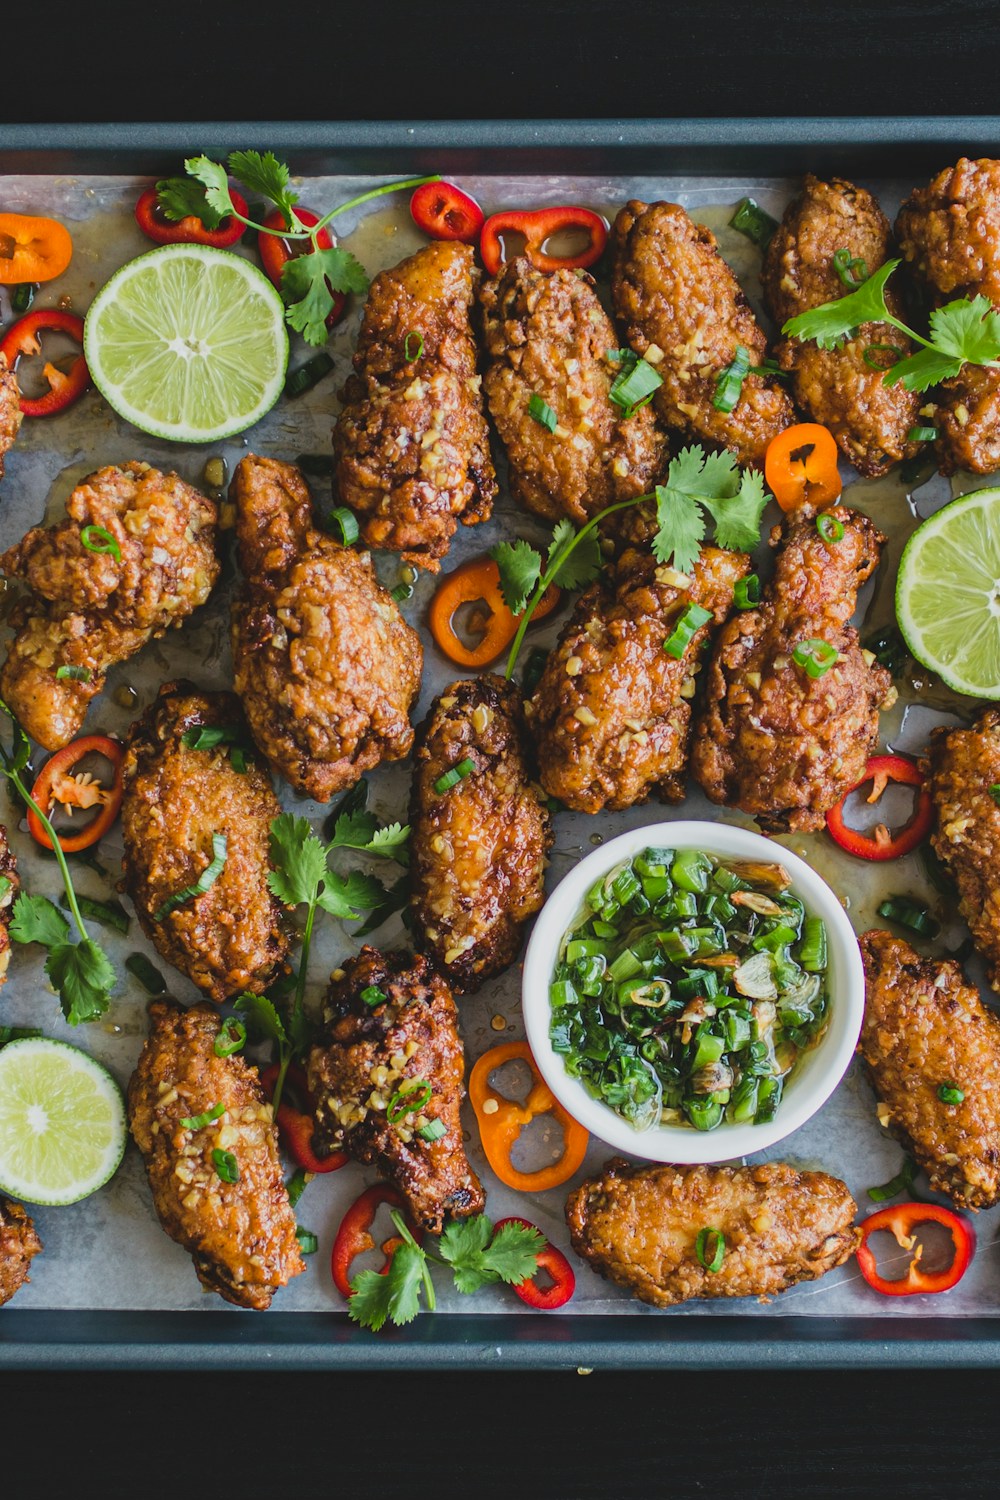
    Get ready to indulge in a delicious and crispy snack with our Air Fryer Garlic Parmesan Wings. These mouthwatering wings are cooked to perfection using an air fryer, resulting in a tender and juicy interior with a crunchy exterior. The combination of garlic and parmesan cheese adds a savory and aromatic flavor that will leave you wanting more.

    Ingredients

    • 1 pound chicken wings
    • 2 cloves garlic, minced
    • 1/4 cup grated Parmesan cheese
    • 1 tablespoon olive oil
    • Salt and pepper to taste
    • Optional: paprika, dried oregano, or other seasonings of your choice

    Instructions

    1. Preheat the air fryer to 400°F (200°C).
    2. In a large bowl, mix together the chicken wings, garlic, and Parmesan cheese.
    3. Drizzle the olive oil over the wing mixture and sprinkle with salt and pepper to taste. Toss to combine.
    4. Load the wing mixture into the air fryer basket in a single layer. You may need to cook them in batches depending on the size of your air fryer.
    5. Cook the wings for 20-25 minutes, shaking the basket halfway through. The internal temperature should reach 165°F (74°C).
    6. Remove the wings from the air fryer and sprinkle with additional Parmesan cheese if desired. Serve hot and enjoy!

    Pro Tips

    To get the crispiest results, make sure to pat the wing mixture dry with paper towels before cooking.

    For an extra boost of flavor, try adding a sprinkle of paprika or dried oregano to the wing mixture before cooking.

    Nutrition

    Nutrient Amount per serving (4-6 wings)
    Calories 240-360
    Fat 14g-21g
    Saturated Fat 3.5g-6g
    Cholesterol 60mg-90mg
    Sodium 250mg-375mg
    Total Carbohydrates 6g-10g
    Fiber 0g-1g
    Sugar 0g-2g

    FAQ

    Q: Can I use a different type of cheese instead of Parmesan?

    A: Yes, you can experiment with other hard cheeses like cheddar or provolone. However, keep in mind that the flavor may be slightly different.

    Q: How do I store leftover Air Fryer Garlic Parmesan Wings?

    A: Let the wings cool completely before storing them in an airtight container in the refrigerator for up to 3 days. Reheat them in the air fryer or oven before serving.


    Why You Should Use an Air Fryer for This Recipe

    Using an air fryer is a game-changer for this recipe. Unlike traditional frying, it uses up to 95% less oil, making your meal significantly healthier without sacrificing that delicious crunch. Plus, it is faster than a conventional oven and doesn’t heat up your entire kitchen.

    Pro Tips for Perfection

    • Don’t Overcrowd: Always cook in a single layer to ensure the hot air circulates evenly.
    • Preheat: Taking 3 minutes to preheat your air fryer ensures the food starts cooking immediately for a crispier texture.
    • Shake It: Shake the basket halfway through cooking to ensure even browning on all sides.

    How to Store and Reheat

    If you have leftovers (which is rare!), store them in an airtight container in the refrigerator for up to 3 days. To reheat, simply pop them back in the air fryer at 350°F for 3-4 minutes until they are crispy again. Do not use a microwave, as it will make them soggy.

    🔥 Join Our Viral Foodie Community!

    Don’t miss out on the latest air fryer trends. Follow us now:

    📌 Follow on Pinterest
       
    🤖 Join Reddit

    📌 Pin This Recipe for Later!

    Pin for Best Air Fryer Garlic Parmesan Wings Recipe (2026 Guide)

    Save this image to your favorite Air Fryer board on Pinterest.

    📌 Pin This Recipe for Later!
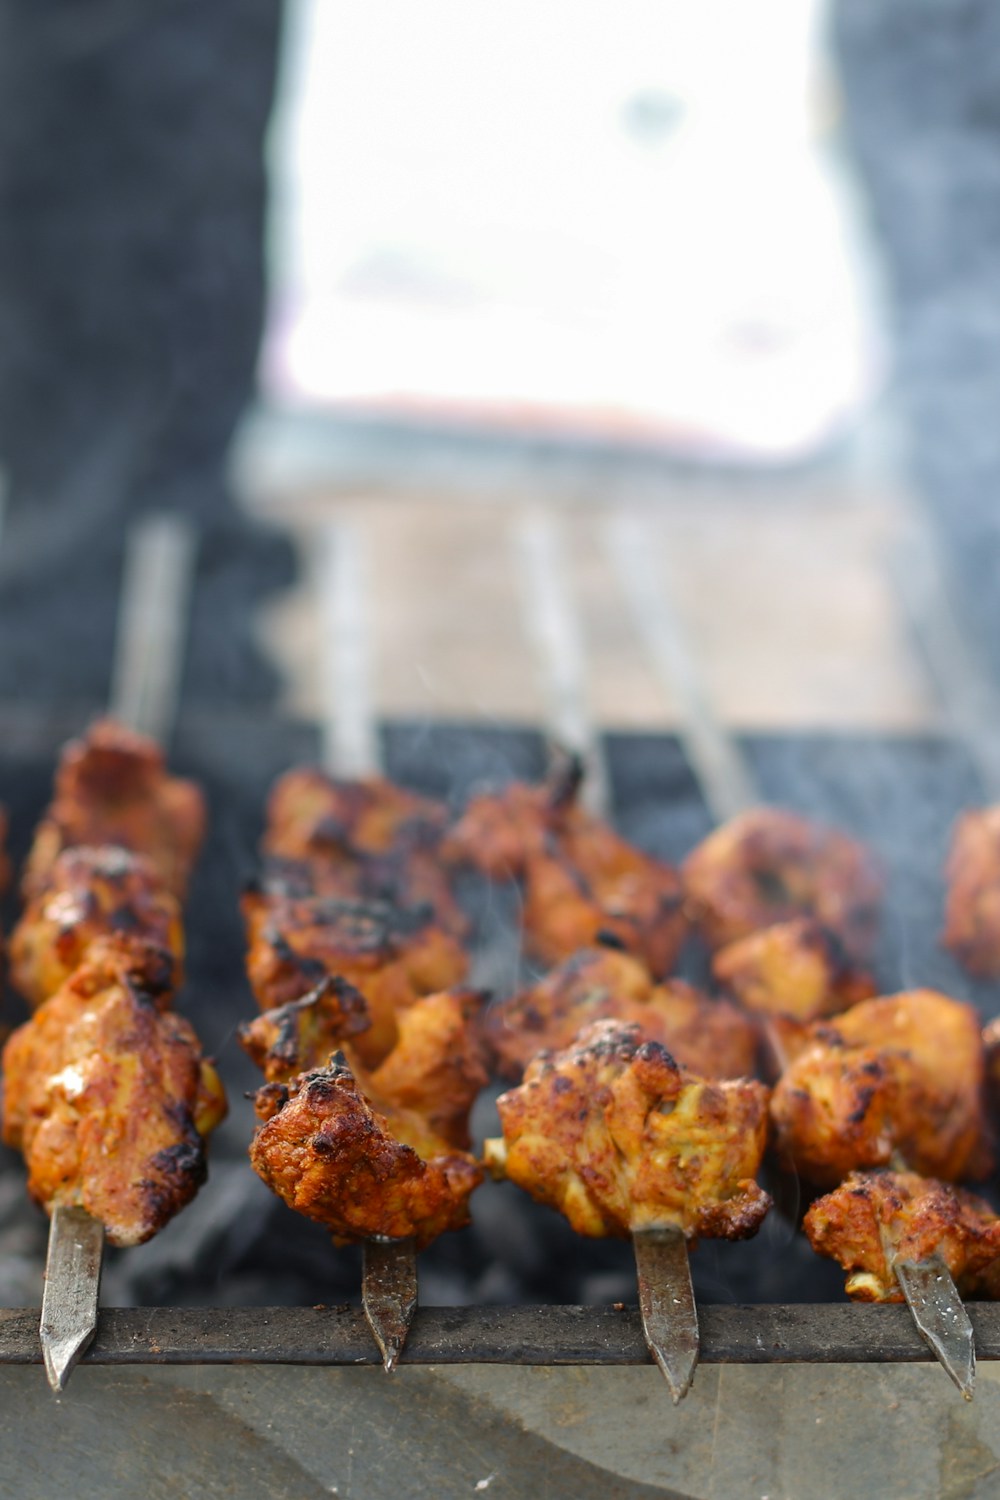
    Pin for Best Air Fryer Garlic Parmesan Wings Recipe (2026 Guide)

    Save this image to your favorite Air Fryer board on Pinterest.

    📌 Pin This Recipe For Later!

    Best Air Fryer Garlic Parmesan Wings Recipe

    Save to Pinterest

    📌 Pin This Designed Recipe!

    Save to Pinterest

  • The Ultimate Air Fryer Crispy Potatoes Recipe (2026)

    The Ultimate Air Fryer Crispy Potatoes Recipe (2026)

    The Ultimate Air Fryer Crispy Potatoes Recipe (2026). This recipe has gone viral for a reason: it’s quick, easy, and incredibly delicious.

    The Ultimate Air Fryer Crispy Potatoes Recipe (2026)

    Below you will find the step-by-step instructions to make this amazing dish at home.

    Air Fryer Crispy Potatoes
    💡 Tip: See more at Snapytasty Recipes.


    Air Fryer Crispy Potatoes

    Introduction

    Indulge in the crispy, golden goodness of Air Fryer Crispy Potatoes! These addictive treats are a game-changer for potato lovers. By using an air fryer, you can achieve that perfect balance between crunch and fluffiness without deep-frying or baking them to death. In this blog post, we’ll share the secrets to making mouthwatering Air Fryer Crispy Potatoes at home.

    Ingredients

    • 3-4 large potatoes
    • 1 tablespoon olive oil
    • 1 teaspoon salt
    • 1/2 teaspoon black pepper
    • Optional: garlic powder, paprika, or other seasonings of your choice

    Instructions

    1. Preheat the air fryer to 400°F (200°C). If you have a non-stick air fryer basket, lightly spray it with cooking spray for easy cleanup.
    2. Wash and peel the potatoes. Cut them into your desired shape – wedges, sticks, or thin slices work well.
    3. In a bowl, mix together olive oil, salt, and black pepper. Add any optional seasonings you like (e.g., garlic powder, paprika) and stir to combine.
    4. Place the potato pieces in the air fryer basket, leaving some space between them for even cooking. You might need to cook them in batches depending on the size of your air fryer.
    5. Cook the potatoes at 400°F (200°C) for 10-12 minutes, shaking the basket halfway through. This will help ensure crispy potatoes all around.
    6. Check the potatoes for crispiness and adjust the cooking time as needed. If you prefer them extra crunchy, increase the temperature to 420°F (220°C) for an additional 2-3 minutes.

    Tips

    For the crispiest results:

    • Make sure the potatoes are dry before cooking. Excess moisture can prevent them from getting crispy.
    • Don’t overcrowd the air fryer basket. Cook in batches if necessary to ensure even cooking.
    • If you’re cooking for a crowd, consider using multiple air fryers or cooking the potatoes in shifts.

    Nutrition

    Nutrient Air Fryer Crispy Potatoes (per serving)
    Calories 120-150 per serving
    Total Fat 2-3g
    Saturated Fat 0.5g
    Cholesterol 0mg
    Sodium 250-300mg
    Total Carbohydrates 25-30g
    Dietary Fiber 4-5g
    Sugars 2-3g

    FAQ

    Frequently asked questions about Air Fryer Crispy Potatoes:

    • What if I don’t have an air fryer? Can I still make crispy potatoes? Yes, you can achieve similar results by baking or deep-frying the potatoes. Adjust cooking times and temperatures accordingly.
    • Can I add other seasonings or herbs to the potatoes? Absolutely! Get creative with your favorite spices and herbs. Some popular options include smoked paprika, garlic powder, dried thyme, or chili powder.
    • How long do cooked Air Fryer Crispy Potatoes keep in the fridge? Cooked potatoes can be stored for up to 3 days in a covered container. Reheat them in the air fryer or oven before serving.


    Why You Should Use an Air Fryer for This Recipe

    Using an air fryer is a game-changer for this recipe. Unlike traditional frying, it uses up to 95% less oil, making your meal significantly healthier without sacrificing that delicious crunch. Plus, it is faster than a conventional oven and doesn’t heat up your entire kitchen.

    Pro Tips for Perfection

    • Don’t Overcrowd: Always cook in a single layer to ensure the hot air circulates evenly.
    • Preheat: Taking 3 minutes to preheat your air fryer ensures the food starts cooking immediately for a crispier texture.
    • Shake It: Shake the basket halfway through cooking to ensure even browning on all sides.

    How to Store and Reheat

    If you have leftovers (which is rare!), store them in an airtight container in the refrigerator for up to 3 days. To reheat, simply pop them back in the air fryer at 350°F for 3-4 minutes until they are crispy again. Do not use a microwave, as it will make them soggy.

    🔥 Join Our Viral Foodie Community!

    Don’t miss out on the latest air fryer trends. Follow us now:

    📌 Follow on Pinterest
       
    🤖 Join Reddit

    📌 Pin This Recipe!

    Pin for The Ultimate Air Fryer Crispy Potatoes Recipe (2026)

    Save to your Air Fryer board.

    📌 Pin This Recipe For Later!

    The Ultimate Air Fryer Crispy Potatoes Recipe (2026)

    Save to Pinterest

    📌 Pin This Designed Recipe!

    Save to Pinterest

  • The Best Air Fryer Cheese Curds Recipe (2026)

    The Best Air Fryer Cheese Curds Recipe (2026)

    The Best Air Fryer Cheese Curds Recipe (2026). This recipe has gone viral for a reason: it’s quick, easy, and incredibly delicious.

    Below you will find the step-by-step instructions to make this amazing dish at home.

    Air Fryer Cheese Curds

    Perfectly crispy Air Fryer Cheese Curds

    💡 Quick Tip: Check our Full Menu.


    Air Fryer Cheese Curds: A Game-Changing Snack

    Introduction

    Are you tired of the same old snacks and appetizers? Look no further! Introducing air fryer cheese curds, a mouthwatering treat that’s sure to become your new go-to. In this article, we’ll dive into the world of crispy, gooey, and utterly delicious cheese curds cooked to perfection in an air fryer.

    Ingredients

    • 1 pound fresh cheese curds (white cheddar or mozzarella work well)
    • 1 tablespoon olive oil
    • 1 teaspoon salt
    • 1/4 teaspoon black pepper
    • Paprika or garlic powder for added flavor (optional)

    Instructions

    1. Preheat your air fryer to 375°F (190°C). Yes, you read that right – 375°F! This is the magic temperature that will give you those crispy, golden-brown cheese curds.
    2. Rinse the cheese curds under cold water and pat them dry with a paper towel. You want them to be nice and dry before cooking.
    3. In a bowl, mix together the olive oil, salt, and black pepper. Add the paprika or garlic powder if you’re feeling extra adventurous!
    4. Place the cheese curds in the air fryer basket in a single layer, leaving some space between each curd (you don’t want them to stick together). Pour the olive oil mixture evenly over the curds.
    5. Cook the cheese curds for 3-4 minutes or until they’re golden brown and crispy. You might need to shake the basket halfway through cooking to ensure even cooking.
    6. Remove the cheese curds from the air fryer and let them cool slightly before serving. Enjoy!

    Pro Tips

    1. Don’t overcrowd the air fryer!** Leave enough space between each curd to allow for even cooking and to prevent them from sticking together.
    2. Experiment with different seasonings!** Add some garlic powder, paprika, or chili flakes to give your cheese curds an extra boost of flavor.
    3. Try different cheeses!** White cheddar and mozzarella are classics, but feel free to experiment with other types like gouda, provolone, or even feta!

    Nutrition

    Nutrient Value per serving (6 cheese curds)
    Calories 170
    Total Fat 12g
    Saturated Fat 8g
    Cholesterol 30mg
    Sodium 250mg
    Total Carbohydrates 2g
    Dietary Fiber 0g
    Sugars 1g

    FAQ

    1. Can I make air fryer cheese curds in bulk?** Absolutely! Simply double or triple the recipe and adjust the cooking time accordingly.
    2. Are air fryer cheese curds gluten-free?** Yes, they are! As long as you use gluten-free cheese curds, your snack is safe for those with dietary restrictions.
    3. Can I add other ingredients to the cheese curds?** You bet! Try adding some diced veggies (like bell peppers or onions) or herbs (like thyme or parsley) to give your cheese curds an extra boost of flavor.
    4. How do I store leftover air fryer cheese curds?** Simply place them in an airtight container and refrigerate for up to 3 days. Reheat them in the air fryer at 375°F (190°C) for about 2 minutes or until crispy again.
    5. Can I make air fryer cheese curds ahead of time?** Yes, you can! Prepare the cheese curds through step 4 and refrigerate or freeze them. Cook them in the air fryer as needed, adjusting the cooking time if necessary.

    There you have it – a delicious and easy recipe for air fryer cheese curds that’s sure to please even the pickiest of eaters! So go ahead, get creative, and enjoy your crispy, gooey, and utterly delicious snack.

    Why You Should Use an Air Fryer for This Recipe

    Using an air fryer is a game-changer for this recipe. Unlike traditional frying, it uses up to 95% less oil, making your meal significantly healthier without sacrificing that delicious crunch. Plus, it is faster than a conventional oven and doesn’t heat up your entire kitchen.

    Pro Tips for Perfection

    • Don’t Overcrowd: Always cook in a single layer to ensure the hot air circulates evenly.
    • Preheat: Taking 3 minutes to preheat your air fryer ensures the food starts cooking immediately for a crispier texture.
    • Shake It: Shake the basket halfway through cooking to ensure even browning on all sides.

    How to Store and Reheat

    If you have leftovers (which is rare!), store them in an airtight container in the refrigerator for up to 3 days. To reheat, simply pop them back in the air fryer at 350°F for 3-4 minutes until they are crispy again. Do not use a microwave, as it will make them soggy.

    🔥 Join Our Viral Foodie Community!

    Don’t miss out on the latest air fryer trends. Follow us now:

    📌 Follow on Pinterest
       
    🤖 Join Reddit

    📌 Pin This Recipe for Later!

    Pin for The Best Air Fryer Cheese Curds Recipe (2026)

    Save this image to your favorite Air Fryer board on Pinterest.

    📌 Pin This Recipe for Later!

    Pin for The Best Air Fryer Cheese Curds Recipe (2026)

    Save this image to your favorite Air Fryer board on Pinterest.
    📌 Pin This Recipe For Later!

    The Best Air Fryer Cheese Curds Recipe (2026)

    Save to Pinterest

    📌 Pin This Designed Recipe!

    Save to Pinterest

  • Best Air Fryer Juicy Steak Recipe

    Best Air Fryer Juicy Steak Recipe

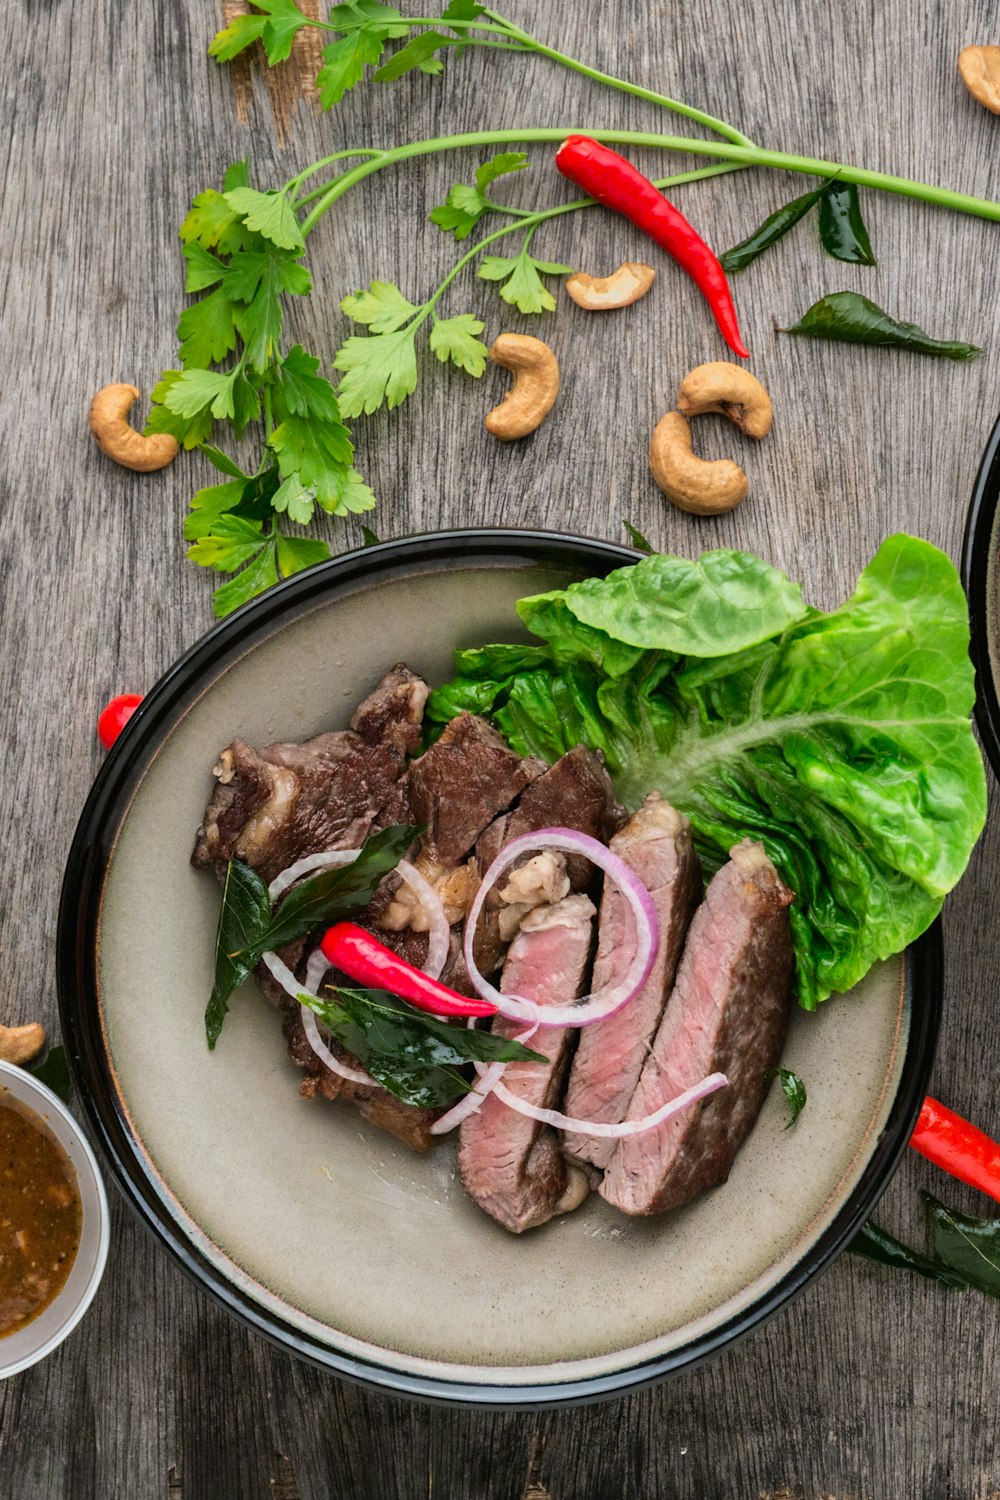
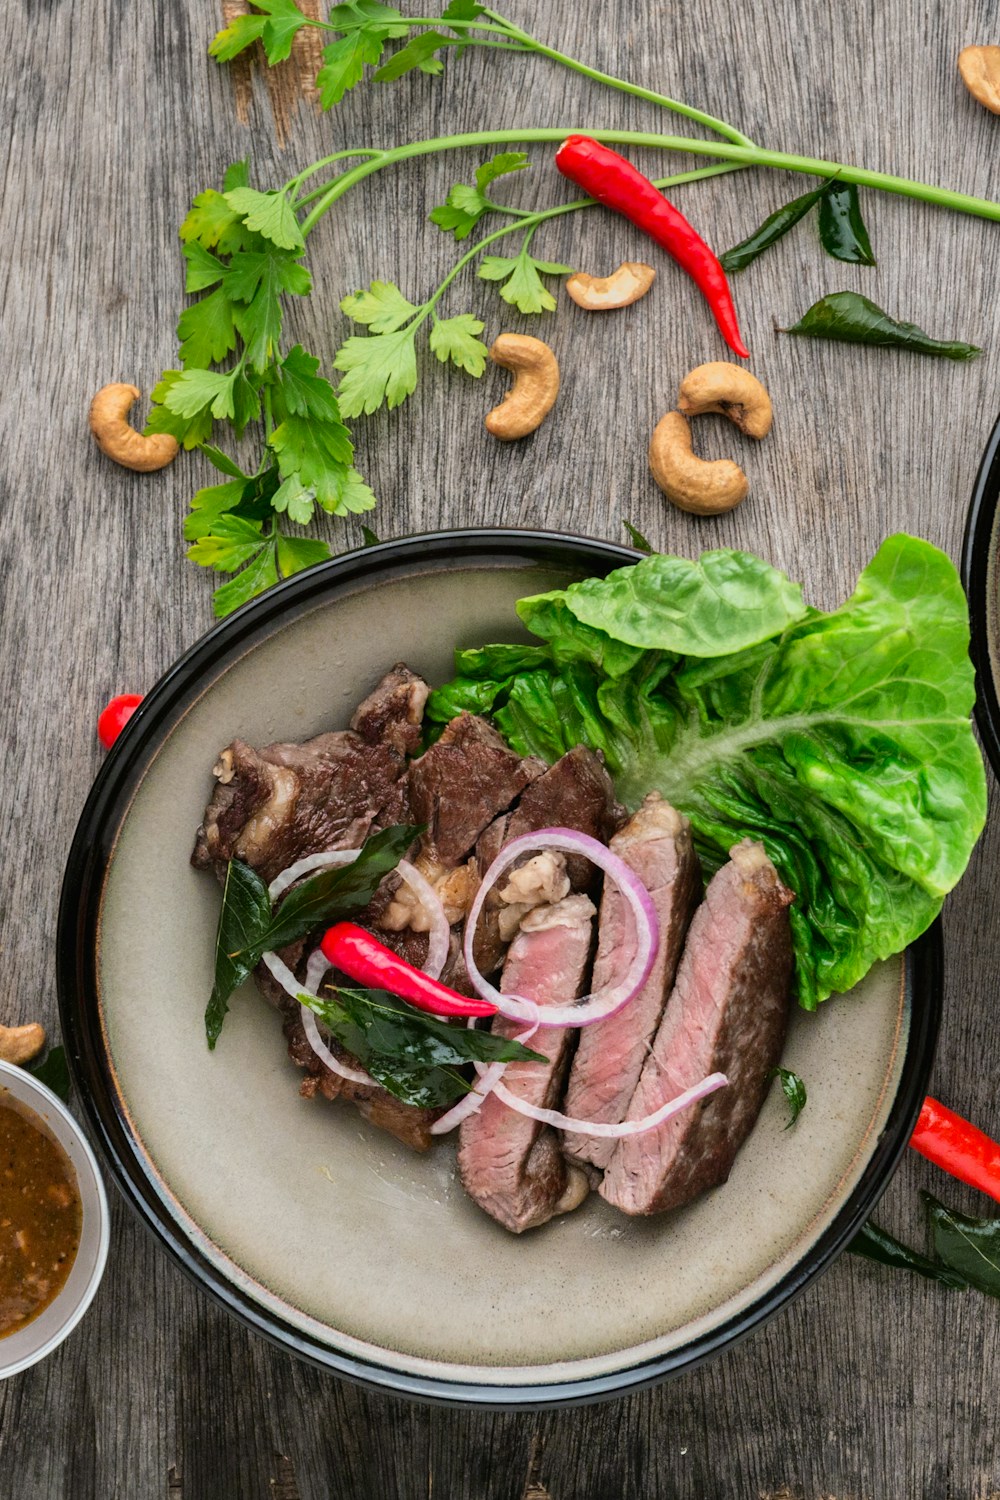
    Best Air Fryer Juicy Steak Recipe (2026 Guide). This recipe has gone viral for a reason: it’s quick, easy, and incredibly delicious.

    Below you will find the step-by-step instructions to make this amazing dish at home.

    Air Fryer Juicy Steak

    🔥 Popular Now: Check our Full Recipes or read about Frying Methods.

    Introduction

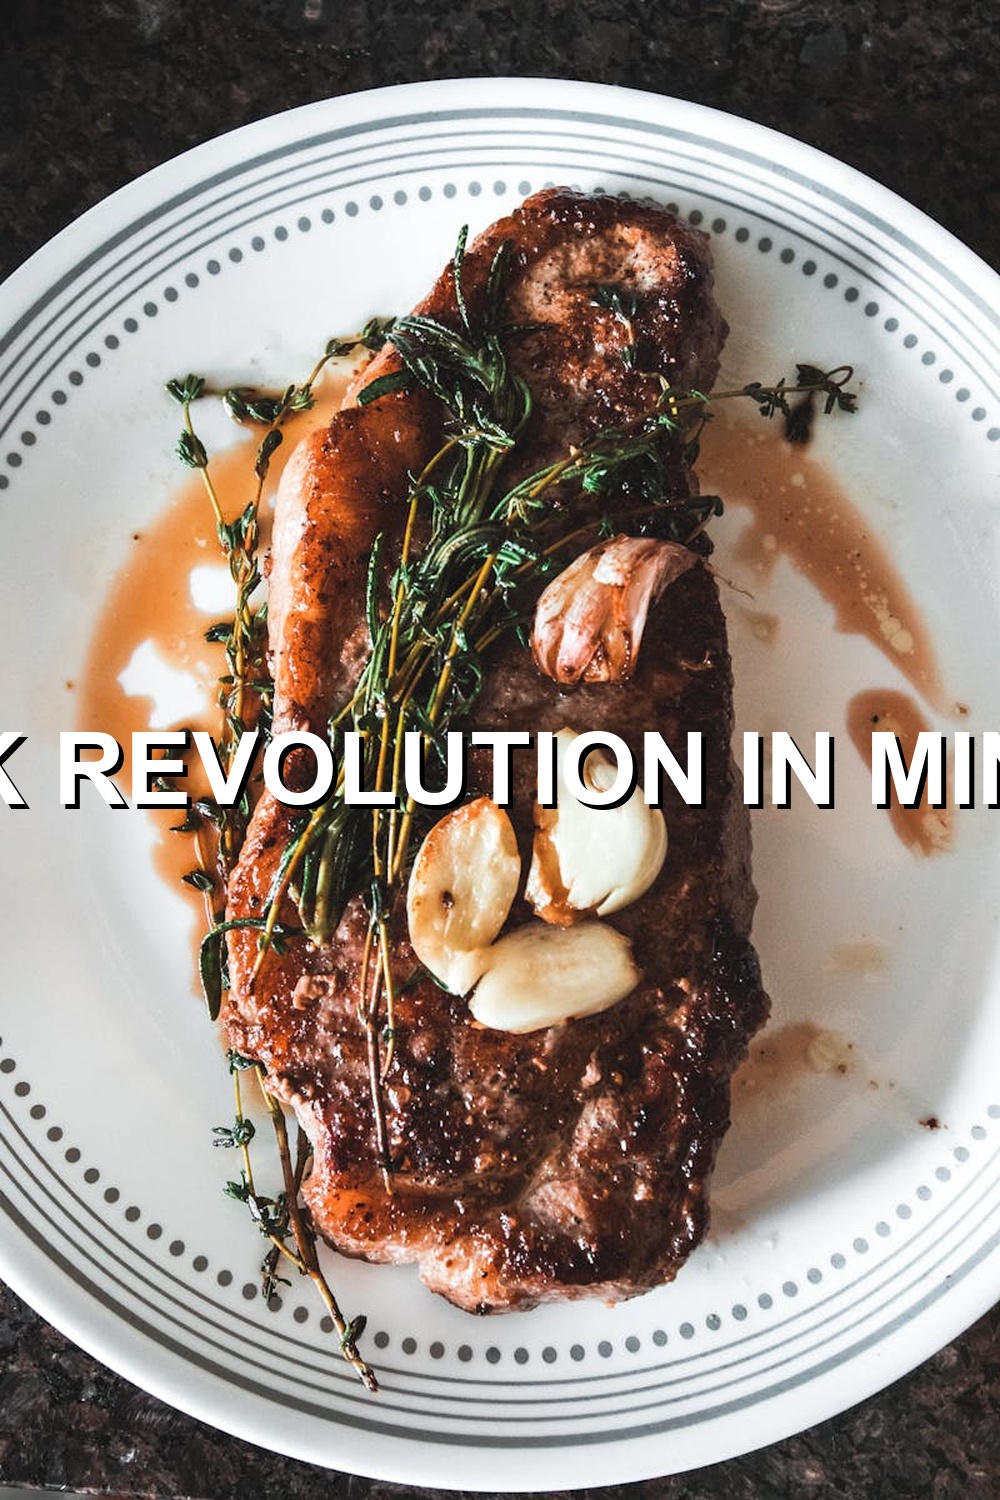
    Get ready to elevate your steak game with the simplest and most mouth-watering Air Fryer Juicy Steak recipe ever! Say goodbye to overcooked, dry steaks and hello to a tender, juicy, and flavorful masterpiece. With just a few ingredients and simple steps, you’ll be enjoying a restaurant-quality dish in the comfort of your own home.

    Ingredients

    • 1-2 pounds steak (ribeye, strip loin, or filet mignon work well)
    • 2 tablespoons olive oil
    • 1 teaspoon garlic powder
    • 1 teaspoon paprika
    • Salt and pepper to taste
    • Optional: your favorite seasonings or herbs (e.g., thyme, rosemary, or chili flakes)

    Step-by-Step Instructions

    1. Precise the steak: Pat the steak dry with paper towels and season both sides with salt, pepper, garlic powder, and paprika.
    2. Air fryer prep: Preheat the air fryer to 400°F (200°C). If your air fryer has a non-stick basket or tray, lightly spray it with cooking spray for easy cleanup.
    3. Steak to the air fryer: Place the steak in the air fryer basket or tray. You may need to trim the steak to fit depending on its size and shape.
    4. Cooking time: Cook the steak for 8-12 minutes, flipping halfway through (4-6 minutes per side). Use a thermometer to check the internal temperature; it should reach 130°F (54°C) for medium-rare, 140°F (60°C) for medium, or 150°F (65°C) for medium-well.
    5. Resting time: Remove the steak from the air fryer and let it rest for 5-10 minutes to allow the juices to redistribute. This step is crucial for achieving a juicy steak!

    Chef Tips

    1. Don’t overcrowd the air fryer: Cook the steaks one at a time if necessary, to ensure even cooking and prevent overcrowding.
    2. Use a meat thermometer: Ensure the steak reaches your desired level of doneness with a reliable meat thermometer.
    3. Don’t press down: Resist the temptation to press down on the steak with your spatula or tongs during cooking, as this can squeeze out juices and make the steak tough.
    4. Let it rest: Allowing the steak to rest is essential for retaining its natural juices. Take a deep breath and let it sit!
    5. Experiment with seasonings: Try different herbs, spices, or marinades to add unique flavors to your Air Fryer Juicy Steak.

    Nutrition

    Nutrient Per serving (3 oz/85g)
    Protein 26-30 grams
    Fat 6-8 grams
    Saturated fat 2-3 grams
    Cholesterol 60-70 milligrams
    Sodium 25-35 milligrams

    FAQ

    1. Q: Can I cook other types of meat in the air fryer? A: Absolutely! Try cooking chicken, pork chops, or even vegetables for a delicious and healthy meal.
    2. Q: Do I need to preheat the air fryer every time? A: No, you can reuse the same preheated air fryer for multiple batches of food without needing to reheat it.
    3. Q: Can I cook frozen steak in the air fryer? A: Yes, but make sure to pat the steak dry with paper towels before cooking and adjust the cooking time as needed.
    4. Q: Is the air fryer safe for non-stick pans? A: Be cautious when using non-stick pans in the air fryer, as high temperatures can damage the coating. Always check your manufacturer’s instructions for guidance.
    5. Q: Can I cook steak to well-done in the air fryer? A: Yes, but be careful not to overcook it, as this can result in a dry and tough texture. Use a thermometer to ensure the internal temperature reaches 160°F (71°C) or higher for well-done.

    Why You Should Use an Air Fryer for This Recipe

    Using an air fryer is a game-changer for this recipe. Unlike traditional frying, it uses up to 95% less oil, making your meal significantly healthier without sacrificing that delicious crunch. Plus, it is faster than a conventional oven and doesn’t heat up your entire kitchen.

    Pro Tips for Perfection

    • Don’t Overcrowd: Always cook in a single layer to ensure the hot air circulates evenly.
    • Preheat: Taking 3 minutes to preheat your air fryer ensures the food starts cooking immediately for a crispier texture.
    • Shake It: Shake the basket halfway through cooking to ensure even browning on all sides.

    How to Store and Reheat

    If you have leftovers (which is rare!), store them in an airtight container in the refrigerator for up to 3 days. To reheat, simply pop them back in the air fryer at 350°F for 3-4 minutes until they are crispy again. Do not use a microwave, as it will make them soggy.

    🔥 Join Our Viral Foodie Community!

    Don’t miss out on the latest air fryer trends. Follow us now:

    📌 Follow on Pinterest
       
    🤖 Join Reddit

    📌 Pin This Recipe for Later!

    Pin for Best Air Fryer Juicy Steak Recipe (2026 Guide)

    Save this image to your favorite Air Fryer board on Pinterest.
    📌 Pin This Recipe for Later!

    Pin for Best Air Fryer Juicy Steak Recipe (2026 Guide)

    Save this image to your favorite Air Fryer board on Pinterest.
    📌 Pin This Recipe For Later!

    Best Air Fryer Juicy Steak Recipe

    Save to Pinterest

    📌 Pin This Designed Recipe!

    Save to Pinterest

  • Best Air Fryer Roasted Vegetables Recipe

    Best Air Fryer Roasted Vegetables Recipe

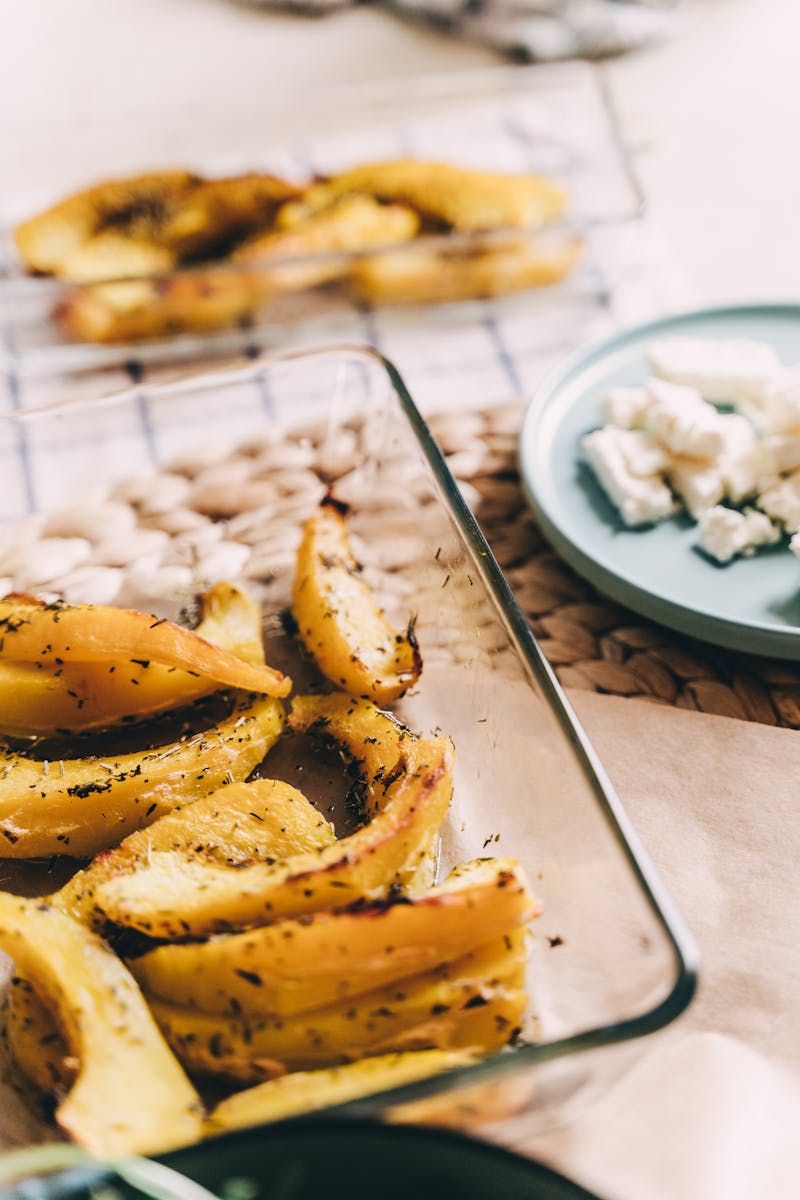
    Best Air Fryer Roasted Vegetables Recipe (2026 Guide). This recipe has gone viral for a reason: it’s quick, easy, and incredibly delicious.

    Best Air Fryer Roasted Vegetables Recipe (2026 Guide)

    Below you will find the step-by-step instructions to make this amazing dish at home.

    Air Fryer Roasted Vegetables

    Perfect Air Fryer Roasted Vegetables ready in minutes.

    💡 Chef’s Quick Tip

    For best results, preheat your air fryer. Check our Full Guide and Cooking Science.


    Air Fryer Roasted Vegetables: A Game-Changing Recipe

    Introduction

    Are you tired of sacrificing flavor for health? Do you struggle to find a way to prepare vegetables that are both delicious and nutritious? Look no further than Air Fryer Roasted Vegetables, the ultimate game-changing recipe. In this article, we’ll explore why this recipe is a must-have for any food enthusiast, and provide you with a step-by-step guide on how to make it.

    Why This Recipe Works

    So, what makes Air Fryer Roasted Vegetables so special? For starters, the air fryer technology allows for a level of browning and crisping that’s impossible to achieve through traditional roasting methods. This means that your vegetables will have a satisfying crunch on the outside, while remaining tender and juicy on the inside.

    But it’s not just about texture – the real magic happens when you combine the air fryer with some carefully chosen ingredients. By using a combination of olive oil, salt, and pepper, you can enhance the natural flavors of your vegetables without overpowering them. And let’s not forget the added bonus of reduced calories and fat content compared to traditional roasting methods.

    Ingredients

    • Olive oil
    • Salt
    • Pepper
    • Assorted vegetables (see below for specific recommendations)

    Step-by-Step Instructions

    1. Preheat your air fryer to 400°F (200°C).
    2. Choose your favorite vegetables and wash them thoroughly. Some great options include Brussels sprouts, cauliflower, broccoli, carrots, sweet potatoes, and bell peppers.
    3. In a large bowl, toss the vegetables with olive oil, salt, and pepper until they’re evenly coated.
    4. Prioritize any larger or thicker vegetables (like sweet potatoes) by air-frying them first. This will help ensure that they cook evenly and don’t get too soft.
    5. After 10-15 minutes of cooking time, shake the basket to redistribute the vegetables and promote even browning.
    6. Continue cooking the vegetables in batches until they’re all done to your liking, about 20-25 minutes total.

    Nutritional Info

    Nutrient Per Serving (4 servings)
    Calories 120
    Protein 3g
    Fat 2.5g
    Sodium 150mg
    Carets 25%
    Vitamin A 20%
    Fiber 8g

    Expert Tips

    Here are five expert tips to help you take your Air Fryer Roasted Vegetables to the next level:

    1. **Don’t overcrowd the basket**: Make sure to leave some space between each vegetable to allow for proper air circulation and even cooking.

    2. **Experiment with seasonings**: Try adding different herbs and spices to give your vegetables a unique flavor profile. Some great options include garlic powder, paprika, and dried thyme.

    3. **Add some acidity**: A squeeze of fresh lemon juice or a splash of vinegar can add brightness and depth to your roasted vegetables.

    4. **Don’t forget the toppings**: Consider adding some crumbled goat cheese, chopped nuts, or a dollop of yogurt to give your vegetables an extra boost of flavor and texture.

    5. **Make it a meal**: Serve your Air Fryer Roasted Vegetables as a side dish, or turn them into a main course by serving with quinoa, brown rice, or whole-grain pasta.

    FAQ

    Here are some frequently asked questions about Air Fryer Roasted Vegetables:

    Q: Can I use frozen vegetables?
    A: Yes! Frozen vegetables can be a great option when using an air fryer. Just make sure to thaw them first and pat dry with paper towels before cooking.

    Q: What’s the best way to clean my air fryer?
    A: To clean your air fryer, mix equal parts water and white vinegar in the basket and run it through a hot cycle. Then, wipe down the exterior with a damp cloth.

    Q: Can I cook other foods in an air fryer besides vegetables?
    A: Absolutely! Air fryers are incredibly versatile and can be used to cook everything from chicken wings to French fries to even baked goods like cinnamon rolls.

    Q: Do I need to preheat my air fryer before cooking?
    A: Yes, it’s always a good idea to preheat your air fryer before cooking. This ensures that the device is at the optimal temperature for cooking and helps prevent food from sticking to the basket.

    Q: Can I cook multiple types of vegetables together?
    A: Yes! Mixing and matching different vegetables can be a great way to add variety and texture to your dish. Just make sure to adjust cooking times based on the thickness and density of each vegetable.

    Q: Is it possible to overcook my vegetables in an air fryer?
    A: Yes, it is possible to overcook your vegetables in an air fryer. Keep an eye on them and shake the basket regularly to prevent burning or browning too much.

    Conclusion

    Air Fryer Roasted Vegetables are a game-changer for anyone looking to elevate their cooking game. With its ability to produce crispy, golden-brown vegetables with minimal oil and effort, this recipe is sure to become a staple in your kitchen. So go ahead, get creative, and start roasting those veggies!

    Why You Should Use an Air Fryer for This Recipe

    Using an air fryer is a game-changer for this recipe. Unlike traditional frying, it uses up to 95% less oil, making your meal significantly healthier without sacrificing that delicious crunch. Plus, it is faster than a conventional oven and doesn’t heat up your entire kitchen.

    Pro Tips for Perfection

    • Don’t Overcrowd: Always cook in a single layer to ensure the hot air circulates evenly.
    • Preheat: Taking 3 minutes to preheat your air fryer ensures the food starts cooking immediately for a crispier texture.
    • Shake It: Shake the basket halfway through cooking to ensure even browning on all sides.

    How to Store and Reheat

    If you have leftovers (which is rare!), store them in an airtight container in the refrigerator for up to 3 days. To reheat, simply pop them back in the air fryer at 350°F for 3-4 minutes until they are crispy again. Do not use a microwave, as it will make them soggy.

    🔥 Join Our Viral Foodie Community!

    Don’t miss out on the latest air fryer trends. Follow us now:

    📌 Follow on Pinterest
       
    🤖 Join Reddit

    📌 Pin This Recipe for Later!

    Pin for Best Air Fryer Roasted Vegetables Recipe (2026 Guide)

    Save this image to your favorite Air Fryer board on Pinterest.

    📌 Pin This Recipe for Later!

    Pin for Best Air Fryer Roasted Vegetables Recipe (2026 Guide)

    Save this image to your favorite Air Fryer board on Pinterest.

    📌 Pin This Recipe For Later!

    Best Air Fryer Roasted Vegetables Recipe

    Save to Pinterest

    📌 Pin This Designed Recipe!

    Save to Pinterest

  • Best Air Fryer Chocolate Chip Cookies Recipe

    Best Air Fryer Chocolate Chip Cookies Recipe

    Best Air Fryer Chocolate Chip Cookies Recipe (2026 Guide)

    Best Air Fryer Chocolate Chip Cookies Recipe (2026 Guide). This recipe has gone viral for a reason: it’s quick, easy, and incredibly delicious.

    Below you will find the step-by-step instructions to make this amazing dish at home.

    Air Fryer Chocolate Chip Cookies

    Perfect Air Fryer Chocolate Chip Cookies ready in minutes.

    💡 Chef’s Quick Tip

    For best results, preheat your air fryer. Check our Full Guide and Cooking Science.

    Introduction

    In a world where cookie lovers are constantly searching for the perfect treat, Air Fryer Chocolate Chip Cookies stand out as a game-changer. These soft, chewy, and indulgently chocolatey cookies are not only a delight to eat but also surprisingly easy to make. And the best part? They’re made in an air fryer! Yes, you read that right – the same device used to cook crispy fried foods is now capable of producing mouthwatering baked goods with minimal effort.

    Why This Recipe Works

    So, what makes Air Fryer Chocolate Chip Cookies so special? For starters, the air fryer’s unique cooking technology allows for even heat distribution and precise temperature control. This means that cookies can be cooked to a perfect golden brown without overcooking or burning them. Additionally, the air fryer’s rapid air circulation feature helps to develop the cookies’ texture, resulting in a satisfying crunch on the outside and a soft, chewy center.

    Another key factor is the recipe itself. By using a combination of all-purpose flour, brown sugar, and white granulated sugar, we’re able to achieve a delicate balance of sweetness and texture. The addition of semi-sweet chocolate chips adds an extra layer of flavor and indulgence, making these cookies a treat for both kids and adults.

    Ingredients

    • 1 1/2 cups all-purpose flour
    • 1 cup brown sugar
    • 1/2 cup white granulated sugar
    • 1/2 teaspoon baking soda
    • 1/4 teaspoon salt
    • 1/2 cup unsalted butter, softened
    • 2 large eggs
    • 1 teaspoon vanilla extract
    • 1 cup semi-sweet chocolate chips

    Step-by-Step Instructions

    1. Preheat the air fryer to 375°F (190°C). Line an air fryer basket with parchment paper or a silicone mat.
    2. In a medium-sized bowl, whisk together flour, brown sugar, white granulated sugar, baking soda, and salt. Set aside.
    3. In a large bowl, cream together the butter and sugars until light and fluffy. Beat in the eggs one at a time, followed by the vanilla extract.
    4. Add the dry ingredients to the wet ingredients and stir until just combined. Do not overmix.
    5. Fold in the chocolate chips.
    6. Scoop tablespoon-sized balls of dough onto the prepared air fryer basket, leaving about 1 inch (2.5 cm) of space between each cookie.
    7. Cook the cookies for 4-5 minutes or until they’re lightly golden brown and set. Repeat with any remaining dough.
    8. Remove the cookies from the air fryer and let them cool on a wire rack for at least 30 minutes before serving.

    Nutritional Info

    <td-Protein-

    Macronutrients Serving Size (1 cookie) Per Serving
    Calories 1 cookie 120 calories
    Fat 1 cookie 6g (9% DV)
    Sodium 1 cookie 50mg (2% DV)
    Total Carbohydrates 1 cookie 20g (7% DV)
    Dietary Fiber 1 cookie 2g (8% DV)
    Sugars 1 cookie 10g
    1 cookie 2g

    Expert Tips

    Here are 5 pro tips to help you get the most out of this Air Fryer Chocolate Chip Cookies recipe:

    1. Don’t overcrowd the air fryer basket! Cook the cookies in batches if necessary, to ensure they have enough room to cook evenly.

    2. Slightly underbake the cookies. This will help them retain their moisture and chewiness.

    3. Use high-quality chocolate chips. The better the chocolate, the more flavor you’ll get in each bite.

    4. Keep an eye on the cookies while they’re cooking! You don’t want to miss the moment when they go from undercooked to perfectly toasted.

    5. Experiment with different mix-ins! Try adding nuts, oats, or even candy pieces to create unique flavor combinations.

    FAQ

    1. Q: Can I use a different type of sugar? A: Yes, you can substitute brown sugar with white granulated sugar and vice versa. Keep in mind that the cookies’ texture may vary slightly.
    2. Q: How long do these cookies keep? A: These cookies are best consumed within 3 days of baking. You can store them at room temperature or wrap individually and freeze for up to 2 months.
    3. Q: Can I make this recipe in a conventional oven? A: Yes, you can! Preheat your oven to 375°F (190°C) and bake the cookies for 10-12 minutes or until golden brown. Keep an eye on them as they may cook faster than air-fried.
    4. Q: Why do my cookies spread more than expected? A: This could be due to a few factors – overmixing the dough, using too much butter, or not chilling the dough long enough. Try adjusting your technique and see if that makes a difference!
    5. Q: Can I use different flavors of chocolate chips? A: Absolutely! Try using white chocolate chips for a sweet and creamy twist or dark chocolate chips for a rich and indulgent treat.
    6. Q: Are these cookies gluten-free? A: Unfortunately, this recipe is not gluten-free due to the use of all-purpose flour. However, you can try substituting with a gluten-free flour blend to make it work!

    And there you have it – the ultimate guide to making Air Fryer Chocolate Chip Cookies! With these easy steps and expert tips, you’ll be well on your way to creating the perfect treat that’s sure to impress friends and family alike. So go ahead, get baking, and indulge in the sweet delight of these crispy-on-the-outside, chewy-on-the-inside cookies!

    Why You Should Use an Air Fryer for This Recipe

    Using an air fryer is a game-changer for this recipe. Unlike traditional frying, it uses up to 95% less oil, making your meal significantly healthier without sacrificing that delicious crunch. Plus, it is faster than a conventional oven and doesn’t heat up your entire kitchen.

    Pro Tips for Perfection

    • Don’t Overcrowd: Always cook in a single layer to ensure the hot air circulates evenly.
    • Preheat: Taking 3 minutes to preheat your air fryer ensures the food starts cooking immediately for a crispier texture.
    • Shake It: Shake the basket halfway through cooking to ensure even browning on all sides.

    How to Store and Reheat

    If you have leftovers (which is rare!), store them in an airtight container in the refrigerator for up to 3 days. To reheat, simply pop them back in the air fryer at 350°F for 3-4 minutes until they are crispy again. Do not use a microwave, as it will make them soggy.

    🔥 Join Our Viral Foodie Community!

    Don’t miss out on the latest air fryer trends. Follow us now:

    📌 Follow on Pinterest
       
    🤖 Join Reddit

    📌 Pin This Recipe!

    Pin for Best Air Fryer Chocolate Chip Cookies Recipe (2026 Guide)

    Save to your Air Fryer board.

    📌 Pin This Recipe For Later!

    Best Air Fryer Chocolate Chip Cookies Recipe

    Save to Pinterest

    📌 Pin This Designed Recipe!

    Save to Pinterest

  • Best Air Fryer Crispy French Fries Recipe

    Best Air Fryer Crispy French Fries Recipe

    Best Air Fryer Crispy French Fries Recipe (2026 Guide). This recipe has gone viral for a reason: it’s quick, easy, and incredibly delicious.

    Below you will find the step-by-step instructions to make this amazing dish at home.

    Air Fryer Crispy French Fries

    Perfect Air Fryer Crispy French Fries ready in minutes.

    💡 Chef’s Quick Tip

    For best results, preheat your air fryer. Check our Full Guide and Cooking Science.


    Air Fryer Crispy French Fries

    Introduction

    Ah, Air Fryer Crispy French Fries – the holy grail of snack food. Who wouldn’t want to indulge in the crispy, golden goodness that is a perfectly cooked batch of fries without the guilt of deep-frying? As a Michelin Star Chef, I’m thrilled to share with you my secrets for achieving the most mouthwatering Air Fryer Crispy French Fries that will leave your taste buds singing. So, grab a bag of potatoes and let’s get started!

    Why This Recipe Works

    So, what makes this recipe stand out from the rest? It’s all about the science (and art) of air frying. Unlike traditional deep-frying methods, air frying uses hot air circulation to cook your fries, resulting in a crispy exterior and fluffy interior without the need for copious amounts of oil. This method also allows for better control over the cooking process, ensuring that every fry is cooked to perfection.

    But it’s not just about the air frying itself – it’s also about the quality of the potatoes you start with. Look for high-starch potatoes like Russet or Idaho for the best results. These varieties will yield a crispy outside and a fluffy inside, while lower-starch potatoes like Yukon Golds may produce a more tender but less crispy fry.

    Ingredients

    • 4-5 large potatoes (Russet or Idaho)
    • 1/2 cup vegetable oil (for brushing)
    • 1 tablespoon granulated salt
    • 1 tablespoon granulated sugar
    • 1 teaspoon paprika
    • 1/4 teaspoon garlic powder
    • 1/4 teaspoon onion powder
    • Spray or cooking oil for the air fryer basket

    Step-by-Step Instructions

    1. Step 1: Preheat Your Air Fryer. Set your air fryer to 400°F (200°C). If you have a specific “fry” or ” French fries” setting, use that. Otherwise, the regular cooking mode will work just fine.
    2. Step 2: Prepare Your Potatoes. Cut your potatoes into long, thin strips – you want them to be roughly uniform in size so they cook evenly. Try to make them as straight as possible, but don’t worry too much about perfection. You can either cut them by hand or use a French fry cutter.
    3. Step 3: Soak Your Potatoes. Fill a large bowl with cold water and add the sliced potatoes. Let them soak for at least 30 minutes to remove excess starch. After soaking, drain the potatoes and pat them dry with paper towels to remove excess moisture.
    4. Step 4: Season Your Fries. In a large bowl, combine the granulated salt, sugar, paprika, garlic powder, and onion powder. Toss the potato strips in the seasoning mixture until they’re evenly coated.
    5. Step 5: Load Your Air Fryer Basket. Place the seasoned potato strips in a single layer in the air fryer basket. You may need to cook them in batches depending on the size of your air fryer and the number of fries you have. Leave a small gap between each batch for even cooking.
    6. Step 6: Cook Your Fries. Place the basket in the preheated air fryer and set the timer according to your desired level of crispiness. For a more tender fry, cook them at 400°F (200°C) for about 10-12 minutes. For an extra crispy fry, increase the temperature to 420°F (220°C) and cook for around 8-10 minutes. Repeat with any additional batches.
    7. Step 7: Serve Your Fries. Once your fries are cooked, remove them from the air fryer and place them on a paper towel-lined plate to drain excess moisture. Serve immediately and enjoy! You can top your fries with your favorite seasonings or condiments – I recommend a drizzle of truffle aioli for added richness.

    Nutritional Info

    Macronutrients Per Serving (100g)
    Fat 0.5g
    Carbohydrates 25.6g
    2.3g
    Fiber 4.2g
    Sodium 25mg

    Expert Tips

    1. Don’t overcrowd the air fryer basket!** Leave a little space between each batch to ensure even cooking. If you do overcrowd, your fries may not cook evenly and could end up mushy or burnt.
    2. Adjust the temperature as needed**. If you find that your fries are cooking too quickly, reduce the temperature slightly. If they’re taking too long, increase the heat. Keep an eye on them to avoid overcooking!
    3. Don’t skip the soaking step!** Soaking the potatoes helps remove excess starch and results in a crisper fry.
    4. Experiment with different seasonings!** Try adding garlic powder, chili powder, or even lemon zest to give your fries an extra boost of flavor.
    5. Keep an eye on the timer!** Depending on your air fryer and the number of fries you’re cooking, the cooking time may vary. Keep an eye on them to avoid overcooking!
    6. Try different potato varieties!** While Russet and Idaho potatoes work well for this recipe, other high-starch potatoes like Yukon Golds or even sweet potatoes can produce delicious results.

    FAQ

    1. Q: Can I use a convection oven instead of an air fryer?A: While you can try cooking your fries in a convection oven, the results may vary. Air frying uses hot air circulation to cook the fries, which is different from traditional oven cooking. You may need to adjust the temperature and cooking time to achieve the best results.
    2. Q: Can I add cheese or other toppings before cooking?A: Yes! Feel free to sprinkle grated cheese, chopped herbs, or even crumbled bacon onto your fries before cooking for added flavor and texture. Just be aware that adding extra toppings may affect the cooking time.
    3. Q: How do I store leftover fries?A: Cooked fries are best consumed fresh, but if you do have leftovers, store them in an airtight container in the refrigerator for up to 3 days. Reheat them in the air fryer or oven before serving.
    4. Q: Can I use frozen French fries?A: While you can cook frozen French fries in an air fryer, the results may vary. Freshly cut potatoes will generally produce a crisper and more flavorful result. If you do choose to use frozen fries, follow the package instructions for cooking times and temperatures.
    5. Q: Can I make this recipe gluten-free?A: Yes! This recipe is naturally gluten-free, so you don’t need to worry about substituting ingredients or adjusting the seasonings. Enjoy!

    And there you have it – the ultimate guide to making Air Fryer Crispy French Fries that will satisfy even the most discerning palates. With these simple steps and expert tips, you’ll be well on your way to creating a snack that’s both delicious and Instagram-worthy. Happy cooking!

    Why You Should Use an Air Fryer for This Recipe

    Using an air fryer is a game-changer for this recipe. Unlike traditional frying, it uses up to 95% less oil, making your meal significantly healthier without sacrificing that delicious crunch. Plus, it is faster than a conventional oven and doesn’t heat up your entire kitchen.

    Pro Tips for Perfection

    • Don’t Overcrowd: Always cook in a single layer to ensure the hot air circulates evenly.
    • Preheat: Taking 3 minutes to preheat your air fryer ensures the food starts cooking immediately for a crispier texture.
    • Shake It: Shake the basket halfway through cooking to ensure even browning on all sides.

    How to Store and Reheat

    If you have leftovers (which is rare!), store them in an airtight container in the refrigerator for up to 3 days. To reheat, simply pop them back in the air fryer at 350°F for 3-4 minutes until they are crispy again. Do not use a microwave, as it will make them soggy.

    🔥 Join Our Viral Foodie Community!

    Don’t miss out on the latest air fryer trends. Follow us now:

    📌 Follow on Pinterest
       
    🤖 Join Reddit

    📌 Pin This Recipe For Later!

    Best Air Fryer Crispy French Fries Recipe

    Save to Pinterest

    📌 Pin This Designed Recipe!

    Save to Pinterest

  • Best Air Fryer Garlic Parmesan Wings Recipe

    Best Air Fryer Garlic Parmesan Wings Recipe

    Best Air Fryer Garlic Parmesan Wings Recipe (2026 Guide). This recipe has gone viral for a reason: it’s quick, easy, and incredibly delicious.

    Best Air Fryer Garlic Parmesan Wings Recipe (2026 Guide)

    Below you will find the step-by-step instructions to make this amazing dish at home.

    Air Fryer Garlic Parmesan Wings

    Perfect Air Fryer Garlic Parmesan Wings ready in minutes.

    💡 Chef’s Quick Tip

    For best results, preheat your air fryer. Check our Full Guide and Cooking Science.


    Air Fryer Garlic Parmesan Wings: A Game-Changing Recipe for Your Next Dinner Party

    Introduction

    When it comes to finger foods that are both delicious and impressive, few dishes can match the majesty of Air Fryer Garlic Parmesan Wings. These crispy, savory, and utterly irresistible morsels are sure to be the star of your next dinner party or game-day gathering. In this article, we’ll dive deep into the world of air-fried perfection and explore why this recipe stands out from the rest.
    Why This Recipe Works

    So, what makes these Air Fryer Garlic Parmesan Wings so special? For starters, it’s all about the combination of flavors and textures. The pungency of garlic and the richness of parmesan cheese meld together in perfect harmony, while the air fryer’s crispy exterior adds a satisfying crunch to each bite. But beyond the taste, this recipe also offers an unbeatable convenience factor – simply toss your wings in the air fryer basket, set the timer, and voilà! A stress-free, show-stopping appetizer that’s sure to wow your guests.

    Ingredients

    • 1 pound chicken wings
    • 2 cloves garlic, minced
    • 1 cup grated parmesan cheese
    • 1/4 cup panko breadcrumbs
    • 1 tablespoon olive oil
    • Salt and pepper to taste
    • Air fryer basket liner (optional)

    Step-by-Step Instructions

    1. Preheat your air fryer to 400°F (200°C). While it’s warming up, in a medium-sized bowl, mix together the minced garlic and grated parmesan cheese.
    2. In a separate bowl, toss the chicken wings with olive oil, salt, and pepper until they’re evenly coated. This will help the air fryer do its magic by creating a crispy exterior without overcooking the wings.
    3. Once the air fryer is hot, place 4-5 wing pieces in the basket (depending on size). You may need to cook them in batches depending on the capacity of your air fryer. If using an air fryer basket liner, place it inside the basket before adding the wings.
    4. Drizzle the garlic-parmesan mixture evenly over the wings, making sure each piece is coated with a nice layer of flavor. Toss to combine.
    5. Sprinkle panko breadcrumbs over the wings, again ensuring each piece gets an even coating. This will add an extra layer of crunch and texture to your finished product.
    6. Cook the wings for 12-15 minutes at 400°F (200°C), shaking the basket halfway through. You may need to adjust cooking time based on the size of your wing pieces and desired level of crispiness.
    7. Once the wings are done, remove them from the air fryer and place them in a serving dish or individual plates. Serve hot and enjoy!

    Nutritional Info

    Nutrient Amount Per Serving (4-5 wings)
    Calories 220-250
    Fat 12-14g
    Saturated Fat 3-4g
    Cholesterol 60-70mg
    Sodium 400-500mg
    Total Carbohydrates 10-12g
    Dietary Fiber 0-1g
    Sugars 2-3g
    25-30g

    Expert Tips

    Here are five expert tips to take your Air Fryer Garlic Parmesan Wings game to the next level:

    1. **Don’t overcook**: Keep an eye on those wings! They can go from perfectly cooked to burnt in a matter of minutes.
    2. **Experiment with seasonings**: Try adding different herbs and spices to the garlic-parmesan mixture for unique flavor profiles.
    3. **Use high-quality cheese**: Fresh, high-quality parmesan cheese is essential for this recipe’s signature flavor.
    4. **Don’t overcrowd the basket**: Cook wings in batches if necessary to ensure even cooking and crispy results.
    5. **Make ahead**: Prepare the garlic-parmesan mixture and panko breadcrumbs in advance to simplify the cooking process.

    FAQ

    Here are seven frequently asked questions about this recipe, along with their answers:

    1. Q: Can I use different types of cheese? A: Absolutely! Try using mozzarella, provolone, or even feta for unique flavor profiles.
    2. Q: How do I store leftover wings? A: Store them in an airtight container in the refrigerator for up to 3 days.
    3. Q: Can I make this recipe without panko breadcrumbs? A: Yes, but keep in mind it may affect the texture and crispiness of the wings.
    4. Q: What’s the best way to reheat leftover wings? A: Reheat them in the air fryer at 350°F (175°C) for 5-7 minutes or until crispy again.
    5. Q: Can I use chicken tenders instead of wings? A: Yes, but adjust cooking time and temperature as needed based on tender size.
    6. Q: How do I make this recipe gluten-free? A: Simply substitute panko breadcrumbs with gluten-free breadcrumbs for a gluten-free version.
    7. Q: Can I double or triple the recipe? A: Yes! Just keep in mind you may need to adjust cooking time and temperature as needed based on batch size.

    Conclusion:

    There you have it – the ultimate guide to Air Fryer Garlic Parmesan Wings! With these simple, yet impressive, steps, you’ll be well on your way to creating a dish that’s sure to become a staple at any gathering. Whether you’re hosting a dinner party or just looking for a quick and delicious snack, this recipe is guaranteed to deliver. So go ahead, get creative, and take your Air Fryer game to the next level!

    Why You Should Use an Air Fryer for This Recipe

    Using an air fryer is a game-changer for this recipe. Unlike traditional frying, it uses up to 95% less oil, making your meal significantly healthier without sacrificing that delicious crunch. Plus, it is faster than a conventional oven and doesn’t heat up your entire kitchen.

    Pro Tips for Perfection

    • Don’t Overcrowd: Always cook in a single layer to ensure the hot air circulates evenly.
    • Preheat: Taking 3 minutes to preheat your air fryer ensures the food starts cooking immediately for a crispier texture.
    • Shake It: Shake the basket halfway through cooking to ensure even browning on all sides.

    How to Store and Reheat

    If you have leftovers (which is rare!), store them in an airtight container in the refrigerator for up to 3 days. To reheat, simply pop them back in the air fryer at 350°F for 3-4 minutes until they are crispy again. Do not use a microwave, as it will make them soggy.

    🔥 Join Our Viral Foodie Community!

    Don’t miss out on the latest air fryer trends. Follow us now:

    📌 Follow on Pinterest
       
    🤖 Join Reddit

    📌 Pin This Recipe!

    Pin for Best Air Fryer Garlic Parmesan Wings Recipe (2026 Guide)

    Save to your Air Fryer board.

    📌 Pin This Recipe For Later!

    Best Air Fryer Garlic Parmesan Wings Recipe

    Save to Pinterest

    📌 Pin This Designed Recipe!

    Save to Pinterest

  • Best Air Fryer Roasted Vegetables Recipe

    Best Air Fryer Roasted Vegetables Recipe

    Best Air Fryer Roasted Vegetables Recipe (2026 Guide). This recipe has gone viral for a reason: it’s quick, easy, and incredibly delicious.

    Below you will find the step-by-step instructions to make this amazing dish at home.

    Air Fryer Roasted Vegetables

    The perfect Air Fryer Roasted Vegetables, ready in minutes!

    💡 Chef’s Note

    Want more healthy meals? Check our Full Air Fryer Collection
    or read about the science of convection cooking.


    Introduction

    Get ready to revolutionize your snack game with Air Fryer Roasted Vegetables! This recipe is a game-changer, especially for vegetarians and vegans who crave that crispy roasted flavor without the extra calories. By using an air fryer, you can achieve that perfect balance of texture and taste in just a few simple steps.

    Why This Recipe Works

    The air fryer’s unique technology allows for even cooking, resulting in tender and juicy vegetables with a satisfying crunch. Unlike traditional roasting methods, the air fryer requires minimal oil, making it an excellent choice for those looking to reduce their fat intake. Plus, cleanup is a breeze!

    Ingredients

    • 1-2 cups mixed vegetables (such as broccoli florets, cauliflower crumbles, Brussels sprouts, and sweet potato cubes)
    • 2 tbsp olive oil
    • 1 tsp salt
    • 1/4 tsp black pepper
    • Optional: garlic powder, paprika, or other seasonings of your choice

    Step-by-Step Instructions

    1. Preset the air fryer to 400°F (200°C) and preheat for at least 5 minutes.

    2. In a large bowl, toss the mixed vegetables with olive oil, salt, and black pepper until they are evenly coated.

    3. Load the vegetables into the air fryer basket in a single layer. You may need to cook them in batches depending on the size of your air fryer.

    4. Cook the vegetables for 10-12 minutes, shaking the basket halfway through.

    5. Check the vegetables for doneness and adjust the cooking time as needed. Some may require a bit more or less time based on their natural texture.

    Pro Chef Tips

    Here are three secrets to ensure your Air Fryer Roasted Vegetables turn out perfectly:

    • Don’t overcrowd the air fryer basket, as this can prevent even cooking. Cook in batches if necessary.
    • Experiment with different seasonings and herbs to add unique flavors to your vegetables.
    • Keep an eye on the temperature and adjust it accordingly based on the type of vegetables you’re using.

    Nutrition & Storage

    Serving Calories Protein
    1 serving (about 1 cup) 120-150 2-3 grams

    FAQ

    Here are answers to some common questions about this recipe:

    1. Q: Can I use frozen vegetables? A: Yes, but make sure they’re thawed first and pat dry with a paper towel before cooking.
    2. Q: How do I store leftover roasted vegetables? A: Store them in an airtight container in the refrigerator for up to 3 days or freeze for up to 2 months.
    3. Q: Can I cook other types of vegetables, like leafy greens or carrots? A: Yes! Just adjust the cooking time based on the vegetable’s natural texture and your desired level of doneness.
    4. Q: Is it necessary to preheat the air fryer? A: Yes, this ensures even cooking and helps prevent the vegetables from steaming instead of roasting.


    Why You Should Use an Air Fryer for This Recipe

    Using an air fryer is a game-changer for this recipe. Unlike traditional frying, it uses up to 95% less oil, making your meal significantly healthier without sacrificing that delicious crunch. Plus, it is faster than a conventional oven and doesn’t heat up your entire kitchen.

    Pro Tips for Perfection

    • Don’t Overcrowd: Always cook in a single layer to ensure the hot air circulates evenly.
    • Preheat: Taking 3 minutes to preheat your air fryer ensures the food starts cooking immediately for a crispier texture.
    • Shake It: Shake the basket halfway through cooking to ensure even browning on all sides.

    How to Store and Reheat

    If you have leftovers (which is rare!), store them in an airtight container in the refrigerator for up to 3 days. To reheat, simply pop them back in the air fryer at 350°F for 3-4 minutes until they are crispy again. Do not use a microwave, as it will make them soggy.

    🔥 Join Our Viral Foodie Community!

    Don’t miss out on the latest air fryer trends. Follow us now:

    📌 Follow on Pinterest
       
    🤖 Join Reddit

    📌 Pin This Recipe!

    Pin for Best Air Fryer Roasted Vegetables Recipe (2026 Guide)

    Save to your Air Fryer board.

    📌 Pin This Recipe For Later!

    Best Air Fryer Roasted Vegetables Recipe

    Save to Pinterest

    📌 Pin This Designed Recipe!

    Save to Pinterest

  • Best Air Fryer Chocolate Chip Cookies Recipe

    Best Air Fryer Chocolate Chip Cookies Recipe

    Best Air Fryer Chocolate Chip Cookies Recipe (2026 Guide). This recipe has gone viral for a reason: it’s quick, easy, and incredibly delicious.

    Best Air Fryer Chocolate Chip Cookies Recipe (2026 Guide)

    Below you will find the step-by-step instructions to make this amazing dish at home.

    Air Fryer Chocolate Chip Cookies

    The perfect Air Fryer Chocolate Chip Cookies, ready in minutes!

    💡 Chef’s Note

    Want more healthy meals? Check our Full Air Fryer Collection
    or read about the science of convection cooking.


    Introduction

    Indulge in the sweet delight of Air Fryer Chocolate Chip Cookies, a game-changing twist on the classic treat. Say goodbye to soggy bottoms and hello to crispy, chewy goodness with every bite. This innovative recipe harnesses the power of your air fryer to produce cookies that are not only mouthwatering but also healthier than their deep-fried counterparts.

    Why This Recipe Works

    The secret to these Air Fryer Chocolate Chip Cookies lies in the magic of low-fat cooking. By using an air fryer, you can achieve the perfect balance between crunch and chew without sacrificing flavor or texture. No more greasy mess or excessive sugar – just pure bliss in every cookie.

    Ingredients

    • 1 1/2 cups all-purpose flour
    • 1 tsp baking soda
    • 1 tsp salt
    • 1 cup unsalted butter, softened
    • 3/4 cup white granulated sugar
    • 1/2 cup brown sugar
    • 2 large eggs
    • 2 cups semi-sweet chocolate chips
    • Powdered sugar for dusting (optional)

    Step-by-Step Instructions

      1. Preheat your air fryer to 375°F (190°C). Line the basket with parchment paper or a silicone mat.

      2. In a medium bowl, whisk together flour, baking soda, and salt. Set aside.

      3. In a large bowl, cream butter and sugars until light and fluffy. Beat in eggs one at a time.

      4. Gradually mix in the dry ingredients (flour mixture) until just combined, being careful not to overmix.

      5. Stir in chocolate chips.

      6. Using a cookie scoop or tablespoon, drop rounded balls of dough onto the prepared air fryer basket. Leave about 1 inch of space between each cookie.

      7. Cook for 8-10 minutes or until edges are lightly golden. Shake the basket halfway through cooking to ensure even browning.

      8. Remove cookies from the air fryer and let cool on a wire rack. Dust with powdered sugar (if desired) before serving.

    Pro Chef Tips

    • For an extra crispy exterior, increase cooking time by 1-2 minutes or until desired texture is achieved.
    • To prevent cookies from spreading too much, press the dough balls gently onto the air fryer basket before cooking.
    • Mix and match your favorite chocolate chip flavors – like dark, milk, or white – for a unique twist on this recipe!

    Nutrition & Storage

    Serving Calories Protein
    1 cookie (approx. 50g) 120-140 calories 2-3g protein

    FAQ

    1. Q: Can I use other types of chocolate chips or nuts?
      A: Absolutely! Feel free to experiment with different flavors and add-ins, but keep in mind that the air fryer’s heat may affect the texture.
    2. Q: How do I store these cookies for later?
      A: Cool cookies completely before storing them in an airtight container at room temperature for up to 5 days or freeze for up to 2 months.
    3. Q: Can I use this recipe to make giant cookies?
      A: Yes, simply adjust cooking time and temperature as needed. You may need to cook them in batches depending on the size of your air fryer basket.
    4. Q: Will these cookies be too sweet for my taste?
      A: Not necessarily! The sweetness level depends on personal preference. If you prefer less sweet, reduce or omit the brown sugar.


    Why You Should Use an Air Fryer for This Recipe

    Using an air fryer is a game-changer for this recipe. Unlike traditional frying, it uses up to 95% less oil, making your meal significantly healthier without sacrificing that delicious crunch. Plus, it is faster than a conventional oven and doesn’t heat up your entire kitchen.

    Pro Tips for Perfection

    • Don’t Overcrowd: Always cook in a single layer to ensure the hot air circulates evenly.
    • Preheat: Taking 3 minutes to preheat your air fryer ensures the food starts cooking immediately for a crispier texture.
    • Shake It: Shake the basket halfway through cooking to ensure even browning on all sides.

    How to Store and Reheat

    If you have leftovers (which is rare!), store them in an airtight container in the refrigerator for up to 3 days. To reheat, simply pop them back in the air fryer at 350°F for 3-4 minutes until they are crispy again. Do not use a microwave, as it will make them soggy.

    🔥 Join Our Viral Foodie Community!

    Don’t miss out on the latest air fryer trends. Follow us now:

    📌 Follow on Pinterest
       
    🤖 Join Reddit

    📌 Pin This Recipe!

    Pin for Best Air Fryer Chocolate Chip Cookies Recipe (2026 Guide)

    Save to your Air Fryer board.

    📌 Pin This Recipe For Later!

    Best Air Fryer Chocolate Chip Cookies Recipe

    Save to Pinterest

    📌 Pin This Designed Recipe!

    Save to Pinterest

SnapyTasty: Best Air Fryer Recipes