Category: Air Fryer Recipes

  • Crumbl Copycat Chocolate Chip Cookies

    Crumbl Copycat Chocolate Chip Cookies

    Crumbl Copycat Chocolate Chip Cookies (2026 Viral Recipe). This recipe has gone viral for a reason: it’s quick, easy, and incredibly delicious.

    Crumbl Copycat Chocolate Chip Cookies (2026 Viral Recipe)

    Below you will find the step-by-step instructions to make this amazing dish at home.

    Introduction

    Are you ready to indulge in a cookie that’s truly crumbl-worthy? Look no further! Our Crumbl Copycat Chocolate Chip Cookies recipe is a game-changer. These soft, chewy, and utterly scrumptious treats are sure to satisfy your sweet tooth. And the best part? They’re surprisingly easy to make at home.

    Crumbl Cookies have become a phenomenon in recent years, with fans lining up around the block for their signature chocolate chip cookies. But why wait in line when you can make them yourself in the comfort of your own kitchen?

    In this article, we’ll dive into the world of Crumbl Copycat Chocolate Chip Cookies and provide you with a step-by-step guide on how to recreate these addictive treats at home.

    Ingredients

    • 1 cup (2 sticks) unsalted butter, softened
    • 3/4 cup white granulated sugar
    • 1/2 cup brown sugar
    • 2 large eggs
    • 2 teaspoons pure vanilla extract
    • 2 1/4 cups all-purpose flour
    • 1 teaspoon baking soda
    • 1/2 teaspoon salt
    • 1 cup semi-sweet chocolate chips
    • 1 cup chopped walnuts (optional)

    Step-by-Step Instructions

    1. Preheat your oven to 375°F (190°C). Line a baking sheet with parchment paper or a silicone mat.
    2. In a medium-sized bowl, whisk together the flour, baking soda, and salt. Set aside.
    3. In a large bowl, cream together the butter and sugars until light and fluffy, about 2-3 minutes.
    4. Beat in the eggs one at a time, followed by the vanilla extract.
    5. Gradually mix in the dry ingredients (flour mixture) until just combined, being careful not to overmix.
    6. Stir in the chocolate chips and walnuts (if using).
    7. Scoop tablespoon-sized balls of dough onto the prepared baking sheet, leaving about 2 inches of space between each cookie.
    8. Bake for 10-12 minutes or until the edges are lightly golden brown.
    9. Remove from the oven and let cool on the baking sheet for 5 minutes before transferring to a wire rack to cool completely.

    Pro Tips for Success

    * To ensure your cookies retain their shape, make sure to not overbake them. A few seconds underdone is better than a few seconds too long.
    * If you want an extra crispy exterior and chewy interior, bake the cookies for 9 minutes and then broil for an additional 1-2 minutes. Keep an eye on them to avoid burning!
    * Don’t overcrowd your baking sheet! Leave enough space between each cookie to allow for proper spreading during baking.
    * If you’re feeling extra fancy, try adding in some chopped nuts or dried cranberries to give the cookies a unique twist.

    Frequently Asked Questions

    Q: Can I make these cookies ahead of time?
    A: Yes! You can prepare the dough up to 24 hours in advance and store it in an airtight container at room temperature. Simply scoop and bake as instructed when you’re ready.
    Q: What’s the secret to achieving that signature Crumbl chewiness?
    A: It’s all about the ratio of white sugar to brown sugar! The combination creates a unique texture that’s both crunchy on the outside and chewy on the inside.

    There you have it – our ultimate guide to making Crumbl Copycat Chocolate Chip Cookies at home. With these simple steps, you’ll be whipping up batches of these mouthwatering treats in no time. So go ahead, get baking, and indulge in the cookie goodness that’s got everyone hooked!


    📢 Join Our Foodie Community!

    Love these recipes? Follow us for more daily inspiration and kitchen hacks:

    💡 Pro Tips for Perfect Air Frying

    • Space is Key: Don’t overcrowd the basket for max crispiness. 🌬️
    • Preheat: A preheated air fryer gives better results. 🔥
    • Shake: Flip halfway for even browning. 🔄

    💡 Master Your Air Fryer: Pro Tips

    • Airflow: Don’t crowd the basket. 🌬️
    • Preheat: 3-5 mins for best results. 🔥
    • Shake: Flip halfway for even browning. 🔄

    Why You Should Use an Air Fryer for This Recipe

    Using an air fryer is a game-changer for this recipe. Unlike traditional frying, it uses up to 95% less oil, making your meal significantly healthier without sacrificing that delicious crunch. Plus, it is faster than a conventional oven and doesn’t heat up your entire kitchen.

    Pro Tips for Perfection

    • Don’t Overcrowd: Always cook in a single layer to ensure the hot air circulates evenly.
    • Preheat: Taking 3 minutes to preheat your air fryer ensures the food starts cooking immediately for a crispier texture.
    • Shake It: Shake the basket halfway through cooking to ensure even browning on all sides.

    How to Store and Reheat

    If you have leftovers (which is rare!), store them in an airtight container in the refrigerator for up to 3 days. To reheat, simply pop them back in the air fryer at 350°F for 3-4 minutes until they are crispy again. Do not use a microwave, as it will make them soggy.

    🔥 Join Our Viral Foodie Community!

    Don’t miss out on the latest air fryer trends. Follow us now:

    📌 Follow on Pinterest
       
    🤖 Join Reddit

    📌 Pin This Recipe!

    Pin for Crumbl Copycat Chocolate Chip Cookies (2026 Viral Recipe)

    Save to your Air Fryer board.

  • Marry Me Chicken (Creamy Tuscan Style)

    Marry Me Chicken (Creamy Tuscan Style)

    Marry Me Chicken (Creamy Tuscan Style) (2026 Viral Recipe). This recipe has gone viral for a reason: it’s quick, easy, and incredibly delicious.

    Marry Me Chicken (Creamy Tuscan Style) (2026 Viral Recipe)

    Below you will find the step-by-step instructions to make this amazing dish at home.

    Introduction

    Imagine a dish so divine, it’ll make you want to propose. Literally. Marry Me Chicken is the ultimate creamy, dreamy, Tuscan-inspired culinary masterpiece that will leave you and your loved ones swooning for more. With its rich, velvety sauce and tender, flavorful chicken, this recipe is sure to become a family favorite.

    But don’t just take our word for it! The secret to Marry Me Chicken’s irresistible charm lies in the harmonious balance of creamy heavy cream, tangy Parmesan cheese, and savory Italian herbs. When you combine these elements with juicy chicken breasts, you get a dish that’s equal parts comforting and sophisticated.

    So, if you’re looking for a recipe that will win hearts (and taste buds), look no further! Marry Me Chicken is the perfect choice for a special occasion, a cozy night in, or just because. And don’t worry; we won’t tell anyone it’s really just an excuse to indulge in a rich and creamy sauce.

    Ingredients

    • 1 1/2 pounds boneless, skinless chicken breasts, cut into 1-inch pieces
    • 1 cup heavy cream
    • 1 cup grated Parmesan cheese
    • 1 tablespoon olive oil
    • 2 cloves garlic, minced
    • 1 teaspoon dried oregano
    • 1/2 teaspoon dried basil
    • Salt and pepper to taste
    • 1 cup cooked spaghetti or fettuccine noodles (optional)

    Step-by-Step Instructions

    1. Preheat your oven to 375°F (190°C).
    2. In a large skillet, heat the olive oil over medium-high heat. Add the chicken and cook until browned on all sides and cooked through, about 5-7 minutes. Remove the chicken from the skillet and set aside.
    3. In the same skillet, add the garlic and cook for 1 minute, or until fragrant.
    4. Pour in the heavy cream and bring the mixture to a simmer. Reduce the heat to medium-low and let it cook for 2-3 minutes, or until slightly thickened.
    5. Stir in the Parmesan cheese until melted and smooth. Season with salt, pepper, oregano, and basil.
    6. Add the cooked chicken back into the skillet and toss to coat with the creamy sauce. Simmer for an additional 1-2 minutes to allow the flavors to meld together.
    7. Serve the Marry Me Chicken hot over cooked spaghetti or fettuccine noodles, if desired.

    Pro Tips for Success

    * To take your Marry Me Chicken to the next level, try adding some sautéed mushrooms or bell peppers to the skillet with the garlic and chicken.
    * For an extra-rich sauce, add 1-2 tablespoons of grated Parmesan cheese towards the end of the cooking time. This will help thicken the sauce and give it a velvety texture.
    * Don’t be afraid to get creative with your toppings! Add some toasted breadcrumbs or crispy prosciutto for added crunch, or try using different types of pasta or vegetables.

    Frequently Asked Questions

    Q: Can I use low-fat or non-dairy alternatives in the creamy sauce?
    A: While we can’t promise the same level of richness and decadence, you can experiment with lower-fat options like half-and-half or a non-dairy creamer. However, keep in mind that the flavor and texture may be slightly different.

    Q: How do I make this recipe more substantial? Can I add other ingredients?
    A: Absolutely! Try adding some cooked vegetables (like broccoli or carrots), roasted potatoes, or even some crispy bacon to make the dish more filling.

    Q: Can I prepare the creamy sauce ahead of time?
    A: Yes, you can make the sauce up to a day in advance. Simply refrigerate it until ready to use, then reheat and stir in the cooked chicken.


    📢 Join Our Foodie Community!

    Love these recipes? Follow us for more daily inspiration and kitchen hacks:

    💡 Pro Tips for Perfect Air Frying

    • Space is Key: Don’t overcrowd the basket for max crispiness. 🌬️
    • Preheat: A preheated air fryer gives better results. 🔥
    • Shake: Flip halfway for even browning. 🔄

    💡 Master Your Air Fryer: Pro Tips

    • Airflow: Don’t crowd the basket. 🌬️
    • Preheat: 3-5 mins for best results. 🔥
    • Shake: Flip halfway for even browning. 🔄

    Why You Should Use an Air Fryer for This Recipe

    Using an air fryer is a game-changer for this recipe. Unlike traditional frying, it uses up to 95% less oil, making your meal significantly healthier without sacrificing that delicious crunch. Plus, it is faster than a conventional oven and doesn’t heat up your entire kitchen.

    Pro Tips for Perfection

    • Don’t Overcrowd: Always cook in a single layer to ensure the hot air circulates evenly.
    • Preheat: Taking 3 minutes to preheat your air fryer ensures the food starts cooking immediately for a crispier texture.
    • Shake It: Shake the basket halfway through cooking to ensure even browning on all sides.

    How to Store and Reheat

    If you have leftovers (which is rare!), store them in an airtight container in the refrigerator for up to 3 days. To reheat, simply pop them back in the air fryer at 350°F for 3-4 minutes until they are crispy again. Do not use a microwave, as it will make them soggy.

    🔥 Join Our Viral Foodie Community!

    Don’t miss out on the latest air fryer trends. Follow us now:

    📌 Follow on Pinterest
       
    🤖 Join Reddit

    📌 Pin This Recipe!

    Pin for Marry Me Chicken (Creamy Tuscan Style) (2026 Viral Recipe)

    Save to your Air Fryer board.

  • Spicy Tuna Crispy Rice

    Spicy Tuna Crispy Rice

    Spicy Tuna Crispy Rice (2026 Viral Recipe). This recipe has gone viral for a reason: it’s quick, easy, and incredibly delicious.

    Spicy Tuna Crispy Rice (2026 Viral Recipe)

    Below you will find the step-by-step instructions to make this amazing dish at home.

    Introduction

    Get ready to ignite your taste buds with our mouth-watering Spicy Tuna Crispy Rice recipe! This delectable dish is a perfect blend of Japanese and Korean flavors, combining the freshness of sashimi-grade tuna with the crunchiness of crispy rice. Whether you’re a foodie or just looking for a quick and easy meal, this recipe is sure to become a new favorite.

    Ingredients

    • 1 cup cooked Japanese short-grain rice (preferably Koshihikari or Akita Komachi)
    • 1/4 cup Gochujang (Korean chili paste)
    • 2 tablespoons soy sauce
    • 2 tablespoons rice vinegar
    • 1 tablespoon sesame oil
    • 1 teaspoon grated ginger
    • 1/2 teaspoon garlic, minced
    • 1/4 teaspoon red pepper flakes (optional)
    • 1 can of sashimi-grade tuna (about 6 oz), drained and flaked
    • 1/4 cup chopped scallions, for garnish
    • Salt and black pepper, to taste

    Step-by-Step Instructions

    1. Preheat your oven to 375°F (190°C).
    2. In a large mixing bowl, combine the cooked Japanese short-grain rice, Gochujang, soy sauce, rice vinegar, sesame oil, grated ginger, and garlic. Mix well until all the ingredients are fully incorporated.
    3. Divide the rice mixture into small portions, about 1/4 cup each. Shape each portion into a cylindrical shape using your hands or a mold.
    4. Place the shaped rice cylinders onto a baking sheet lined with parchment paper. Drizzle a little sesame oil over the rice to prevent sticking.
    5. Bake the rice in the preheated oven for 10-12 minutes, or until it becomes crispy and golden brown.
    6. While the rice is baking, prepare the tuna by mixing it with a squeeze of fresh lime juice and a pinch of salt. Set aside.
    7. Once the rice is done, remove it from the oven and let it cool slightly.
    8. Assemble the Spicy Tuna Crispy Rice by placing a baked rice cylinder on a plate, followed by a spoonful of tuna, and finishing with some chopped scallions on top.
    9. Drizzle any remaining sesame oil and soy sauce over the dish for added flavor and texture.

    Pro Tips for Success

    * For an extra crispy exterior, you can pan-fry the baked rice cylinders in a little sesame oil until golden brown. Be cautious not to burn them!
    * To ensure the tuna stays fresh and sashimi-grade, handle it gently and store it in the refrigerator at 40°F (4°C) or below.
    * Experiment with different levels of spiciness by adjusting the amount of Gochujang or adding more red pepper flakes. It’s up to you how spicy you like it!
    * Consider using other types of fish, such as salmon or yellowtail, if you prefer a stronger flavor.

    Frequently Asked Questions

    Q: What type of rice is best for this recipe?
    A: Japanese short-grain rice, specifically Koshihikari or Akita Komachi, works wonderfully due to its sticky texture and ability to hold its shape.

    Q: Can I make the Spicy Tuna Crispy Rice ahead of time?
    A: Yes! Prepare the rice mixture up to a day in advance, but cook the rice just before serving. Store leftover tuna in an airtight container at 40°F (4°C) or below for up to 2 days.

    Q: Can I substitute the Gochujang with other chili paste or sauce?
    A: While you can experiment with different chili pastes or sauces, keep in mind that Gochujang provides a distinct umami flavor and spiciness. If you choose to substitute it, start with a small amount and adjust to taste.

    Q: How do I store leftover Spicy Tuna Crispy Rice?
    A: Store leftover rice at room temperature for up to 2 days or refrigerate it for up to 3 days. Reheat the rice gently in the oven or microwave before serving.


    📢 Join Our Foodie Community!

    Love these recipes? Follow us for more daily inspiration and kitchen hacks:

    💡 Pro Tips for Perfect Air Frying

    • Space is Key: Don’t overcrowd the basket for max crispiness. 🌬️
    • Preheat: A preheated air fryer gives better results. 🔥
    • Shake: Flip halfway for even browning. 🔄

    💡 Master Your Air Fryer: Pro Tips

    • Airflow: Don’t crowd the basket. 🌬️
    • Preheat: 3-5 mins for best results. 🔥
    • Shake: Flip halfway for even browning. 🔄

    Why You Should Use an Air Fryer for This Recipe

    Using an air fryer is a game-changer for this recipe. Unlike traditional frying, it uses up to 95% less oil, making your meal significantly healthier without sacrificing that delicious crunch. Plus, it is faster than a conventional oven and doesn’t heat up your entire kitchen.

    Pro Tips for Perfection

    • Don’t Overcrowd: Always cook in a single layer to ensure the hot air circulates evenly.
    • Preheat: Taking 3 minutes to preheat your air fryer ensures the food starts cooking immediately for a crispier texture.
    • Shake It: Shake the basket halfway through cooking to ensure even browning on all sides.

    How to Store and Reheat

    If you have leftovers (which is rare!), store them in an airtight container in the refrigerator for up to 3 days. To reheat, simply pop them back in the air fryer at 350°F for 3-4 minutes until they are crispy again. Do not use a microwave, as it will make them soggy.

    🔥 Join Our Viral Foodie Community!

    Don’t miss out on the latest air fryer trends. Follow us now:

    📌 Follow on Pinterest
       
    🤖 Join Reddit

    📌 Pin This Recipe!

    Pin for Spicy Tuna Crispy Rice (2026 Viral Recipe)

    Save to your Air Fryer board.
  • Philly Cheesesteak Sliders

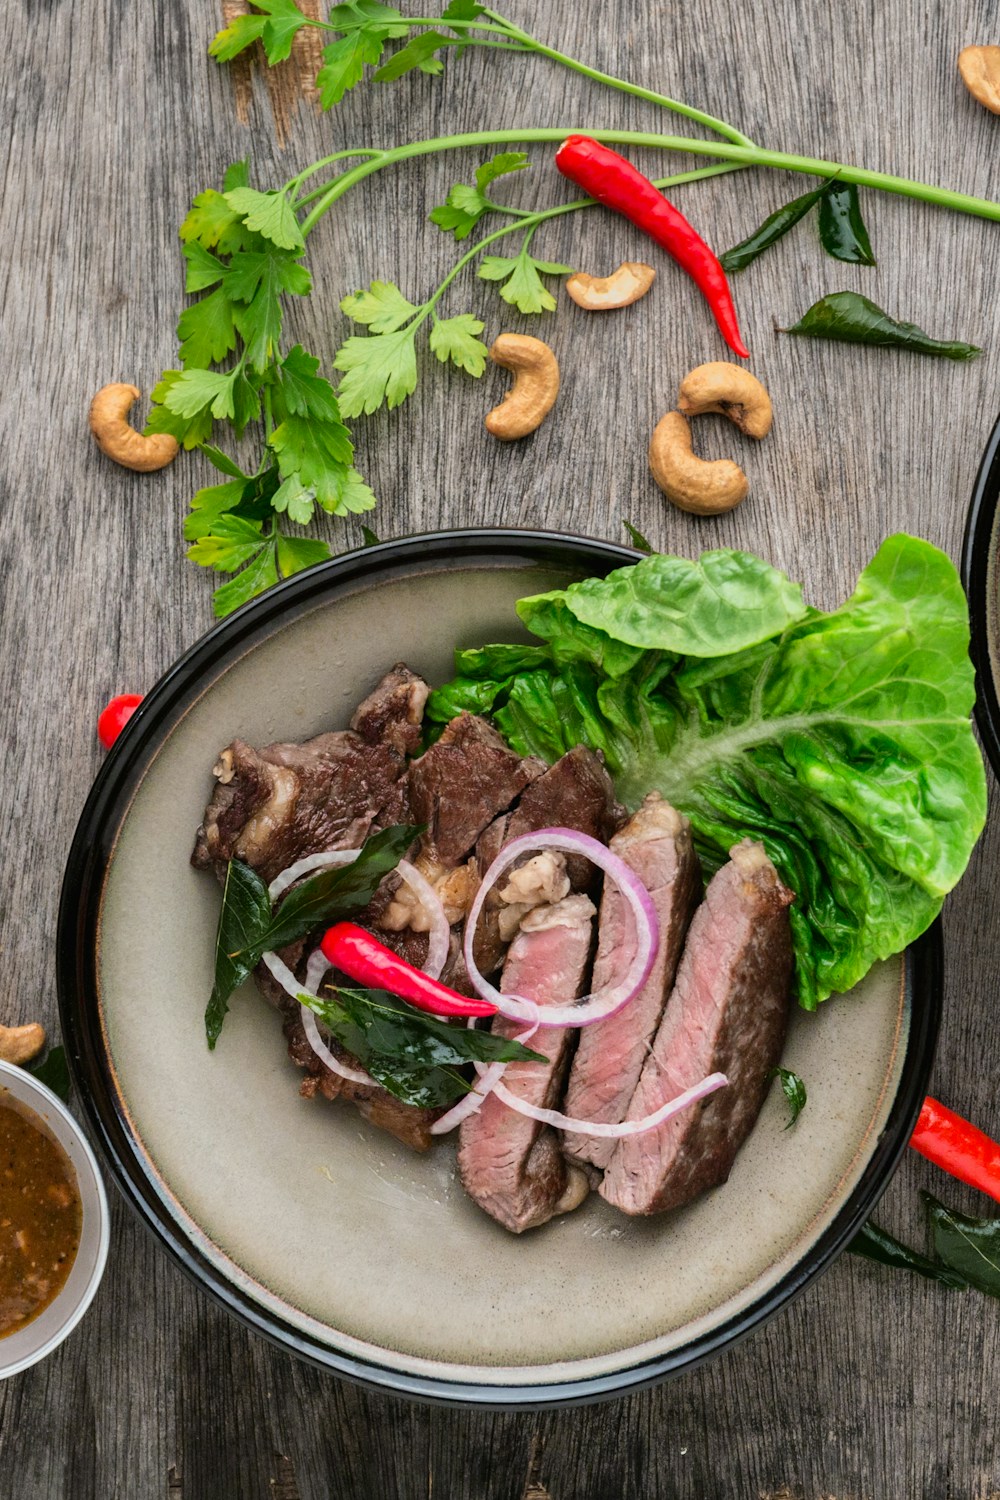
    Philly Cheesesteak Sliders

    Philly Cheesesteak Sliders (2026 Viral Recipe). This recipe has gone viral for a reason: it’s quick, easy, and incredibly delicious.

    Philly Cheesesteak Sliders (2026 Viral Recipe)

    Below you will find the step-by-step instructions to make this amazing dish at home.

    Introduction

    Get ready to take your taste buds on a trip down the East Coast with these mouthwatering Philly Cheesesteak Sliders! These bite-sized beauties are the perfect combination of tender beef, gooey cheese, and crispy bread. Whether you’re a local Philadelphian or just a cheesesteak aficionado, these sliders are sure to satisfy your cravings.

    Inspired by the iconic Philly cheesesteak sandwich, these mini versions pack all the flavor and excitement into a compact package. With their easy-to-make simplicity and crowd-pleasing appeal, they’re perfect for game days, parties, or just a quick snack.

    So grab your apron, preheat your grill or skillet, and get ready to serve up some serious sliders!

    Ingredients

    • 1 pound thinly sliced ribeye or top round steak
    • 4 hamburger buns (preferably hoagie-style)
    • 4 slices of American cheese (or your preferred melty cheese)
    • 1/4 cup sautéed onions
    • 2 cloves garlic, minced
    • 1 tablespoon olive oil
    • Salt and pepper to taste
    • Fresh parsley or chives for garnish (optional)

    Step-by-Step Instructions

    1. **Prepare the steak**: Slice the beef into thin strips, about 1/8 inch thick. Season with salt and pepper on both sides.
    2. **Heat the skillet**: Preheat a large skillet or grill pan over medium-high heat. Add the olive oil and swirl it around to coat the bottom.
    3. **Sear the steak**: Add the beef slices to the skillet and cook for 3-4 minutes per side, or until they reach your desired level of doneness. Transfer the cooked steak to a plate and let it rest for a few minutes.
    4. **Assemble the sliders**: Slice each piece of steak into smaller strips, about 1 inch long. Divide the cheese slices in half, so you have two pieces per slider. Place one piece of cheese on the bottom bun, followed by a few strips of beef, and finally a spoonful of sautéed onions.
    5. **Add the top**: Top each slider with another piece of cheese, then place the top bun on.
    6. **Repeat and serve**: Repeat the process for the remaining sliders and serve immediately.

    Pro Tips for Success

    * For an added layer of flavor, sauté some sliced mushrooms or bell peppers along with the onions to add to your sliders.
    * To keep the cheese melted and gooey, place a piece of aluminum foil over the top bun while you’re assembling the sliders. This will help trap the heat and keep everything warm and melty.
    * Don’t be afraid to get creative with your toppings! Try adding some crumbled bacon, diced jalapeños, or even a dollop of spicy mustard for an extra kick.

    Frequently Asked Questions

    Q: Can I use leftover steak for these sliders?
    A: Absolutely! In fact, using leftover steak can be a great way to repurpose it and avoid food waste. Just make sure the steak is still relatively warm or at room temperature before assembling the sliders.

    Q: What’s the best way to store leftovers?
    A: For the most part, you’ll want to store the assembled sliders in an airtight container in the refrigerator for up to 24 hours. If you’ve stored the cooked steak separately, it should keep for 3-5 days in the fridge or up to 2 months in the freezer.

    Q: Can I make these sliders ahead of time?
    A: While it’s technically possible to assemble and store the sliders ahead of time, they’re best served fresh. The cheese will start to melt and become soggy if left for too long, so it’s best to assemble them just before serving.


    📢 Join Our Foodie Community!

    Love these recipes? Follow us for more daily inspiration and kitchen hacks:

    💡 Pro Tips for Perfect Air Frying

    • Space is Key: Don’t overcrowd the basket for max crispiness. 🌬️
    • Preheat: A preheated air fryer gives better results. 🔥
    • Shake: Flip halfway for even browning. 🔄

    💡 Master Your Air Fryer: Pro Tips

    • Airflow: Don’t crowd the basket. 🌬️
    • Preheat: 3-5 mins for best results. 🔥
    • Shake: Flip halfway for even browning. 🔄

    Why You Should Use an Air Fryer for This Recipe

    Using an air fryer is a game-changer for this recipe. Unlike traditional frying, it uses up to 95% less oil, making your meal significantly healthier without sacrificing that delicious crunch. Plus, it is faster than a conventional oven and doesn’t heat up your entire kitchen.

    Pro Tips for Perfection

    • Don’t Overcrowd: Always cook in a single layer to ensure the hot air circulates evenly.
    • Preheat: Taking 3 minutes to preheat your air fryer ensures the food starts cooking immediately for a crispier texture.
    • Shake It: Shake the basket halfway through cooking to ensure even browning on all sides.

    How to Store and Reheat

    If you have leftovers (which is rare!), store them in an airtight container in the refrigerator for up to 3 days. To reheat, simply pop them back in the air fryer at 350°F for 3-4 minutes until they are crispy again. Do not use a microwave, as it will make them soggy.

    🔥 Join Our Viral Foodie Community!

    Don’t miss out on the latest air fryer trends. Follow us now:

    📌 Follow on Pinterest
       
    🤖 Join Reddit

    📌 Pin This Recipe!

    Pin for Philly Cheesesteak Sliders (2026 Viral Recipe)

    Save to your Air Fryer board.
  • Oreo Cheesecake Cookies

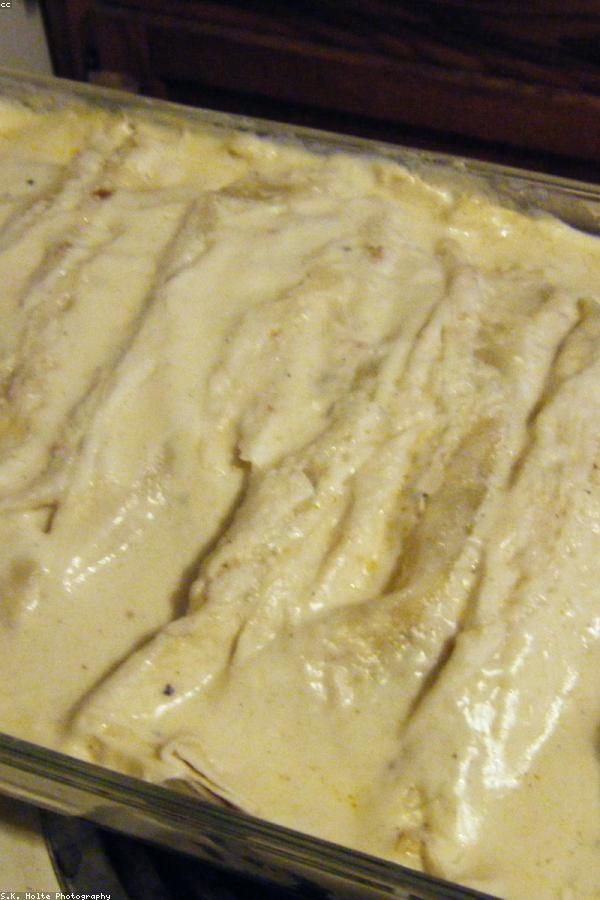
    Oreo Cheesecake Cookies

    Oreo Cheesecake Cookies (2026 Viral Recipe). This recipe has gone viral for a reason: it’s quick, easy, and incredibly delicious.

    Oreo Cheesecake Cookies (2026 Viral Recipe)

    Below you will find the step-by-step instructions to make this amazing dish at home.

    Introduction

    Get ready to indulge in a sweet treat that combines the best of both worlds: the classic Oreo cookie and the creamy, dreamy goodness of cheesecake. Say hello to our Oreo Cheesecake Cookies recipe! These mouthwatering morsels are packed with crushed Oreos, melted butter, and a rich cheesecake filling, all wrapped up in a crumbly cookie package. Whether you’re a fan of classic cookies or love experimenting with new flavors, these babies will satisfy your cravings.

    Ingredients

    • 1 cup unsalted butter, softened
    • 3/4 cup granulated sugar
    • 1 teaspoon vanilla extract
    • 1 and 1/2 cups all-purpose flour
    • 1/2 cup crushed Oreos (about 20-25 cookies)
    • 8 ounces cream cheese, softened
    • 1/4 cup granulated sugar
    • 2 large eggs
    • 1 teaspoon vanilla extract
    • Sesame seeds or chopped nuts for garnish (optional)

    Step-by-Step Instructions

    To create these show-stopping cookies, follow our simple recipe:

    1. Preheat your oven to 375°F (190°C). Line a baking sheet with parchment paper or a silicone mat.

    2. In a medium bowl, whisk together the flour and crushed Oreos. Set aside.

    3. In a large bowl, cream together the butter and granulated sugar until light and fluffy, about 2-3 minutes.

    4. Beat in the vanilla extract.

    5. Gradually mix in the flour mixture until just combined, being careful not to overmix.

    6. Scoop tablespoon-sized balls of dough onto the prepared baking sheet, leaving about 2 inches of space between each cookie.

    7. Bake for 10-12 minutes or until lightly golden around the edges.

    8. Remove from the oven and let cool on the baking sheet for 5 minutes before transferring to a wire rack to cool completely.

    9. While the cookies are cooling, prepare the cheesecake filling. In a medium bowl, beat the cream cheese until smooth. Add the granulated sugar and vanilla extract; mix until combined.

    10. Beat in the eggs one at a time, making sure each is fully incorporated before adding the next.

    11. To assemble the cookies, spread a small dollop of the cheesecake filling onto the center of each cooled cookie. Top with an additional cookie to create a sandwich.

    12. If desired, garnish with sesame seeds or chopped nuts for added texture and visual appeal.

    Pro Tips for Success

    • Use high-quality Oreos for the best flavor.
    • Don’t overbake the cookies – they should be lightly golden and still slightly soft in the center.
    • To ensure the cheesecake filling doesn’t spread during assembly, chill it in the refrigerator for at least 30 minutes before using.
    • For an added crunch, sprinkle a pinch of crushed Oreos onto the top of each cookie sandwich before serving.

    Frequently Asked Questions

    Q: Can I use other flavors of cookies or add-ins to create different variations?

    A: Absolutely! Feel free to experiment with your favorite cookie flavors, such as peanut butter or mint. You can also add in nuts, candy pieces, or even bacon bits for added texture and flavor.

    Q: How do I store these cookies once they’re assembled?

    A: Store the cookies in an airtight container at room temperature for up to 3 days. If you want to keep them fresh for longer, consider freezing the cheesecake filling and assembling the cookies just before serving.

    Q: Can I make these cookies ahead of time?

    A: Yes! You can bake the cookie bases up to 2 days in advance and store them in an airtight container. Assemble the sandwiches just before serving to ensure the best texture and flavor.

    There you have it – our Oreo Cheesecake Cookies recipe is sure to become a new favorite! With their unique blend of textures and flavors, these cookies are perfect for snacking, gift-giving, or simply satisfying your sweet tooth. So go ahead, indulge in the joy of Oreo cheesecakes in cookie form – you won’t regret it!


    📢 Join Our Foodie Community!

    Love these recipes? Follow us for more daily inspiration and kitchen hacks:

    💡 Pro Tips for Perfect Air Frying

    • Space is Key: Don’t overcrowd the basket for max crispiness. 🌬️
    • Preheat: A preheated air fryer gives better results. 🔥
    • Shake: Flip halfway for even browning. 🔄

    💡 Master Your Air Fryer: Pro Tips

    • Airflow: Don’t crowd the basket. 🌬️
    • Preheat: 3-5 mins for best results. 🔥
    • Shake: Flip halfway for even browning. 🔄

    Why You Should Use an Air Fryer for This Recipe

    Using an air fryer is a game-changer for this recipe. Unlike traditional frying, it uses up to 95% less oil, making your meal significantly healthier without sacrificing that delicious crunch. Plus, it is faster than a conventional oven and doesn’t heat up your entire kitchen.

    Pro Tips for Perfection

    • Don’t Overcrowd: Always cook in a single layer to ensure the hot air circulates evenly.
    • Preheat: Taking 3 minutes to preheat your air fryer ensures the food starts cooking immediately for a crispier texture.
    • Shake It: Shake the basket halfway through cooking to ensure even browning on all sides.

    How to Store and Reheat

    If you have leftovers (which is rare!), store them in an airtight container in the refrigerator for up to 3 days. To reheat, simply pop them back in the air fryer at 350°F for 3-4 minutes until they are crispy again. Do not use a microwave, as it will make them soggy.

    🔥 Join Our Viral Foodie Community!

    Don’t miss out on the latest air fryer trends. Follow us now:

    📌 Follow on Pinterest
       
    🤖 Join Reddit

    📌 Pin This Recipe!

    Pin for Oreo Cheesecake Cookies (2026 Viral Recipe)

    Save to your Air Fryer board.
  • Hawaiian Poke Bowl

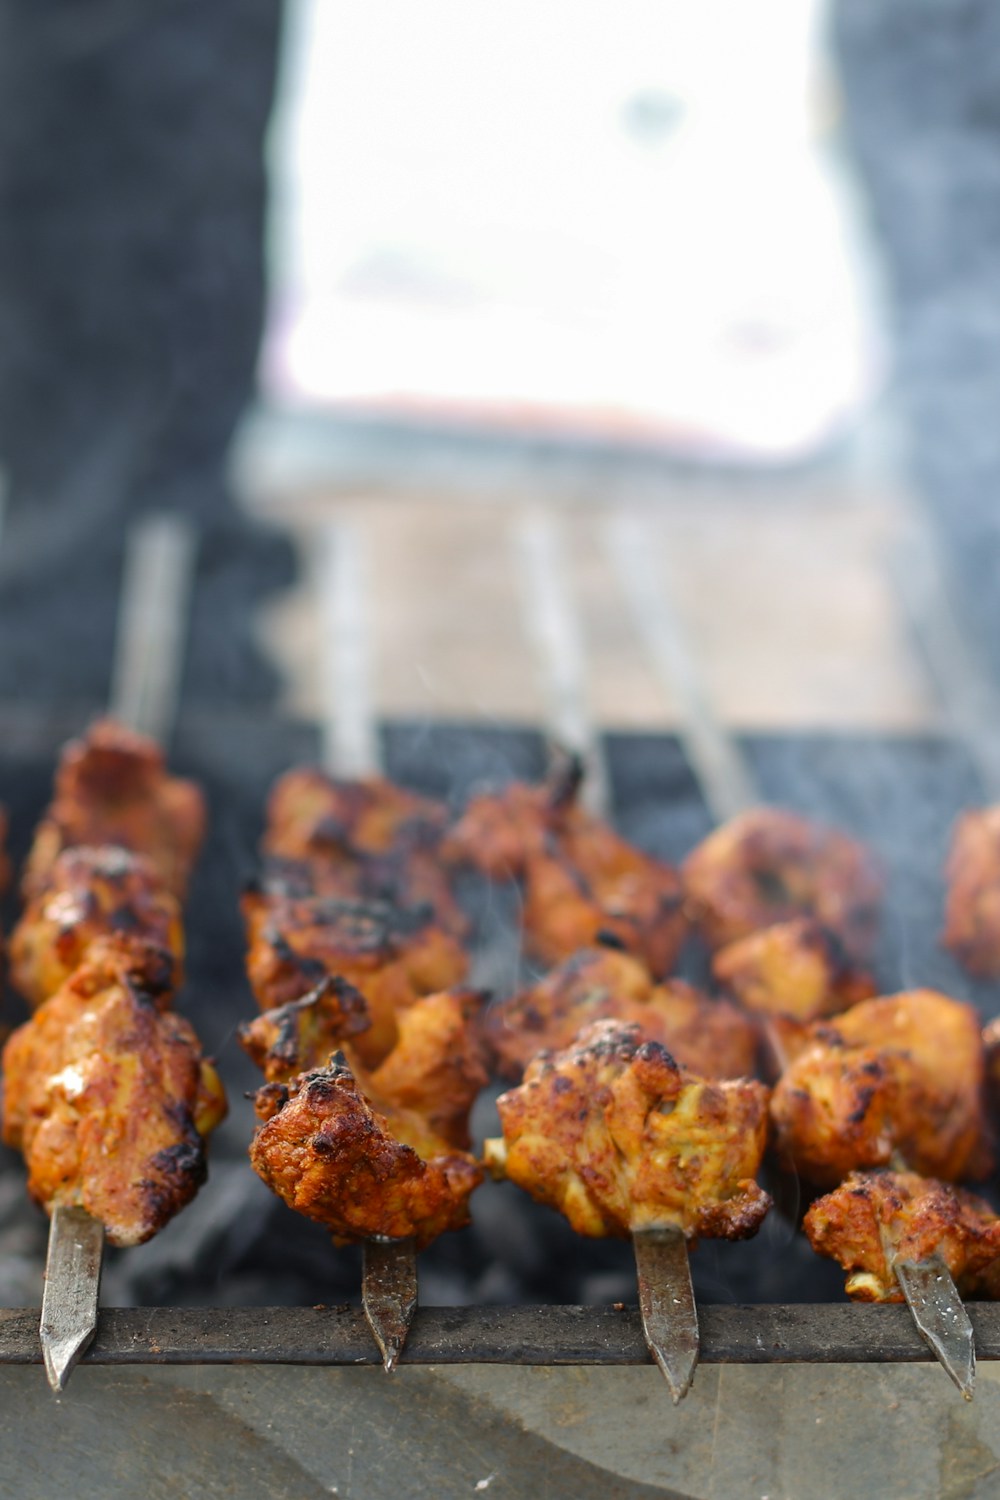
    Hawaiian Poke Bowl

    Hawaiian Poke Bowl (2026 Viral Recipe). This recipe has gone viral for a reason: it’s quick, easy, and incredibly delicious.

    Hawaiian Poke Bowl (2026 Viral Recipe)

    Below you will find the step-by-step instructions to make this amazing dish at home.

    Introduction

    Get ready to take a culinary journey to the islands with our mouth-watering Hawaiian Poke Bowl recipe! Poke, which translates to “to slice or cut” in Hawaiian, is a traditional dish that originated in ancient Hawaii. This refreshing and flavorful bowl is made with raw fish, mixed with various seasonings and toppings, served over a bed of sushi rice. It’s a popular snack among locals and visitors alike. In this article, we’ll guide you through the simple steps to create an authentic Hawaiian Poke Bowl that will transport your taste buds to the tropical paradise.

    Ingredients

    • 1 pound sashimi-grade tuna (or other fish of your choice), cut into small cubes
    • 1/2 cup sushi rice
    • 1/4 cup soy sauce
    • 2 tablespoons sesame oil
    • 2 cloves garlic, minced
    • 1 tablespoon grated ginger
    • Salt and pepper to taste
    • Optional toppings: diced green onions, toasted sesame seeds, pickled ginger, seaweed salad, or your favorite garnishes

    Step-by-Step Instructions

    1. **Prepare the sushi rice**: Rinse the rice thoroughly and cook according to package instructions using a 1:1 ratio of water to rice. Once cooked, allow it to cool completely.

    2. **Marinate the fish**: In a large bowl, whisk together soy sauce, sesame oil, garlic, ginger, salt, and pepper. Add the cubed tuna and marinate for at least 30 minutes in the refrigerator. Stir occasionally to ensure even coating.

    3. **Assemble the poke bowl**: Divide the cooled sushi rice into bowls or containers. Arrange the marinated fish cubes on top of the rice.

    4. **Add your favorite toppings**: Customize your Poke Bowl with your desired garnishes, such as diced green onions, toasted sesame seeds, pickled ginger, or seaweed salad.

    5. **Garnish and serve**: Serve immediately, garnished with any remaining toppings, if desired.

    Pro Tips for Success

    * For the best flavor, use sashimi-grade fish that is fresh and of high quality.
    * Adjust the marinating time to your liking, but be sure not to over-marinate the fish (max 1 hour).
    * Don’t overcrowd the bowl with toppings – allow each component to shine!
    * Experiment with different types of fish, such as salmon or ahi tuna, for unique flavor profiles.

    Frequently Asked Questions

    Q: Can I use cooked fish instead of raw?
    A: While it’s possible to use cooked fish, traditional Poke Bowl is made with raw fish. If you’re concerned about food safety, consider using a pasteurized or cooked fish alternative.

    Q: What types of fish can I use?
    A: Sashimi-grade tuna is the classic choice for Poke Bowl, but you can experiment with other fish like salmon, ahi tuna, or even octopus (for a more adventurous twist).

    Q: Can I make this ahead of time?
    A: While it’s possible to prepare individual components ahead of time, it’s best to assemble the Poke Bowl just before serving. This ensures the freshness and quality of the ingredients.

    Get ready to indulge in the tropical flavors of Hawaii with our mouth-watering Poke Bowl recipe! With these simple steps and expert tips, you’ll be well on your way to creating an authentic Hawaiian culinary experience that will transport your taste buds to the islands.


    📢 Join Our Foodie Community!

    Love these recipes? Follow us for more daily inspiration and kitchen hacks:

    💡 Pro Tips for Perfect Air Frying

    • Space is Key: Don’t overcrowd the basket for max crispiness. 🌬️
    • Preheat: A preheated air fryer gives better results. 🔥
    • Shake: Flip halfway for even browning. 🔄

    💡 Master Your Air Fryer: Pro Tips

    • Airflow: Don’t crowd the basket. 🌬️
    • Preheat: 3-5 mins for best results. 🔥
    • Shake: Flip halfway for even browning. 🔄

    Why You Should Use an Air Fryer for This Recipe

    Using an air fryer is a game-changer for this recipe. Unlike traditional frying, it uses up to 95% less oil, making your meal significantly healthier without sacrificing that delicious crunch. Plus, it is faster than a conventional oven and doesn’t heat up your entire kitchen.

    Pro Tips for Perfection

    • Don’t Overcrowd: Always cook in a single layer to ensure the hot air circulates evenly.
    • Preheat: Taking 3 minutes to preheat your air fryer ensures the food starts cooking immediately for a crispier texture.
    • Shake It: Shake the basket halfway through cooking to ensure even browning on all sides.

    How to Store and Reheat

    If you have leftovers (which is rare!), store them in an airtight container in the refrigerator for up to 3 days. To reheat, simply pop them back in the air fryer at 350°F for 3-4 minutes until they are crispy again. Do not use a microwave, as it will make them soggy.

    🔥 Join Our Viral Foodie Community!

    Don’t miss out on the latest air fryer trends. Follow us now:

    📌 Follow on Pinterest
       
    🤖 Join Reddit

    📌 Pin This Recipe!

    Pin for Hawaiian Poke Bowl (2026 Viral Recipe)

    Save to your Air Fryer board.
  • Avocado Toast with Poached Egg

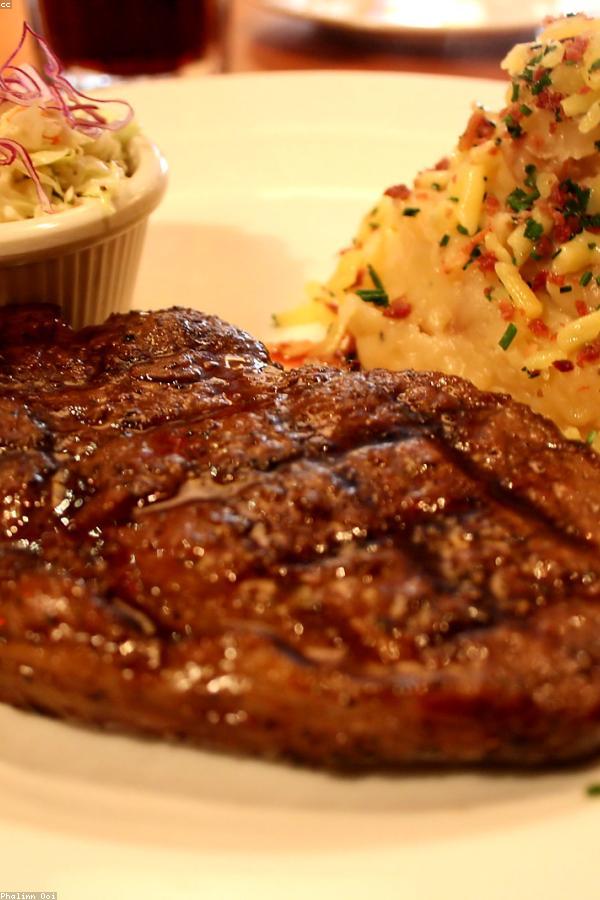
    Avocado Toast with Poached Egg

    Avocado Toast with Poached Egg (2026 Viral Recipe). This recipe has gone viral for a reason: it’s quick, easy, and incredibly delicious.

    Avocado Toast with Poached Egg (2026 Viral Recipe)

    Below you will find the step-by-step instructions to make this amazing dish at home.

    Introduction

    Get ready to start your day off right with a deliciously simple yet satisfying breakfast dish: Avocado Toast with Poached Egg. This creamy, savory, and utterly Instagrammable recipe has taken the internet by storm for good reason – it’s an incredibly flavorful and filling meal that’s perfect for busy mornings or lazy Sundays.

    In this article, we’ll dive into the world of avocado toast and take it to the next level by adding a runny poached egg on top. This classic combination is sure to become your new go-to breakfast or brunch option. So grab your favorite bread, ripe avocados, and eggs – let’s get started!

    Ingredients

    • 4 slices of whole grain bread (such as sourdough or baguette)
    • 3 ripe avocados, mashed
    • 2 tablespoons of olive oil
    • Salt and pepper to taste
    • 1/4 teaspoon of red pepper flakes (optional, for some heat)
    • 4 large eggs
    • Kosher salt, for poaching the eggs
    • Water, for poaching the eggs

    Step-by-Step Instructions

    1. Start by toasting your bread until it’s lightly browned and crispy. You can use a toaster or simply place the slices under the broiler for a few minutes.

    2. In a medium bowl, mash those avocados until they’re smooth and creamy. Yes, you can definitely use a fork to help break them down!

    3. Add the olive oil, salt, pepper, and red pepper flakes (if using) to the mashed avocado. Mix well until combined.

    4. Spread about 1/2 tablespoon of the avocado mixture onto each toasted bread slice. You can be generous with this layer – it’s up to you how much you want on your toast!

    5. Crack an egg into a small bowl or ramekin. Repeat for the remaining three eggs.

    6. Bring a large pot of water to a boil, then reduce the heat to a simmer. Gently place each egg into the water and let them cook for 3-4 minutes, or until the whites are set and the yolks are still runny.

    7. Remove the poached eggs from the water with a slotted spoon and drain off any excess water. Place one egg on top of each toasted bread slice.

    8. Sprinkle a pinch of kosher salt over the egg to bring out its natural flavor.

    9. Serve your Avocado Toast with Poached Egg immediately, garnished with some chopped fresh herbs (like parsley or chives) if desired.

    Pro Tips for Success

    • To ensure perfectly ripe avocados, look for ones that are slightly soft to the touch and have a slight give when you press on them. If they’re too hard, they won’t be as creamy in your toast!
    • For an extra-crispy crust on your bread, try grilling it under the broiler for about 30 seconds after toasting.
    • If you find that your eggs are taking a little longer to poach than expected, simply increase the cooking time by 30-second increments until they’re done. Just be sure not to overcook them!

    Frequently Asked Questions

    Q: Can I use other types of bread besides whole grain?
    A: Absolutely! Feel free to experiment with different breads, such as baguette, ciabatta, or even gluten-free options.

    Q: What if my avocado is not ripe enough? Should I still try using it?
    A: If your avocado is not yet ripe, it’s best to let it sit at room temperature for a few more days until it reaches the desired level of ripeness. This will ensure you get that creamy texture and flavor in your toast.

    Q: Can I make this recipe ahead of time or reheat it later?
    A: While it’s possible to prepare individual components ahead of time (like mashing the avocado or poaching the eggs), we recommend assembling the Avocado Toast with Poached Egg just before serving for optimal freshness and texture. However, you can toast the bread and store it in an airtight container overnight – simply add the egg and avocado in the morning!


    📢 Join Our Foodie Community!

    Love these recipes? Follow us for more daily inspiration and kitchen hacks:

    💡 Pro Tips for Perfect Air Frying

    • Space is Key: Don’t overcrowd the basket for max crispiness. 🌬️
    • Preheat: A preheated air fryer gives better results. 🔥
    • Shake: Flip halfway for even browning. 🔄

    💡 Master Your Air Fryer: Pro Tips

    • Airflow: Don’t crowd the basket. 🌬️
    • Preheat: 3-5 mins for best results. 🔥
    • Shake: Flip halfway for even browning. 🔄

    Why You Should Use an Air Fryer for This Recipe

    Using an air fryer is a game-changer for this recipe. Unlike traditional frying, it uses up to 95% less oil, making your meal significantly healthier without sacrificing that delicious crunch. Plus, it is faster than a conventional oven and doesn’t heat up your entire kitchen.

    Pro Tips for Perfection

    • Don’t Overcrowd: Always cook in a single layer to ensure the hot air circulates evenly.
    • Preheat: Taking 3 minutes to preheat your air fryer ensures the food starts cooking immediately for a crispier texture.
    • Shake It: Shake the basket halfway through cooking to ensure even browning on all sides.

    How to Store and Reheat

    If you have leftovers (which is rare!), store them in an airtight container in the refrigerator for up to 3 days. To reheat, simply pop them back in the air fryer at 350°F for 3-4 minutes until they are crispy again. Do not use a microwave, as it will make them soggy.

    🔥 Join Our Viral Foodie Community!

    Don’t miss out on the latest air fryer trends. Follow us now:

    📌 Follow on Pinterest
       
    🤖 Join Reddit

    📌 Pin This Recipe!

    Pin for Avocado Toast with Poached Egg (2026 Viral Recipe)

    Save to your Air Fryer board.

  • Mexican Street Corn (Elote)

    Mexican Street Corn (Elote)

    Mexican Street Corn (Elote) (2026 Viral Recipe). This recipe has gone viral for a reason: it’s quick, easy, and incredibly delicious.

    Mexican Street Corn (Elote) (2026 Viral Recipe)

    Below you will find the step-by-step instructions to make this amazing dish at home.

    Introduction

    The sweet, smoky flavor of Mexican Street Corn, also known as Elote, is a staple at outdoor gatherings and celebrations throughout Mexico. This iconic street food has gained popularity worldwide, and for good reason – it’s ridiculously easy to make, packed with flavor, and perfect for snacking on the go.

    In this article, we’ll dive into the world of Elote, exploring the simple yet flavorful recipe that’s captured hearts (and taste buds) across the globe. Whether you’re a seasoned foodie or just looking for a delicious snack to bring to your next backyard BBQ, this guide is here to help you master the art of Mexican Street Corn.

    Ingredients

    • 4 ears of corn, husked and silked
    • 1/4 cup mayonnaise
    • 1/4 cup Mexican crema (or substitute with sour cream)
    • 1 tablespoon lime juice
    • 1 teaspoon ground cumin
    • 1/2 teaspoon smoked paprika (optional, but highly recommended for that authentic flavor)
    • Salt and pepper to taste
    • Chopped cilantro or scallions for garnish (optional)
    • Fresh lime wedges for serving

    Step-by-Step Instructions

    1. Preheat your grill or grill pan to medium-high heat.
    2. Place the corn ears on the grill and cook for 10-12 minutes, rotating every 3-4 minutes, until they’re lightly charred and tender.
    3. Remove the corn from the grill and let it cool slightly.
    4. In a small bowl, whisk together the mayonnaise, crema, lime juice, cumin, smoked paprika (if using), salt, and pepper.
    5. Slather the mixture evenly onto each ear of corn, making sure to get it all the way down to the cob.
    6. Sprinkle with additional cilantro or scallions if desired.
    7. Serve the Elote warm, with a squeeze of fresh lime juice over the top.

    Pro Tips for Success

    * For an extra-authentic touch, grill the corn over an open flame or using a gas grill to get that perfect char.
    * If you can’t find Mexican crema, substitute it with sour cream and add a pinch of baking soda to help balance the flavor.
    * Don’t be afraid to experiment with different types of hot sauce or chili flakes for added heat.
    * For a make-ahead option, slather the mayonnaise mixture onto the corn and refrigerate for up to 2 hours before grilling.

    Frequently Asked Questions

    Q: Can I use frozen corn instead?
    A: While fresh corn is preferred, you can substitute with thawed frozen corn. Just be sure to pat it dry with a paper towel before grilling to prevent sticking.

    Q: Is Elote gluten-free?
    A: Absolutely! This recipe is naturally gluten-free, making it a great option for those with dietary restrictions.

    Q: Can I make this in advance and reheat it?
    A: Yes, but keep in mind that the mayonnaise mixture might start to separate if refrigerated too long. Best to grill just before serving or store leftover Elote in an airtight container at room temperature for up to 2 hours.

    There you have it – the ultimate recipe for Mexican Street Corn (Elote) that’s sure to impress your friends and family. With its rich, smoky flavor and satisfying crunch, this street food classic is perfect for any gathering, big or small. So go ahead, fire up the grill, and get ready to fiesta!


    📢 Join Our Foodie Community!

    Love these recipes? Follow us for more daily inspiration and kitchen hacks:

    💡 Pro Tips for Perfect Air Frying

    • Space is Key: Don’t overcrowd the basket for max crispiness. 🌬️
    • Preheat: A preheated air fryer gives better results. 🔥
    • Shake: Flip halfway for even browning. 🔄

    💡 Master Your Air Fryer: Pro Tips

    • Airflow: Don’t crowd the basket. 🌬️
    • Preheat: 3-5 mins for best results. 🔥
    • Shake: Flip halfway for even browning. 🔄

    Why You Should Use an Air Fryer for This Recipe

    Using an air fryer is a game-changer for this recipe. Unlike traditional frying, it uses up to 95% less oil, making your meal significantly healthier without sacrificing that delicious crunch. Plus, it is faster than a conventional oven and doesn’t heat up your entire kitchen.

    Pro Tips for Perfection

    • Don’t Overcrowd: Always cook in a single layer to ensure the hot air circulates evenly.
    • Preheat: Taking 3 minutes to preheat your air fryer ensures the food starts cooking immediately for a crispier texture.
    • Shake It: Shake the basket halfway through cooking to ensure even browning on all sides.

    How to Store and Reheat

    If you have leftovers (which is rare!), store them in an airtight container in the refrigerator for up to 3 days. To reheat, simply pop them back in the air fryer at 350°F for 3-4 minutes until they are crispy again. Do not use a microwave, as it will make them soggy.

    🔥 Join Our Viral Foodie Community!

    Don’t miss out on the latest air fryer trends. Follow us now:

    📌 Follow on Pinterest
       
    🤖 Join Reddit

    📌 Pin This Recipe!

    Pin for Mexican Street Corn (Elote) (2026 Viral Recipe)

    Save to your Air Fryer board.

  • Creamy Tuscan Chicken

    Creamy Tuscan Chicken

    Creamy Tuscan Chicken (2026 Viral Recipe). This recipe has gone viral for a reason: it’s quick, easy, and incredibly delicious.

    Creamy Tuscan Chicken (2026 Viral Recipe)

    Below you will find the step-by-step instructions to make this amazing dish at home.

    Introduction

    Get ready to transport your taste buds to the rolling hills of Tuscany with our Creamy Tuscan Chicken recipe! This mouthwatering dish is a masterclass in rich flavors and velvety textures, perfect for a cozy night in or a special occasion. By combining tender chicken breast, savory sun-dried tomatoes, and a decadent cream sauce, we’ve crafted a culinary experience that will leave you wanting more.

    Ingredients

    • 1 1/2 pounds boneless, skinless chicken breasts, cut into bite-sized pieces
    • 2 tablespoons olive oil
    • 1 onion, finely chopped
    • 3 cloves garlic, minced
    • 1 cup sun-dried tomatoes, packed in oil and drained
    • 1/4 cup white wine (optional)
    • 2 cups chicken broth
    • 1 cup heavy cream
    • 2 tablespoons butter
    • 2 teaspoons dried basil
    • 1 teaspoon dried oregano
    • Salt and pepper, to taste
    • Fresh parsley, chopped (optional)

    Step-by-Step Instructions

    1. Preheat your oven to 375°F (190°C). In a large skillet, heat the olive oil over medium-high heat. Add the chicken and cook until browned on both sides and cooked through, about 5-6 minutes per side. Transfer the chicken to a plate and set aside.

    2. In the same skillet, add the chopped onion and cook until translucent, about 3-4 minutes. Add the minced garlic and cook for an additional minute, stirring constantly to prevent burning.

    3. Stir in the sun-dried tomatoes, white wine (if using), chicken broth, heavy cream, butter, dried basil, and dried oregano. Bring the mixture to a simmer and let it cook for about 5 minutes or until the sauce has thickened slightly.

    4. Add the cooked chicken back into the skillet and toss to coat with the creamy Tuscan sauce. Season with salt and pepper to taste.

    5. Transfer the chicken and sauce to a baking dish and bake in the preheated oven for about 15-20 minutes, or until the sauce has thickened further and the flavors have melded together.

    6. Remove from the oven and garnish with chopped fresh parsley (if desired). Serve hot over cooked pasta, rice, or enjoy as is – your choice!

    Pro Tips for Success

    * To ensure tender and juicy chicken, make sure to not overcrowd the skillet when cooking the chicken.
    * If using white wine, don’t worry if you can’t find a specific Italian varietal. Any dry white wine will do!
    * Don’t be afraid to adjust the amount of sun-dried tomatoes or cream sauce to your taste preferences.
    * To make ahead and refrigerate, cook the chicken and sauce separately, then assemble and bake just before serving.

    Frequently Asked Questions

    Q: Can I substitute heavy cream with half-and-half or Greek yogurt?
    A: Yes! While heavy cream provides a rich texture, you can substitute it with half-and-half or Greek yogurt for a lighter version. Keep in mind that the sauce may not be as thick and creamy.

    Q: What type of pasta pairs well with Creamy Tuscan Chicken?
    A: Classic choices include pappardelle, fettuccine, or penne. You can also try pairing it with roasted vegetables or garlic bread for a hearty meal.

    Q: Can I make this recipe in a slow cooker?
    A: Absolutely! Brown the chicken and cook the sauce separately, then combine everything in the slow cooker and cook on low for 3-4 hours.


    📢 Join Our Foodie Community!

    Love these recipes? Follow us for more daily inspiration and kitchen hacks:

    💡 Pro Tips for Perfect Air Frying

    • Space is Key: Don’t overcrowd the basket for max crispiness. 🌬️
    • Preheat: A preheated air fryer gives better results. 🔥
    • Shake: Flip halfway for even browning. 🔄

    💡 Master Your Air Fryer: Pro Tips

    • Airflow: Don’t crowd the basket. 🌬️
    • Preheat: 3-5 mins for best results. 🔥
    • Shake: Flip halfway for even browning. 🔄

    Why You Should Use an Air Fryer for This Recipe

    Using an air fryer is a game-changer for this recipe. Unlike traditional frying, it uses up to 95% less oil, making your meal significantly healthier without sacrificing that delicious crunch. Plus, it is faster than a conventional oven and doesn’t heat up your entire kitchen.

    Pro Tips for Perfection

    • Don’t Overcrowd: Always cook in a single layer to ensure the hot air circulates evenly.
    • Preheat: Taking 3 minutes to preheat your air fryer ensures the food starts cooking immediately for a crispier texture.
    • Shake It: Shake the basket halfway through cooking to ensure even browning on all sides.

    How to Store and Reheat

    If you have leftovers (which is rare!), store them in an airtight container in the refrigerator for up to 3 days. To reheat, simply pop them back in the air fryer at 350°F for 3-4 minutes until they are crispy again. Do not use a microwave, as it will make them soggy.

    🔥 Join Our Viral Foodie Community!

    Don’t miss out on the latest air fryer trends. Follow us now:

    📌 Follow on Pinterest
       
    🤖 Join Reddit

    📌 Pin This Recipe!

    Pin for Creamy Tuscan Chicken (2026 Viral Recipe)

    Save to your Air Fryer board.

  • Garlic Butter Steak Bites

    Garlic Butter Steak Bites

    Garlic Butter Steak Bites (2026 Viral Recipe). This recipe has gone viral for a reason: it’s quick, easy, and incredibly delicious.

    Garlic Butter Steak Bites (2026 Viral Recipe)

    Below you will find the step-by-step instructions to make this amazing dish at home.

    Introduction

    Get ready to tantalize your taste buds with a mouthwatering dish that’s sure to become a family favorite: Garlic Butter Steak Bites! These tender, juicy bites of heaven are packed with flavor and can be prepared in no time. Whether you’re a busy professional or a parent looking for a quick and easy meal solution, this recipe is perfect for you.

    Ingredients

    • 1 pound steak (such as flank steak or ribeye), cut into 1-inch cubes
    • 2 cloves garlic, minced
    • 2 tablespoons butter, softened
    • 1 tablespoon olive oil
    • 1 teaspoon salt
    • 1/4 teaspoon black pepper
    • Optional: 1/4 cup chopped fresh parsley for garnish

    Step-by-Step Instructions

    1. Preheat your oven to 400°F (200°C). Line a baking sheet with parchment paper or aluminum foil for easy cleanup.
    2. In a small bowl, mix together the minced garlic and softened butter until well combined.
    3. Place the steak cubes on the prepared baking sheet in a single layer, leaving a little space between each bite.
    4. Drizzle the olive oil over the steak, making sure each piece is coated.
    5. Sprinkle the salt and black pepper evenly over the steak, making sure not to overlap the pieces.
    6. Take small dollops of the garlic butter mixture (about 1/2 teaspoon per steak cube) and place them on top of each piece of steak.
    7. Use your fingers or a spatula to gently spread the garlic butter evenly across each piece of steak, making sure they’re all coated with that delicious flavor.
    8. Place the baking sheet in the oven and bake for 12-15 minutes, or until the steak reaches your desired level of doneness (rare, medium rare, or well done).
    9. Remove the baking sheet from the oven and let it cool slightly before serving.

    Pro Tips for Success

    * For a more caramelized crust on your garlic butter, try broiling the steak bites for an additional 1-2 minutes after baking. Keep an eye on them to avoid overcooking.
    * If you’re short on time, prepare the garlic butter mixture ahead of time and store it in the refrigerator for up to 24 hours.
    * To make this recipe more substantial, serve the Garlic Butter Steak Bites with your favorite sides, such as mashed potatoes, roasted vegetables, or a fresh green salad.

    Frequently Asked Questions

    Q: Can I use other types of steak besides flank steak or ribeye?
    A: Yes! Feel free to experiment with different cuts of steak, like sirloin, strip loin, or even ground beef. Just adjust the cooking time and method as needed.
    Q: How do I store leftovers?
    A: Store leftover Garlic Butter Steak Bites in an airtight container in the refrigerator for up to 3 days. Reheat them in the oven or on the stovetop with a little oil until warmed through.
    Q: Can I make this recipe ahead of time and freeze it?
    A: Yes! Prepare the garlic butter mixture and store it in an airtight container in the freezer for up to 2 months. Simply thaw and bake when you’re ready.

    Get ready to indulge in the rich, savory flavors of Garlic Butter Steak Bites. With this simple recipe, you’ll be on your way to creating a dish that’s sure to please even the pickiest eaters. So go ahead, get creative, and make it your own!


    📢 Join Our Foodie Community!

    Love these recipes? Follow us for more daily inspiration and kitchen hacks:

    💡 Pro Tips for Perfect Air Frying

    • Space is Key: Don’t overcrowd the basket for max crispiness. 🌬️
    • Preheat: A preheated air fryer gives better results. 🔥
    • Shake: Flip halfway for even browning. 🔄

    💡 Master Your Air Fryer: Pro Tips

    • Airflow: Don’t crowd the basket. 🌬️
    • Preheat: 3-5 mins for best results. 🔥
    • Shake: Flip halfway for even browning. 🔄

    Why You Should Use an Air Fryer for This Recipe

    Using an air fryer is a game-changer for this recipe. Unlike traditional frying, it uses up to 95% less oil, making your meal significantly healthier without sacrificing that delicious crunch. Plus, it is faster than a conventional oven and doesn’t heat up your entire kitchen.

    Pro Tips for Perfection

    • Don’t Overcrowd: Always cook in a single layer to ensure the hot air circulates evenly.
    • Preheat: Taking 3 minutes to preheat your air fryer ensures the food starts cooking immediately for a crispier texture.
    • Shake It: Shake the basket halfway through cooking to ensure even browning on all sides.

    How to Store and Reheat

    If you have leftovers (which is rare!), store them in an airtight container in the refrigerator for up to 3 days. To reheat, simply pop them back in the air fryer at 350°F for 3-4 minutes until they are crispy again. Do not use a microwave, as it will make them soggy.

    🔥 Join Our Viral Foodie Community!

    Don’t miss out on the latest air fryer trends. Follow us now:

    📌 Follow on Pinterest
       
    🤖 Join Reddit

    📌 Pin This Recipe!

    Pin for Garlic Butter Steak Bites (2026 Viral Recipe)

    Save to your Air Fryer board.