Category: Air Fryer Recipes

  • Perfect Roasted Brussels Sprouts (Air Fryer)

    Perfect Roasted Brussels Sprouts (Air Fryer)

    Perfect Roasted Brussels Sprouts (Air Fryer) (2026 Viral Recipe). This recipe has gone viral for a reason: it’s quick, easy, and incredibly delicious.
    Perfect Roasted Brussels Sprouts (Air Fryer) (2026 Viral Recipe)

    Below you will find the step-by-step instructions to make this amazing dish at home.

    Introduction

    The humble Brussels sprout. Once a staple of holiday meals, now a polarizing ingredient that sparks strong opinions. Love them or hate them, there’s no denying the nutritional benefits and versatility of this cruciferous superstar. And what better way to bring out their natural sweetness and depth than by roasting them to perfection in an air fryer?

    In this article, we’ll delve into the world of perfectly roasted Brussels sprouts, courtesy of your trusty air fryer. Whether you’re a seasoned veggie enthusiast or just looking for a game-changing side dish, you’ve come to the right place. So grab your favorite bottle of hot sauce (just kidding, or am I?), and let’s get started!

    Ingredients

    • 1 pound Brussels sprouts, trimmed and halved
    • 2 tablespoons olive oil
    • 1 tablespoon apple cider vinegar
    • 1 teaspoon Dijon mustard
    • 1/4 teaspoon salt
    • 1/4 teaspoon black pepper
    • 1/4 teaspoon red pepper flakes (optional, for some heat)
    • 2 cloves garlic, minced (optional)
    • 1/4 cup chopped fresh parsley or thyme (optional, for garnish)

    Step-by-Step Instructions

    To achieve the perfect roasted Brussels sprouts in your air fryer, follow these simple steps:

    1. Preheat your air fryer to 400°F (200°C).
    2. In a large bowl, toss together the Brussels sprouts, olive oil, apple cider vinegar, Dijon mustard, salt, black pepper, and red pepper flakes (if using). Make sure they’re evenly coated with the marinade.
    3. If you’re feeling fancy, add the minced garlic to the mix and give it a good stir.
    4. Load the Brussels sprouts into your air fryer basket in a single layer, leaving some space between each sprout for even cooking.
    5. Cook the Brussels sprouts at 400°F (200°C) for 12-15 minutes, shaking the basket halfway through. You may need to adjust the cooking time based on your specific air fryer model and personal preference.
    6. Remove the roasted Brussels sprouts from the air fryer and sprinkle with chopped parsley or thyme (if using). Serve hot and enjoy!

    Pro Tips for Success

    • Toss those Brussels sprouts! Make sure they’re evenly coated with the marinade to ensure maximum flavor penetration.

    • Don’t overcrowd! Load the air fryer basket in a single layer, leaving some space between each sprout for even cooking. This will help prevent steam from building up and resulting in soggy sprouts.

    • Shake it like you mean it! Halfway through the cooking time, give that Brussels sprout basket a good shake to redistribute the sprouts and ensure they’re cooked evenly.

    • Experiment with flavors! Try adding different seasonings or spices to your marinade to create unique flavor profiles. We love a good drizzle of balsamic glaze or a sprinkle of smoked paprika on our roasted Brussels sprouts!

    Frequently Asked Questions

    • Can I use frozen Brussels sprouts for this recipe?

      A: Yes! Frozen Brussels sprouts can be used as a substitute, but keep in mind they might not have the same texture or flavor as fresh ones. Simply thaw and pat dry before roasting.

    • How do I adjust the cooking time for larger or smaller batches?

      A: As a general rule, add or subtract 2-3 minutes of cooking time based on the size of your batch. Keep an eye on them to ensure they’re cooked through and caramelized to your liking!

    • Can I make this recipe in advance?

      A: Yes! Roasted Brussels sprouts can be prepared up to a day in advance, but it’s best to keep them at room temperature until serving. You can also refrigerate or freeze for later use.

    There you have it – the perfect roasted Brussels sprouts recipe for your air fryer! With these simple steps and pro tips, you’ll be well on your way to creating a delicious side dish that’s sure to impress even the most skeptical of eaters. So go ahead, get roasting, and make those Brussels sprouts shine!


    📢 Join Our Foodie Community!

    Love these recipes? Follow us for more daily inspiration and kitchen hacks:

    💡 Pro Tips for Perfect Air Frying

    • Space is Key: Don’t overcrowd the basket for max crispiness. 🌬️
    • Preheat: A preheated air fryer gives better results. 🔥
    • Shake: Flip halfway for even browning. 🔄

    💡 Master Your Air Fryer: Pro Tips

    • Airflow: Don’t crowd the basket. 🌬️
    • Preheat: 3-5 mins for best results. 🔥
    • Shake: Flip halfway for even browning. 🔄

    Why You Should Use an Air Fryer for This Recipe

    Using an air fryer is a game-changer for this recipe. Unlike traditional frying, it uses up to 95% less oil, making your meal significantly healthier without sacrificing that delicious crunch. Plus, it is faster than a conventional oven and doesn’t heat up your entire kitchen.

    Pro Tips for Perfection

    • Don’t Overcrowd: Always cook in a single layer to ensure the hot air circulates evenly.
    • Preheat: Taking 3 minutes to preheat your air fryer ensures the food starts cooking immediately for a crispier texture.
    • Shake It: Shake the basket halfway through cooking to ensure even browning on all sides.

    How to Store and Reheat

    If you have leftovers (which is rare!), store them in an airtight container in the refrigerator for up to 3 days. To reheat, simply pop them back in the air fryer at 350°F for 3-4 minutes until they are crispy again. Do not use a microwave, as it will make them soggy.

    🔥 Join Our Viral Foodie Community!

    Don’t miss out on the latest air fryer trends. Follow us now:

    📌 Follow on Pinterest
       
    🤖 Join Reddit

    📌 Pin This Recipe!

    Pin for Perfect Roasted Brussels Sprouts (Air Fryer) (2026 Viral Recipe)

    Save to your Air Fryer board.
  • 10-Minute Air Fryer Salmon Bites (Air Fryer)

    10-Minute Air Fryer Salmon Bites (Air Fryer)

    10-Minute Air Fryer Salmon Bites (Air Fryer) (2026 Viral Recipe). This recipe has gone viral for a reason: it’s quick, easy, and incredibly delicious.

    10-Minute Air Fryer Salmon Bites (Air Fryer) (2026 Viral Recipe)

    Below you will find the step-by-step instructions to make this amazing dish at home.

    Introduction

    Are you tired of sacrificing flavor for convenience in your air fryer recipes? Look no further! Today, we’re going to take your air frying game to the next level with our mouthwatering 10-Minute Air Fryer Salmon Bites recipe. These crispy, succulent bites are a game-changer for busy home cooks and foodies alike. With just a few simple ingredients and minimal prep time, you’ll be indulging in a culinary masterpiece that’s sure to impress your family and friends.

    In this article, we’ll dive into the world of air frying and explore the magic behind our 10-Minute Air Fryer Salmon Bites recipe. From prep work to cooking techniques, we’ll cover it all to ensure you achieve the perfect results every time.

    Ingredients

    • 1 pound salmon fillet, cut into 1-inch cubes
    • 1/4 cup panko breadcrumbs
    • 2 tablespoons olive oil
    • 1 tablespoon lemon juice
    • 1 clove garlic, minced
    • Salt and pepper to taste
    • Optional: paprika, dill, or other seasonings of your choice

    Step-by-Step Instructions

    1. Preheat the air fryer to 400°F (200°C).
    2. In a shallow dish, mix together panko breadcrumbs and minced garlic.
    3. In a separate bowl, whisk together olive oil, lemon juice, salt, and pepper.
    4. Add the salmon cubes to the bowl with the marinade and toss until they’re evenly coated.
    5. Roll each salmon cube in the breadcrumb mixture, pressing gently to adhere.
    6. Place the breaded salmon bites in a single layer in the air fryer basket. You may need to cook them in batches depending on the size of your air fryer.
    7. Cook the salmon bites for 5 minutes at 400°F (200°C).
    8. Increase the temperature to 420°F (220°C) and continue cooking for an additional 2-3 minutes, or until the bites are golden brown and crispy.
    9. Remove the cooked salmon bites from the air fryer and serve immediately.

    Pro Tips for Success

    • Make sure to pat dry any excess moisture from the salmon cubes before breading for better adherence.

    • To achieve the perfect level of crispiness, it’s crucial not to overcrowd the air fryer basket. Cook in batches if necessary.

    • Don’t be afraid to experiment with different seasonings or herbs to give your salmon bites a unique flavor profile!

    Frequently Asked Questions

    If you have any questions about this recipe, here are some answers to get you started:

    • Q: Can I use other types of fish or seafood in place of salmon?

      A: Yes! You can substitute salmon with cod, tilapia, shrimp, or scallops. Just adjust the cooking time and temperature as needed.

    • Q: How do I store leftover air fryer salmon bites?

      A: Store them in an airtight container in the refrigerator for up to 3 days. Reheat before serving by placing them in the air fryer at 300°F (150°C) for about 2 minutes.

    With these easy-to-follow instructions and expert tips, you’re just moments away from creating an unforgettable dining experience with your friends and family. So go ahead, fire up that air fryer, and get ready to indulge in the most mouthwatering Salmon Bites of your life!


    📢 Join Our Foodie Community!

    Love these recipes? Follow us for more daily inspiration and kitchen hacks:

    💡 Pro Tips for Perfect Air Frying

    • Space is Key: Don’t overcrowd the basket for max crispiness. 🌬️
    • Preheat: A preheated air fryer gives better results. 🔥
    • Shake: Flip halfway for even browning. 🔄

    💡 Master Your Air Fryer: Pro Tips

    • Airflow: Don’t crowd the basket. 🌬️
    • Preheat: 3-5 mins for best results. 🔥
    • Shake: Flip halfway for even browning. 🔄

    Why You Should Use an Air Fryer for This Recipe

    Using an air fryer is a game-changer for this recipe. Unlike traditional frying, it uses up to 95% less oil, making your meal significantly healthier without sacrificing that delicious crunch. Plus, it is faster than a conventional oven and doesn’t heat up your entire kitchen.

    Pro Tips for Perfection

    • Don’t Overcrowd: Always cook in a single layer to ensure the hot air circulates evenly.
    • Preheat: Taking 3 minutes to preheat your air fryer ensures the food starts cooking immediately for a crispier texture.
    • Shake It: Shake the basket halfway through cooking to ensure even browning on all sides.

    How to Store and Reheat

    If you have leftovers (which is rare!), store them in an airtight container in the refrigerator for up to 3 days. To reheat, simply pop them back in the air fryer at 350°F for 3-4 minutes until they are crispy again. Do not use a microwave, as it will make them soggy.

    🔥 Join Our Viral Foodie Community!

    Don’t miss out on the latest air fryer trends. Follow us now:

    📌 Follow on Pinterest
       
    🤖 Join Reddit

    📌 Pin This Recipe for Later!

    Pin for 10-Minute Air Fryer Salmon Bites (Air Fryer) (2026 Viral Recipe)

    Save this image to your favorite Air Fryer board on Pinterest.

    📌 Pin This Recipe for Later!

    Pin for 10-Minute Air Fryer Salmon Bites (Air Fryer) (2026 Viral Recipe)

    Save this image to your favorite Air Fryer board on Pinterest.

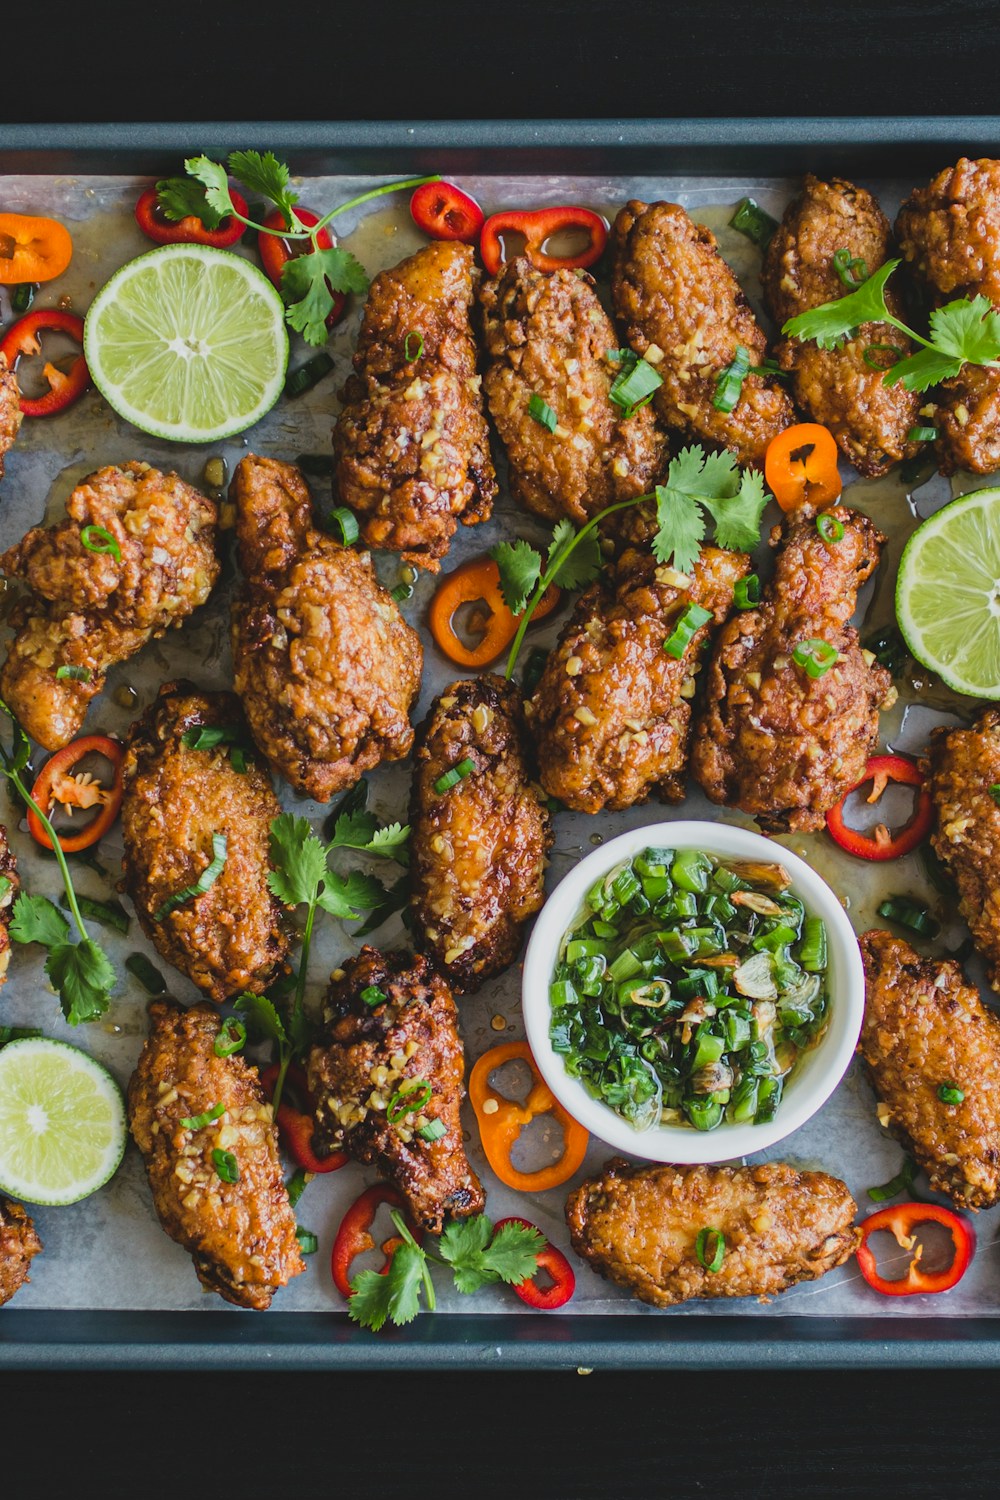
  • Crispy Garlic Parmesan Wings (Air Fryer)

    Crispy Garlic Parmesan Wings (Air Fryer)

    Crispy Garlic Parmesan Wings (Air Fryer) (2026 Viral Recipe). This recipe has gone viral for a reason: it’s quick, easy, and incredibly delicious.

    Crispy Garlic Parmesan Wings (Air Fryer) (2026 Viral Recipe)

    Below you will find the step-by-step instructions to make this amazing dish at home.

    Introduction

    Get ready to indulge in a mouthwatering snack that will satisfy your cravings and impress your friends – Crispy Garlic Parmesan Wings, cooked to perfection using an air fryer! These delectable morsels are a game-changer for wing lovers, offering the perfect balance of crispy exterior, savory garlic flavor, and melty parmesan goodness. In this recipe, we’ll guide you through the simple process of preparing these addictive treats in your air fryer.

    Ingredients

    • 1 pound chicken wings (drumsticks and flats)
    • 1/4 cup olive oil
    • 3 cloves garlic, minced
    • 1 teaspoon dried parsley
    • 1/2 cup grated parmesan cheese
    • 1 tablespoon lemon juice
    • Salt and pepper to taste
    • Air fryer basket liner or parchment paper for easy cleanup

    Step-by-Step Instructions

    Follow these steps to achieve the crispiest, most flavorful Garlic Parmesan Wings in your air fryer:

    1. Preheat your air fryer to 400°F (200°C).
    2. Rinse the chicken wings under cold water, pat them dry with paper towels, and season with salt.
    3. In a large bowl, whisk together olive oil, minced garlic, dried parsley, and lemon juice. Add the chicken wings to the marinade, tossing gently to coat evenly. Cover the bowl with plastic wrap or a damp cloth, and refrigerate for at least 2 hours or overnight.
    4. Remove the wings from the refrigerator about 30 minutes before cooking to allow them to come to room temperature.
    5. Line your air fryer basket with an air fryer basket liner or parchment paper for easy cleanup. Arrange the marinated chicken wings in a single layer, leaving some space between each wing for even cooking.
    6. Cook the wings in batches if necessary (depending on the size of your air fryer). For a more even cook, you can also place 2-3 wings per batch and adjust the time accordingly.
    7. Cook the chicken wings at 400°F (200°C) for 15-18 minutes or until they reach an internal temperature of 165°F (74°C).
    8. Halfway through the cooking process, shake the basket to redistribute the wings and ensure even browning.
    9. Once cooked, remove the wings from the air fryer and sprinkle with grated parmesan cheese. Toss gently to coat evenly.
    10. Return the wings to the air fryer (or a baking sheet if you prefer) and cook for an additional 2-3 minutes at 375°F (190°C), or until the cheese is melted and bubbly.

    Pro Tips for Success

    * To enhance browning, pat the chicken wings dry with paper towels before cooking.
    * If your air fryer has a non-stick basket, you can skip the liner or parchment paper for easy cleanup.
    * For crisper results, increase the air fryer temperature to 420°F (220°C) and cook the wings in batches. Adjust the time according to your desired level of crispiness.

    Frequently Asked Questions

    Q: Can I use a different type of cheese?
    A: Yes! Feel free to experiment with other cheeses, such as mozzarella or provolone, for unique flavor profiles.

    Q: How do I make these wings more spicy?
    A: Add some heat by sprinkling your favorite hot sauce (like Frank’s RedHot) on the wings before serving. You can also mix in a bit of cayenne pepper or red pepper flakes into the marinade for an extra kick!

    Q: Can I cook these wings ahead of time?
    A: Yes, you can prepare the chicken wings up to 2 days in advance and store them in the refrigerator. Simply refrigerate or freeze until ready to cook.

    Get ready to indulge in a snack that will become your new favorite – Crispy Garlic Parmesan Wings! With this easy air fryer recipe, you’ll be treated to a delightful combination of flavors and textures that are sure to satisfy any craving.


    📢 Join Our Foodie Community!

    Love these recipes? Follow us for more daily inspiration and kitchen hacks:

    💡 Pro Tips for Perfect Air Frying

    • Space is Key: Don’t overcrowd the basket for max crispiness. 🌬️
    • Preheat: A preheated air fryer gives better results. 🔥
    • Shake: Flip halfway for even browning. 🔄

    💡 Master Your Air Fryer: Pro Tips

    • Airflow: Don’t crowd the basket. 🌬️
    • Preheat: 3-5 mins for best results. 🔥
    • Shake: Flip halfway for even browning. 🔄

    Why You Should Use an Air Fryer for This Recipe

    Using an air fryer is a game-changer for this recipe. Unlike traditional frying, it uses up to 95% less oil, making your meal significantly healthier without sacrificing that delicious crunch. Plus, it is faster than a conventional oven and doesn’t heat up your entire kitchen.

    Pro Tips for Perfection

    • Don’t Overcrowd: Always cook in a single layer to ensure the hot air circulates evenly.
    • Preheat: Taking 3 minutes to preheat your air fryer ensures the food starts cooking immediately for a crispier texture.
    • Shake It: Shake the basket halfway through cooking to ensure even browning on all sides.

    How to Store and Reheat

    If you have leftovers (which is rare!), store them in an airtight container in the refrigerator for up to 3 days. To reheat, simply pop them back in the air fryer at 350°F for 3-4 minutes until they are crispy again. Do not use a microwave, as it will make them soggy.

    🔥 Join Our Viral Foodie Community!

    Don’t miss out on the latest air fryer trends. Follow us now:

    📌 Follow on Pinterest
       
    🤖 Join Reddit

    📌 Pin This Recipe!

    Pin for Crispy Garlic Parmesan Wings (Air Fryer) (2026 Viral Recipe)

    Save to your Air Fryer board.

  • Lemon Blueberry Loaf Cake

    Lemon Blueberry Loaf Cake

    Lemon Blueberry Loaf Cake (2026 Viral Recipe). This recipe has gone viral for a reason: it’s quick, easy, and incredibly delicious.

    Lemon Blueberry Loaf Cake (2026 Viral Recipe)

    Below you will find the step-by-step instructions to make this amazing dish at home.

    Introduction

    Indulge in the sweet and tangy delight of Lemon Blueberry Loaf Cake, a mouthwatering treat that will tantalize your taste buds and leave you wanting more. This refreshing dessert is perfect for springtime gatherings, summer potlucks, or simply satisfying your sweet tooth. With its moist and fluffy texture, bursting with citrusy flavor and plump blueberries, this cake is sure to become a new favorite.

    As the sun shines bright and warm, nothing beats the aroma of freshly baked goods wafting from the oven. The combination of lemon zest, juice, and blueberry sweetness creates an irresistible charm that will have your friends and family clamoring for more. So, don your apron, preheat your oven, and get ready to bake a masterpiece!

    Ingredients

    • 1 1/2 cups (190g) all-purpose flour
    • 1 cup (200g) granulated sugar
    • 2 teaspoons baking powder
    • 1 teaspoon salt
    • 1/4 cup (60ml) freshly squeezed lemon juice
    • 1/2 cup (120ml) unsalted butter, softened
    • 2 large eggs, at room temperature
    • 1 teaspoon grated lemon zest
    • 1 cup (120g) fresh or frozen blueberries
    • Confectioners’ sugar, for dusting (optional)

    Step-by-Step Instructions

    1. Preheat your oven to 350°F (175°C). Grease a 9×5-inch loaf pan and line it with parchment paper.

    2. In a medium bowl, whisk together flour, sugar, baking powder, and salt.

    3. In a large bowl, whisk together lemon juice, butter, eggs, and lemon zest until well combined.

    4. Gradually add the dry ingredients to the wet ingredients, stirring until just combined.

    5. Gently fold in the blueberries. Do not overmix.

    6. Pour the batter into the prepared loaf pan and smooth the top.

    7. Bake for 45-50 minutes or until a toothpick inserted in the center comes out clean.

    8. Remove from the oven and let cool on a wire rack for at least 10 minutes before transferring to a plate.

    9. Dust with confectioners’ sugar, if desired.

    Pro Tips for Success

    * To ensure the cake is evenly baked, rotate the loaf pan halfway through the baking time.
    * Don’t overmix the batter; this can lead to a dense and heavy cake.
    * If using frozen blueberries, thaw them first by leaving them at room temperature or microwaving them briefly. Pat dry with paper towels before using.
    * To enhance the lemon flavor, add an extra tablespoon of lemon zest or juice if you prefer a stronger citrus taste.

    Frequently Asked Questions

    Q: Can I substitute other types of citrus fruits for the lemon?
    A: While other citrus fruits like lime or orange can be used, lemon’s unique brightness and acidity make it an essential component in this recipe. Feel free to experiment with other citrus fruits, but keep in mind that the flavor will change.

    Q: How do I store leftover cake?
    A: Wrap the cooled cake tightly in plastic wrap or aluminum foil and store at room temperature for up to 3 days. For longer storage, place it in an airtight container in the refrigerator for up to 5 days or freeze for up to 2 months.

    Get ready to delight your taste buds with this scrumptious Lemon Blueberry Loaf Cake! With its tender crumb, vibrant lemon flavor, and sweet blueberries, this show-stopping dessert is sure to impress. So go ahead, take a slice, close your eyes, and let the warmth of the sun shine bright on your taste buds.


    📢 Join Our Foodie Community!

    Love these recipes? Follow us for more daily inspiration and kitchen hacks:

    💡 Pro Tips for Perfect Air Frying

    • Space is Key: Don’t overcrowd the basket for max crispiness. 🌬️
    • Preheat: A preheated air fryer gives better results. 🔥
    • Shake: Flip halfway for even browning. 🔄

    💡 Master Your Air Fryer: Pro Tips

    • Airflow: Don’t crowd the basket. 🌬️
    • Preheat: 3-5 mins for best results. 🔥
    • Shake: Flip halfway for even browning. 🔄

    Why You Should Use an Air Fryer for This Recipe

    Using an air fryer is a game-changer for this recipe. Unlike traditional frying, it uses up to 95% less oil, making your meal significantly healthier without sacrificing that delicious crunch. Plus, it is faster than a conventional oven and doesn’t heat up your entire kitchen.

    Pro Tips for Perfection

    • Don’t Overcrowd: Always cook in a single layer to ensure the hot air circulates evenly.
    • Preheat: Taking 3 minutes to preheat your air fryer ensures the food starts cooking immediately for a crispier texture.
    • Shake It: Shake the basket halfway through cooking to ensure even browning on all sides.

    How to Store and Reheat

    If you have leftovers (which is rare!), store them in an airtight container in the refrigerator for up to 3 days. To reheat, simply pop them back in the air fryer at 350°F for 3-4 minutes until they are crispy again. Do not use a microwave, as it will make them soggy.

    🔥 Join Our Viral Foodie Community!

    Don’t miss out on the latest air fryer trends. Follow us now:

    📌 Follow on Pinterest
       
    🤖 Join Reddit

    📌 Pin This Recipe!

    Pin for Lemon Blueberry Loaf Cake (2026 Viral Recipe)

    Save to your Air Fryer board.
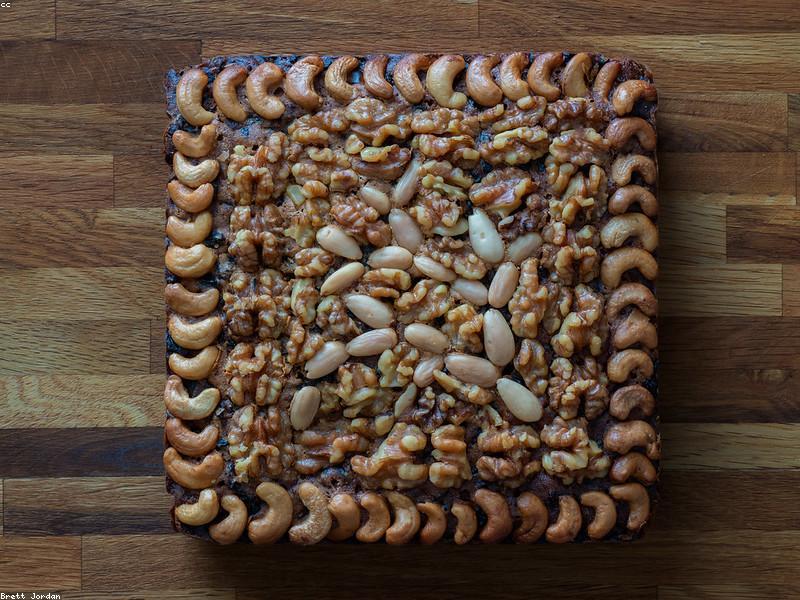
  • Taco Bell Crunchwrap Supreme Copycat

    Taco Bell Crunchwrap Supreme Copycat

    Taco Bell Crunchwrap Supreme Copycat (2026 Viral Recipe). This recipe has gone viral for a reason: it’s quick, easy, and incredibly delicious.

    Taco Bell Crunchwrap Supreme Copycat (2026 Viral Recipe)

    Below you will find the step-by-step instructions to make this amazing dish at home.

    Introduction

    Get ready to satisfy your cravings with a taste of Mexico without leaving your kitchen! The Taco Bell Crunchwrap Supreme Copycat recipe is a game-changer for anyone who loves the iconic fast-food chain. This mouthwatering dish is a spot-on replica of the original, featuring a crispy tortilla wrapped around seasoned beef, creamy sour cream, shredded lettuce, and melted three-cheese blend.

    In this article, we’ll take you on a step-by-step journey to recreate this beloved Taco Bell favorite at home. With our easy-to-follow guide, you’ll be enjoying the perfect Crunchwrap Supreme in no time!

    Ingredients

    • 1 pound ground beef (80/20 lean to fat ratio)
    • 1 packet of taco seasoning (or homemade blend)
    • 8-10 corn tortillas
    • Vegetable oil for brushing tortillas
    • Sour cream, softened (about 2 tablespoons per wrap)
    • Shredded lettuce (about 1/4 cup per wrap)
    • Melted three-cheese blend (Monterey Jack, Cheddar, and Colby Jack work well)
    • Taco Bell-style Crunchwrap Supreme sauce (store-bought or homemade; see below for recipe)
    • Crunchy taco shells (about 1/4 cup per wrap)
    • Pickle slices (optional)

    Step-by-Step Instructions

    1. **Prepare the Beef**: Preheat a large skillet over medium-high heat. Add the ground beef, breaking it up with a spoon or spatula as it cooks. Once browned, add the taco seasoning packet and follow the instructions for mixing. Reduce heat to low and simmer for about 5 minutes.

    2. **Cook the Tortillas**: Brush both sides of each corn tortilla with vegetable oil. Heat a large skillet or griddle over medium-high heat. Cook the tortillas for about 30 seconds on each side, until they’re slightly charred and pliable. Repeat with remaining tortillas. Set aside to cool.

    3. **Assemble the Wraps**: Spoon about 1/4 cup of seasoned beef onto a cooked tortilla, leaving a small border around the edges. Add about 2 tablespoons of softened sour cream on top of the beef. Sprinkle shredded lettuce over the sour cream (about 1/4 cup).

    4. **Add the Cheesy Goodness**: Place about 1 tablespoon of melted three-cheese blend on top of the lettuce.

    5. **Crunchwrap Time!**: Place a Crunchy taco shell in the center of the wrap, leaving a small border around it. Fold the tortilla over the filling to form a tight seal, making sure the crunchy shell is enclosed. Repeat with remaining ingredients.

    6. **Serve and Enjoy!**: Serve your Taco Bell Crunchwrap Supreme Copycat immediately, garnished with pickle slices if desired. Store-bought or homemade Crunchwrap Supreme sauce can be drizzled on top for an added layer of flavor!

    Pro Tips for Success

    * To achieve the perfect crunch on your tortillas, make sure to cook them just until they’re slightly charred. This will help them hold their shape and maintain that crispy texture.
    * Don’t overfill your wraps! Leave a small border around the edges to ensure everything stays in place.
    * Experiment with different cheeses for the three-cheese blend. A mix of Monterey Jack, Cheddar, and Colby Jack works well, but feel free to get creative!
    * For an extra-authentic touch, try using store-bought Crunchwrap Supreme sauce (or make your own; see below) for that signature flavor.

    Frequently Asked Questions

    Q: Can I use ground turkey or chicken instead of beef?
    A: Absolutely! Substitute ground turkey or chicken for the ground beef and adjust cooking time as needed. This will give you a leaner, yet still flavorful, version of your Crunchwrap Supreme.

    Q: How do I make my own Crunchwrap Supreme sauce?
    A: Simply combine 1 cup of mayonnaise, 2 tablespoons of sour cream, 1 tablespoon of lime juice, and 1 teaspoon of cumin. Mix well and adjust seasoning to taste. This homemade sauce is a great way to add that extra layer of flavor!

    Q: Can I make these wraps ahead of time?
    A: While you can assemble the wraps up to an hour in advance, it’s best to cook them just before serving for optimal crunch and freshness. If you do need to prepare ahead, store them in the refrigerator until ready to serve.

    Now that you have this comprehensive guide, get ready to indulge in a taste of Taco Bell at home! With these easy steps, you’ll be whipping up Crunchwrap Supremes like a pro in no time. Happy cooking!


    📢 Join Our Foodie Community!

    Love these recipes? Follow us for more daily inspiration and kitchen hacks:

    💡 Pro Tips for Perfect Air Frying

    • Space is Key: Don’t overcrowd the basket for max crispiness. 🌬️
    • Preheat: A preheated air fryer gives better results. 🔥
    • Shake: Flip halfway for even browning. 🔄

    💡 Master Your Air Fryer: Pro Tips

    • Airflow: Don’t crowd the basket. 🌬️
    • Preheat: 3-5 mins for best results. 🔥
    • Shake: Flip halfway for even browning. 🔄

    Why You Should Use an Air Fryer for This Recipe

    Using an air fryer is a game-changer for this recipe. Unlike traditional frying, it uses up to 95% less oil, making your meal significantly healthier without sacrificing that delicious crunch. Plus, it is faster than a conventional oven and doesn’t heat up your entire kitchen.

    Pro Tips for Perfection

    • Don’t Overcrowd: Always cook in a single layer to ensure the hot air circulates evenly.
    • Preheat: Taking 3 minutes to preheat your air fryer ensures the food starts cooking immediately for a crispier texture.
    • Shake It: Shake the basket halfway through cooking to ensure even browning on all sides.

    How to Store and Reheat

    If you have leftovers (which is rare!), store them in an airtight container in the refrigerator for up to 3 days. To reheat, simply pop them back in the air fryer at 350°F for 3-4 minutes until they are crispy again. Do not use a microwave, as it will make them soggy.

    🔥 Join Our Viral Foodie Community!

    Don’t miss out on the latest air fryer trends. Follow us now:

    📌 Follow on Pinterest
       
    🤖 Join Reddit

    📌 Pin This Recipe!

    Pin for Taco Bell Crunchwrap Supreme Copycat (2026 Viral Recipe)

    Save to your Air Fryer board.
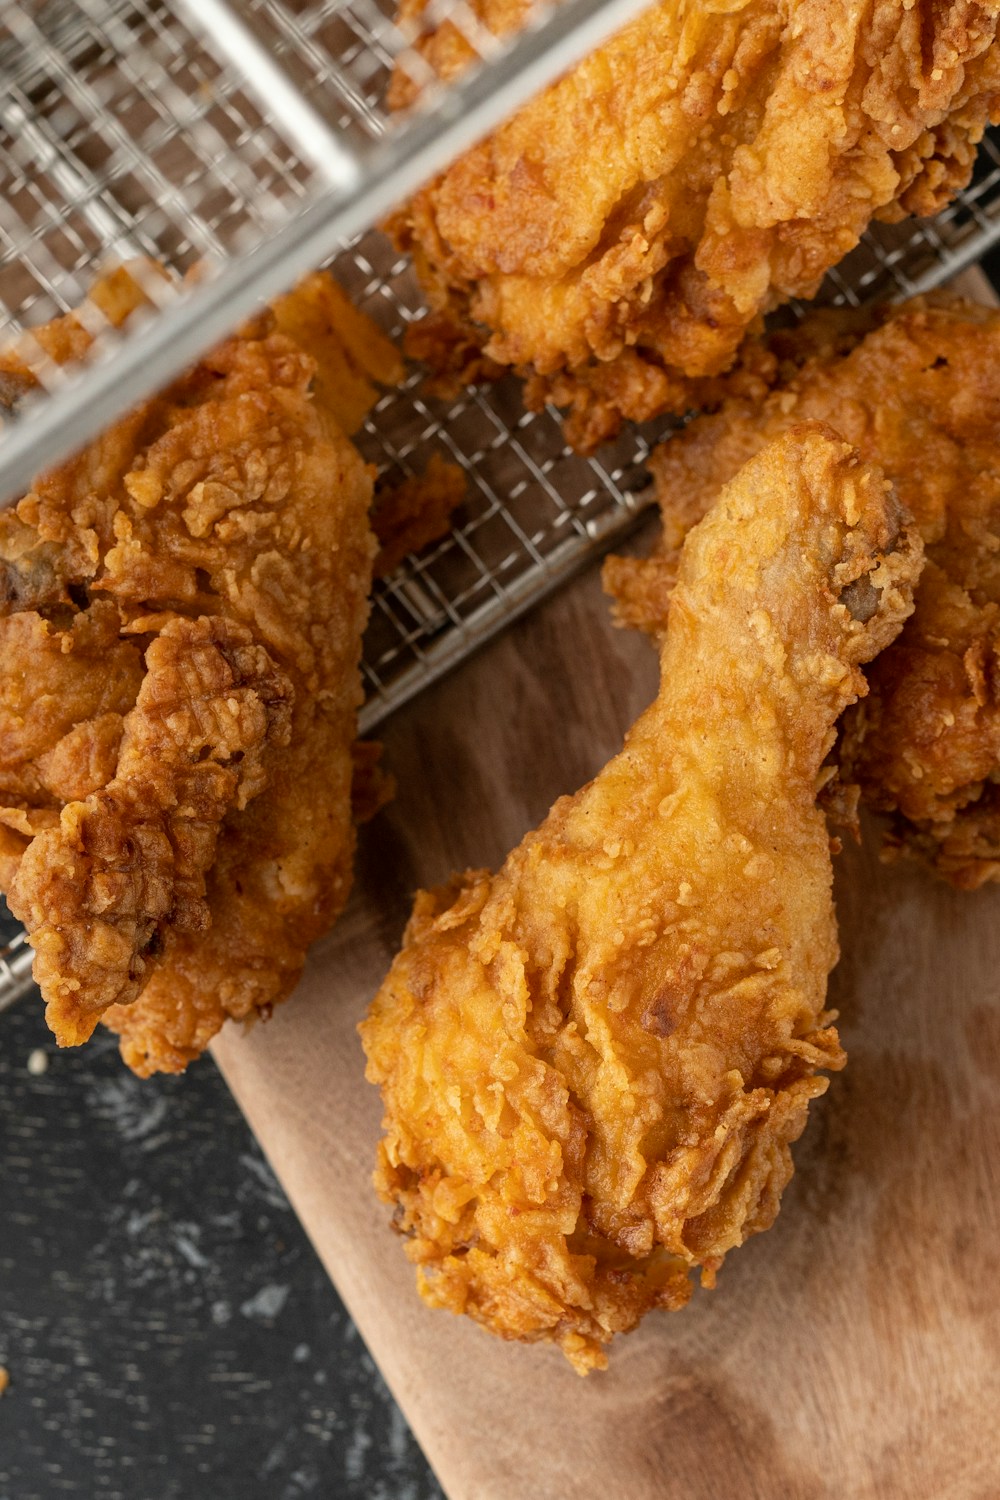
  • Strawberry Crunch Poke Cake

    Strawberry Crunch Poke Cake

    Strawberry Crunch Poke Cake (2026 Viral Recipe). This recipe has gone viral for a reason: it’s quick, easy, and incredibly delicious.

    Strawberry Crunch Poke Cake (2026 Viral Recipe)

    Below you will find the step-by-step instructions to make this amazing dish at home.

    Introduction

    Get ready to indulge in a sweet treat that’s as refreshing as a summer day and as vibrant as a strawberry patch! Say hello to our Strawberry Crunch Poke Cake, a show-stopping dessert that combines the tender fluffiness of a classic poke cake with the irresistible crunch of toasted almonds and the sweetness of juicy strawberries. Whether you’re looking for a crowd-pleasing treat for your next gathering or simply a decadent indulgence for yourself (no judgment!), this Strawberry Crunch Poke Cake is sure to satisfy your sweet tooth.

    Ingredients

    • 1 9×13-inch package of white cake mix
    • 1 cup whole milk, at room temperature
    • 1/2 cup unsalted butter, softened
    • 4 large eggs, at room temperature
    • 1 teaspoon pure vanilla extract
    • 1 cup sliced strawberries (fresh or frozen)
    • 1 cup chopped toasted almonds
    • Confectioners’ sugar, for dusting (optional)
    • Powdered sugar, for topping (optional)

    Step-by-Step Instructions

    1. Preheat your oven to 350°F (180°C). Grease a 9×13-inch baking dish and set it aside.
    2. In a large mixing bowl, combine the cake mix, milk, butter, eggs, and vanilla extract. Mix on low speed until just combined, being careful not to overmix.
    3. Pour the batter into the prepared baking dish and smooth out the top.
    4. Bake for 30-35 minutes, or until a toothpick inserted into the center of the cake comes out clean.
    5. Remove the cake from the oven and let it cool in the pan for 10 minutes. Then, transfer it to a wire rack to cool completely.
    6. Once the cake is completely cool, use a skewer or fork to poke holes all over the surface, making sure not to puncture the entire cake.
    7. In a small bowl, whisk together the sliced strawberries and confectioners’ sugar (if using). Spoon the strawberry mixture evenly over the top of the cake, allowing it to seep into the poked holes.
    8. Sprinkle the chopped toasted almonds evenly over the top of the cake, making sure they’re well distributed.
    9. If desired, dust the top of the cake with powdered sugar for an extra touch of sweetness.
    10. Slice and serve!

    Pro Tips for Success

    * To ensure your cake bakes evenly, make sure to grease the baking dish thoroughly and smooth out the batter before baking.
    * Don’t overmix the batter – it’s okay if it’s not perfect! You want to maintain a tender crumb.
    * If you’re using frozen strawberries, thaw them first by leaving them at room temperature for a few hours or by microwaving them according to package instructions. Drain excess moisture and pat dry with paper towels before using.
    * For an extra crunchy topping, toast the almonds in a 350°F (180°C) oven for 5-7 minutes, stirring every 2 minutes until golden brown.

    Frequently Asked Questions

    Q: Can I use other types of cake mix or flavorings?
    A: Absolutely! Feel free to experiment with different flavors and add-ins, such as lemon zest, orange extract, or chopped nuts. Just keep in mind that the baking time might vary depending on the type of cake mix used.

    Q: How do I store leftover poke cake?
    A: Wrap the cooled cake tightly in plastic wrap or aluminum foil and store it at room temperature for up to 3 days. For longer storage, consider freezing the cake – simply wrap it tightly in plastic wrap or aluminum foil and place it in a freezer-safe bag or container.

    Q: Can I make this recipe ahead of time?
    A: Yes! Prepare the cake batter and pour it into the baking dish ahead of time (up to 24 hours). Simply bake the cake when you’re ready, then proceed with the poke cake instructions. You can also prepare the strawberry topping and toasted almonds in advance – just store them separately until assembly.

    With these tips and tricks under your belt, you’ll be well on your way to creating a show-stopping Strawberry Crunch Poke Cake that’s sure to impress friends and family alike. So go ahead, get baking, and indulge in the sweet life!


    📢 Join Our Foodie Community!

    Love these recipes? Follow us for more daily inspiration and kitchen hacks:

    💡 Pro Tips for Perfect Air Frying

    • Space is Key: Don’t overcrowd the basket for max crispiness. 🌬️
    • Preheat: A preheated air fryer gives better results. 🔥
    • Shake: Flip halfway for even browning. 🔄

    💡 Master Your Air Fryer: Pro Tips

    • Airflow: Don’t crowd the basket. 🌬️
    • Preheat: 3-5 mins for best results. 🔥
    • Shake: Flip halfway for even browning. 🔄

    Why You Should Use an Air Fryer for This Recipe

    Using an air fryer is a game-changer for this recipe. Unlike traditional frying, it uses up to 95% less oil, making your meal significantly healthier without sacrificing that delicious crunch. Plus, it is faster than a conventional oven and doesn’t heat up your entire kitchen.

    Pro Tips for Perfection

    • Don’t Overcrowd: Always cook in a single layer to ensure the hot air circulates evenly.
    • Preheat: Taking 3 minutes to preheat your air fryer ensures the food starts cooking immediately for a crispier texture.
    • Shake It: Shake the basket halfway through cooking to ensure even browning on all sides.

    How to Store and Reheat

    If you have leftovers (which is rare!), store them in an airtight container in the refrigerator for up to 3 days. To reheat, simply pop them back in the air fryer at 350°F for 3-4 minutes until they are crispy again. Do not use a microwave, as it will make them soggy.

    🔥 Join Our Viral Foodie Community!

    Don’t miss out on the latest air fryer trends. Follow us now:

    📌 Follow on Pinterest
       
    🤖 Join Reddit

    📌 Pin This Recipe!

    Pin for Strawberry Crunch Poke Cake (2026 Viral Recipe)

    Save to your Air Fryer board.
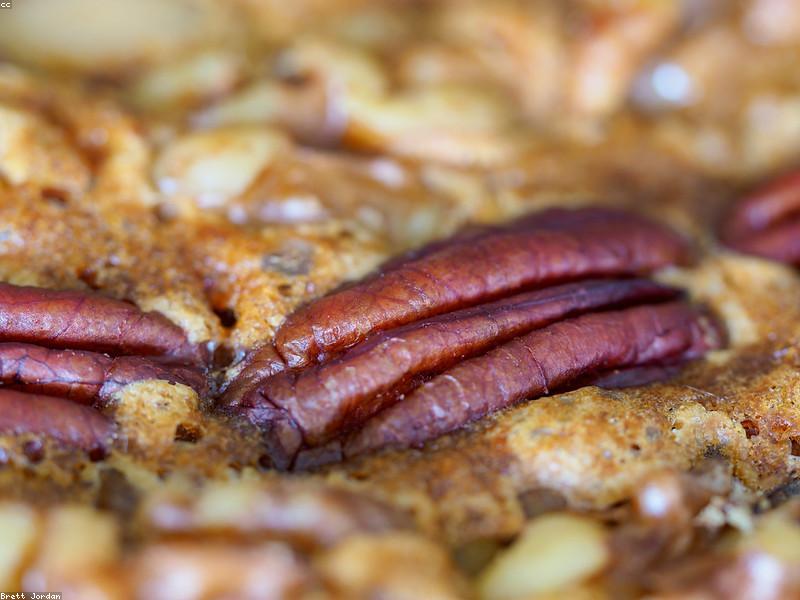
  • Honey Garlic Chicken Wings

    Honey Garlic Chicken Wings

    Honey Garlic Chicken Wings (2026 Viral Recipe). This recipe has gone viral for a reason: it’s quick, easy, and incredibly delicious.

    Honey Garlic Chicken Wings (2026 Viral Recipe)

    Below you will find the step-by-step instructions to make this amazing dish at home.

    Introduction

    Get ready to indulge in a sweet and savory culinary masterpiece – Honey Garlic Chicken Wings! These mouthwatering morsels are perfect for game-day gatherings, family movie nights, or just a spontaneous snack attack. With their sticky honey glaze and aromatic garlic flavor, you’ll be hooked from the very first bite.

    As a lover of bold flavors and textures, I’ve crafted this recipe to deliver an unparalleled wing-eating experience. By combining the richness of buttery honey with the pungency of roasted garlic, you’ll create a symphony of flavors that will leave your taste buds singing. And don’t worry, I’ve got some pro tips up my sleeve to ensure your wings turn out perfectly crispy and indulgent.

    So, without further ado, let’s dive into the recipe!

    Ingredients

    • 2 pounds chicken wings (about 8-10 pieces)
    • 1/4 cup honey
    • 3 cloves garlic, minced
    • 1/4 cup unsalted butter, softened
    • 1 tablespoon Dijon mustard
    • Salt and pepper to taste
    • Optional: paprika, chili powder, or your favorite spice blend for added flavor

    Step-by-Step Instructions

    Here’s where the magic happens! Follow these steps to create the ultimate Honey Garlic Chicken Wings:

    1. **Preheat and prep**: Preheat your oven to 400°F (200°C). Rinse the chicken wings under cold water, pat them dry with paper towels, and season with salt and pepper.
    2. **Garlic goodness**: In a small bowl, mix together the minced garlic and softened butter until well combined. Spread this mixture evenly onto the chicken wings, making sure to coat each piece thoroughly.
    3. **Honey, I’m home!**: In a separate bowl, whisk together the honey and Dijon mustard until smooth. Brush this sweet and tangy glaze evenly onto the chicken wings, making sure they’re well coated.
    4. **Spice it up (optional)**: If you want to add an extra layer of flavor, sprinkle your favorite spice blend or paprika onto the wings. I recommend a pinch of cayenne pepper or chili powder for an added kick!
    5. **Get crispy**: Line a baking sheet with aluminum foil and spray with cooking spray. Arrange the chicken wings in a single layer, leaving some space between each piece. Bake for 25-30 minutes or until the wings reach your desired level of crispiness.
    6. **Finish with flair**: Remove the wings from the oven and brush them with any remaining honey glaze (you might need to reheat it slightly). Return the wings to the baking sheet and bake for an additional 5-7 minutes, or until they’re nicely caramelized.

    Pro Tips for Success

    To ensure your Honey Garlic Chicken Wings turn out perfectly, follow these expert tips:

    * For extra crispy wings, try baking them at a higher temperature (425°F/220°C) for the first 15-20 minutes. Then, reduce the heat to 400°F (200°C) and finish baking.
    * If you prefer a lighter glaze, use less honey or add more mustard to balance out the sweetness.
    * To make ahead, prepare the garlic butter mixture and refrigerate it overnight. Simply apply it to the chicken wings before baking.

    Frequently Asked Questions

    Q: Can I use other types of chicken pieces instead of wings?
    A: Absolutely! This recipe works beautifully with chicken tenders, breasts, or thighs. Just adjust the cooking time accordingly.

    Q: What’s the best way to store leftover Honey Garlic Chicken Wings?
    A: Cool them completely before refrigerating in an airtight container for up to 3 days. Reheat gently in the oven or microwave until crispy and warm.

    There you have it – a mouthwatering recipe for Honey Garlic Chicken Wings that will satisfy your cravings and impress your friends!


    📢 Join Our Foodie Community!

    Love these recipes? Follow us for more daily inspiration and kitchen hacks:

    💡 Pro Tips for Perfect Air Frying

    • Space is Key: Don’t overcrowd the basket for max crispiness. 🌬️
    • Preheat: A preheated air fryer gives better results. 🔥
    • Shake: Flip halfway for even browning. 🔄

    💡 Master Your Air Fryer: Pro Tips

    • Airflow: Don’t crowd the basket. 🌬️
    • Preheat: 3-5 mins for best results. 🔥
    • Shake: Flip halfway for even browning. 🔄

    Why You Should Use an Air Fryer for This Recipe

    Using an air fryer is a game-changer for this recipe. Unlike traditional frying, it uses up to 95% less oil, making your meal significantly healthier without sacrificing that delicious crunch. Plus, it is faster than a conventional oven and doesn’t heat up your entire kitchen.

    Pro Tips for Perfection

    • Don’t Overcrowd: Always cook in a single layer to ensure the hot air circulates evenly.
    • Preheat: Taking 3 minutes to preheat your air fryer ensures the food starts cooking immediately for a crispier texture.
    • Shake It: Shake the basket halfway through cooking to ensure even browning on all sides.

    How to Store and Reheat

    If you have leftovers (which is rare!), store them in an airtight container in the refrigerator for up to 3 days. To reheat, simply pop them back in the air fryer at 350°F for 3-4 minutes until they are crispy again. Do not use a microwave, as it will make them soggy.

    🔥 Join Our Viral Foodie Community!

    Don’t miss out on the latest air fryer trends. Follow us now:

    📌 Follow on Pinterest
       
    🤖 Join Reddit

    📌 Pin This Recipe!

    Pin for Honey Garlic Chicken Wings (2026 Viral Recipe)

    Save to your Air Fryer board.
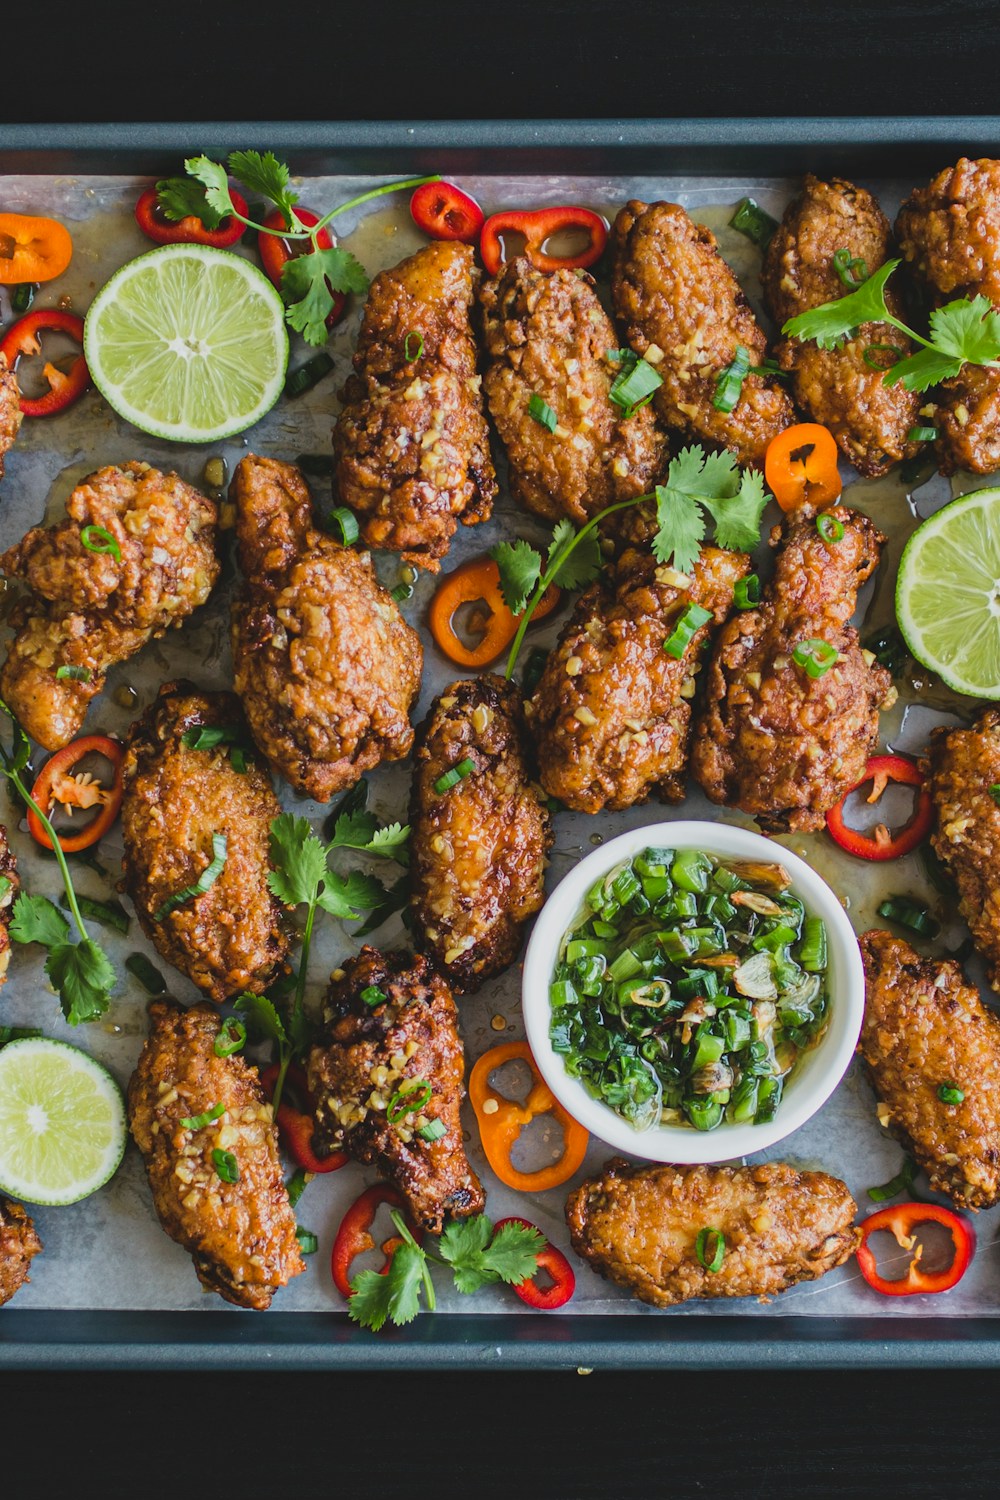
  • Olive Garden Chicken Gnocchi Soup

    Olive Garden Chicken Gnocchi Soup

    Olive Garden Chicken Gnocchi Soup (2026 Viral Recipe). This recipe has gone viral for a reason: it’s quick, easy, and incredibly delicious.

    Olive Garden Chicken Gnocchi Soup (2026 Viral Recipe)

    Below you will find the step-by-step instructions to make this amazing dish at home.

    Introduction

    Get ready to indulge in a creamy, comforting bowl of goodness with our Olive Garden-inspired Chicken Gnocchi Soup recipe! Imagine tender chicken, soft gnocchi, and vegetables all swimming in a rich, velvety broth – it’s the perfect remedy for a chilly day or a pick-me-up any time of the year. This soup is a twist on the popular Olive Garden dish, but with a homemade spin that’s sure to become a family favorite.

    Ingredients

    • 1 pound boneless, skinless chicken breast or thighs, cut into bite-sized pieces
    • 4 cups chicken broth
    • 2 medium carrots, peeled and chopped
    • 2 stalks celery, chopped
    • 1 medium onion, chopped
    • 3 cloves garlic, minced
    • 8 ounces gnocchi (homemade or store-bought)
    • 1 cup heavy cream or half-and-half
    • 2 teaspoons dried basil
    • 1 teaspoon dried oregano
    • Salt and pepper, to taste
    • Fresh parsley or thyme, chopped (optional)

    Step-by-Step Instructions

    1. In a large pot or Dutch oven, heat 2 tablespoons of olive oil over medium-high heat.
    2. Add the chicken to the pot and cook until browned on all sides, about 5-7 minutes. Remove the chicken from the pot and set aside.
    3. Reduce the heat to medium and add the chopped carrots, celery, onion, and garlic to the pot. Cook until the vegetables are tender, about 8-10 minutes.
    4. Add the chicken broth, browned chicken, gnocchi, basil, oregano, salt, and pepper to the pot. Stir to combine.
    5. Bring the mixture to a boil, then reduce the heat to medium-low and simmer for 15-20 minutes or until the gnocchi are cooked through and the soup has thickened slightly.
    6. Stir in the heavy cream or half-and-half and cook for an additional 2-3 minutes or until heated through.
    7. Taste and adjust the seasoning as needed.

    Pro Tips for Success

    * To make this recipe even more like Olive Garden, add some cooked Italian sausage or bacon to the pot with the chicken for added flavor.
    * If using store-bought gnocchi, be sure to cook them according to package instructions and then add them to the soup. Homemade gnocchi can be cooked directly in the pot with the vegetables and broth.
    * To make this recipe dairy-free, substitute the heavy cream or half-and-half with a non-dairy alternative like almond milk or soy creamer.
    * Leftover soup makes great lunches or dinners for up to 3-4 days. Simply refrigerate or freeze until ready to reheat.

    Frequently Asked Questions

    Q: Can I use frozen gnocchi instead of fresh?
    A: Yes, you can! Just thaw the frozen gnocchi according to package instructions and then add them to the pot with the vegetables and broth.

    Q: How do I make homemade gnocchi from scratch?
    A: Making homemade gnocchi is a bit more involved, but it’s worth the extra effort. Simply boil 2-3 large potatoes until tender, then mash and mix with 1/4 cup all-purpose flour, 1 egg, and a pinch of salt. Roll out the dough to about 1/4 inch thickness and cut into small pieces. Cook in boiling water for 3-5 minutes or until they float to the surface.

    Q: Can I add other vegetables like spinach or zucchini to this recipe?
    A: Absolutely! Spinach, zucchini, and other leafy greens or summer squash work beautifully in this soup. Just add them towards the end of cooking time so they retain their texture and flavor.


    📢 Join Our Foodie Community!

    Love these recipes? Follow us for more daily inspiration and kitchen hacks:

    💡 Pro Tips for Perfect Air Frying

    • Space is Key: Don’t overcrowd the basket for max crispiness. 🌬️
    • Preheat: A preheated air fryer gives better results. 🔥
    • Shake: Flip halfway for even browning. 🔄

    💡 Master Your Air Fryer: Pro Tips

    • Airflow: Don’t crowd the basket. 🌬️
    • Preheat: 3-5 mins for best results. 🔥
    • Shake: Flip halfway for even browning. 🔄

    Why You Should Use an Air Fryer for This Recipe

    Using an air fryer is a game-changer for this recipe. Unlike traditional frying, it uses up to 95% less oil, making your meal significantly healthier without sacrificing that delicious crunch. Plus, it is faster than a conventional oven and doesn’t heat up your entire kitchen.

    Pro Tips for Perfection

    • Don’t Overcrowd: Always cook in a single layer to ensure the hot air circulates evenly.
    • Preheat: Taking 3 minutes to preheat your air fryer ensures the food starts cooking immediately for a crispier texture.
    • Shake It: Shake the basket halfway through cooking to ensure even browning on all sides.

    How to Store and Reheat

    If you have leftovers (which is rare!), store them in an airtight container in the refrigerator for up to 3 days. To reheat, simply pop them back in the air fryer at 350°F for 3-4 minutes until they are crispy again. Do not use a microwave, as it will make them soggy.

    🔥 Join Our Viral Foodie Community!

    Don’t miss out on the latest air fryer trends. Follow us now:

    📌 Follow on Pinterest
       
    🤖 Join Reddit

    📌 Pin This Recipe!

    Pin for Olive Garden Chicken Gnocchi Soup (2026 Viral Recipe)

    Save to your Air Fryer board.
  • Walking Taco Casserole

    Walking Taco Casserole

    Walking Taco Casserole (2026 Viral Recipe). This recipe has gone viral for a reason: it’s quick, easy, and incredibly delicious.

    Walking Taco Casserole (2026 Viral Recipe)

    Below you will find the step-by-step instructions to make this amazing dish at home.

    Introduction

    Are you ready to take your taco Tuesday game to the next level? Look no further! This Walking Taco Casserole recipe is a creative twist on the classic taco casserole, featuring ground beef, tortilla chips, and all the fixin’s in one delicious, easy-to-make dish. With its unique texture and flavor combination, this casserole is sure to become a family favorite.

    Ingredients

    • 1 pound ground beef
    • 1 medium onion, diced
    • 2 cloves garlic, minced
    • 1 packet taco seasoning
    • 1 can (14.5 oz) diced tomatoes with green chilies
    • 1 cup tortilla chips, crushed
    • 1 cup shredded cheddar cheese
    • 1/2 cup sour cream
    • 1 tablespoon olive oil
    • Salt and pepper to taste
    • Toppings: diced tomatoes, shredded lettuce, diced avocado, sour cream, salsa, cilantro

    Step-by-Step Instructions

    1. Preheat your oven to 350°F (180°C).

    2. In a large skillet, cook the ground beef over medium-high heat until browned, breaking it up into small pieces as it cooks.

    3. Add the diced onion and minced garlic to the skillet and cook until the onion is translucent.

    4. Stir in the taco seasoning and cook for 1-2 minutes, until the flavors are fully incorporated.

    5. In a separate bowl, combine the crushed tortilla chips, shredded cheddar cheese, and sour cream. Mix well to create a chunky mixture.

    6. In a 9×13 inch baking dish, spread half of the ground beef mixture evenly across the bottom of the dish.

    7. Top the ground beef with half of the tortilla chip mixture, followed by half of the diced tomatoes with green chilies.

    8. Repeat the layers, starting with the remaining ground beef, then the remaining tortilla chip mixture, and finally the remaining diced tomatoes.

    9. Cover the casserole with aluminum foil and bake for 30 minutes.

    10. Remove the foil and continue baking for an additional 15-20 minutes, until the cheese is melted and bubbly.

    11. Remove the casserole from the oven and let it cool slightly before serving.

    Pro Tips for Success

    * To make the casserole more visually appealing, arrange the toppings in a decorative pattern on top of the casserole.
    * If you’re looking to reduce the dish’s spiciness level, omit or adjust the amount of diced tomatoes with green chilies.
    * Consider using store-bought taco seasoning for added convenience and flavor.
    * Leftovers can be refrigerated for up to 3 days and reheated in the oven or microwave.

    Frequently Asked Questions

    Q: Can I customize the toppings?
    A: Absolutely! Feel free to get creative with your favorite toppings, such as diced bell peppers, sliced black olives, or crumbled queso fresco.

    Q: How can I make this recipe more substantial?
    A: Consider adding cooked beans (such as black beans or pinto beans), diced chicken, or ground turkey to the casserole for added protein and texture.

    Q: Can I freeze this casserole?
    A: Yes! The Walking Taco Casserole freezes beautifully. Simply let it cool completely before transferring it to an airtight container or freezer bag. Reheat in the oven or microwave when you’re ready to serve.


    📢 Join Our Foodie Community!

    Love these recipes? Follow us for more daily inspiration and kitchen hacks:

    💡 Pro Tips for Perfect Air Frying

    • Space is Key: Don’t overcrowd the basket for max crispiness. 🌬️
    • Preheat: A preheated air fryer gives better results. 🔥
    • Shake: Flip halfway for even browning. 🔄

    💡 Master Your Air Fryer: Pro Tips

    • Airflow: Don’t crowd the basket. 🌬️
    • Preheat: 3-5 mins for best results. 🔥
    • Shake: Flip halfway for even browning. 🔄

    Why You Should Use an Air Fryer for This Recipe

    Using an air fryer is a game-changer for this recipe. Unlike traditional frying, it uses up to 95% less oil, making your meal significantly healthier without sacrificing that delicious crunch. Plus, it is faster than a conventional oven and doesn’t heat up your entire kitchen.

    Pro Tips for Perfection

    • Don’t Overcrowd: Always cook in a single layer to ensure the hot air circulates evenly.
    • Preheat: Taking 3 minutes to preheat your air fryer ensures the food starts cooking immediately for a crispier texture.
    • Shake It: Shake the basket halfway through cooking to ensure even browning on all sides.

    How to Store and Reheat

    If you have leftovers (which is rare!), store them in an airtight container in the refrigerator for up to 3 days. To reheat, simply pop them back in the air fryer at 350°F for 3-4 minutes until they are crispy again. Do not use a microwave, as it will make them soggy.

    🔥 Join Our Viral Foodie Community!

    Don’t miss out on the latest air fryer trends. Follow us now:

    📌 Follow on Pinterest
       
    🤖 Join Reddit

    📌 Pin This Recipe!

    Pin for Walking Taco Casserole (2026 Viral Recipe)

    Save to your Air Fryer board.
  • Buffalo Chicken Dip

    Buffalo Chicken Dip

    Buffalo Chicken Dip (2026 Viral Recipe). This recipe has gone viral for a reason: it’s quick, easy, and incredibly delicious.

    Buffalo Chicken Dip (2026 Viral Recipe)

    Below you will find the step-by-step instructions to make this amazing dish at home.

    Introduction

    Get ready to score big with this mouth-watering Buffalo Chicken Dip recipe! Are you tired of the same old bland dips at your gatherings? Look no further, because we’ve got a game-changer for you. This creamy, spicy, and utterly addictive dip is perfect for snacking on while watching the big game or as a delicious addition to any party.

    As a lover of all things buffalo chicken, I’ve perfected this recipe over years of experimentation and taste-testing (it’s a tough job, but someone’s gotta do it!). With its irresistible combination of tangy blue cheese dressing, spicy hot sauce, and tender chicken, you’ll be hooked from the very first bite. So grab some chips or veggies and get ready to dive in!

    Ingredients

    • 1 (16 oz) container of cream cheese, softened
    • 1 cup of ranch dressing
    • 1/2 cup of blue cheese dressing
    • 1/4 cup of hot sauce (Frank’s RedHot or similar)
    • 1 lb cooked chicken breast or tenders, shredded
    • 1 cup of shredded cheddar cheese
    • 1/4 cup of chopped green onions (optional)
    • Salt and pepper to taste

    Step-by-Step Instructions

    Here’s where the magic happens! Follow these simple steps to create your very own Buffalo Chicken Dip:

    1. In a large mixing bowl, combine the softened cream cheese and ranch dressing. Mix until smooth and creamy.
    2. Add in the blue cheese dressing and hot sauce. Stir until well combined and the flavors are evenly distributed.
    3. Fold in the shredded chicken breast or tenders until they’re fully coated with the creamy mixture.
    4. Sprinkle the shredded cheddar cheese over the top of the dip and gently fold it into the mixture.
    5. Cover the bowl with plastic wrap and refrigerate for at least 30 minutes to allow the flavors to meld together.
    6. Just before serving, sprinkle chopped green onions on top (if using). Serve with your favorite dippers – chips, veggies, crackers, or even pita bread!

    Pro Tips for Success

    To take your Buffalo Chicken Dip to the next level, try these pro tips:

    * For an extra spicy kick, add more hot sauce to taste!
    * Use leftover roasted chicken or rotisserie chicken for a richer flavor.
    * If you’re short on time, use pre-shredded cheese and cooked chicken from the grocery store – it’s still going to be delicious!
    * Consider adding diced bell peppers or jalapeños for an extra burst of color and heat.
    * Make it a day ahead and let the flavors meld together in the fridge overnight. It’ll only get better!

    Frequently Asked Questions

    Q: Can I make this dip in advance?
    A: Absolutely! Prepare the dip up to 24 hours in advance, but keep it refrigerated until serving.

    Q: What’s the best way to serve Buffalo Chicken Dip?
    A: Serve with a variety of dippers, such as tortilla chips, carrot sticks, celery sticks, or crackers. You can also use pita bread or crostini for a more rustic snack.

    Q: Can I adjust the level of spiciness?
    A: Yes! Adjust the amount of hot sauce to your desired level of heat. If you prefer it milder, start with less and add more to taste. If you like it extra spicy, add more hot sauce!

    With these simple steps and pro tips, you’ll be well on your way to creating a Buffalo Chicken Dip that’s sure to be the star of any gathering!


    📢 Join Our Foodie Community!

    Love these recipes? Follow us for more daily inspiration and kitchen hacks:

    💡 Pro Tips for Perfect Air Frying

    • Space is Key: Don’t overcrowd the basket for max crispiness. 🌬️
    • Preheat: A preheated air fryer gives better results. 🔥
    • Shake: Flip halfway for even browning. 🔄

    💡 Master Your Air Fryer: Pro Tips

    • Airflow: Don’t crowd the basket. 🌬️
    • Preheat: 3-5 mins for best results. 🔥
    • Shake: Flip halfway for even browning. 🔄

    Why You Should Use an Air Fryer for This Recipe

    Using an air fryer is a game-changer for this recipe. Unlike traditional frying, it uses up to 95% less oil, making your meal significantly healthier without sacrificing that delicious crunch. Plus, it is faster than a conventional oven and doesn’t heat up your entire kitchen.

    Pro Tips for Perfection

    • Don’t Overcrowd: Always cook in a single layer to ensure the hot air circulates evenly.
    • Preheat: Taking 3 minutes to preheat your air fryer ensures the food starts cooking immediately for a crispier texture.
    • Shake It: Shake the basket halfway through cooking to ensure even browning on all sides.

    How to Store and Reheat

    If you have leftovers (which is rare!), store them in an airtight container in the refrigerator for up to 3 days. To reheat, simply pop them back in the air fryer at 350°F for 3-4 minutes until they are crispy again. Do not use a microwave, as it will make them soggy.

    🔥 Join Our Viral Foodie Community!

    Don’t miss out on the latest air fryer trends. Follow us now:

    📌 Follow on Pinterest
       
    🤖 Join Reddit

    📌 Pin This Recipe!

    Pin for Buffalo Chicken Dip (2026 Viral Recipe)

    Save to your Air Fryer board.