Author: Chef Sarah

  • Churro Cheesecake Bars

    Churro Cheesecake Bars

    Churro Cheesecake Bars (2026 Viral Recipe). This recipe has gone viral for a reason: it’s quick, easy, and incredibly delicious.
    Churro Cheesecake Bars (2026 Viral Recipe)

    Below you will find the step-by-step instructions to make this amazing dish at home.

    Introduction

    Get ready to indulge in a sweet treat that combines the crispy, sugary goodness of churros with the creamy richness of cheesecake. Say hello to Churro Cheesecake Bars – a game-changing dessert that will become your new go-to for parties, potlucks, and even just a cozy night in.

    Imagine a buttery shortbread crust, topped with a velvety cheesecake filling infused with cinnamon and sugar, and finished off with a crunchy churro topping. It’s a match made in heaven, folks! And the best part? These bars are surprisingly easy to make, requiring only a few simple ingredients and some basic baking skills.

    So, what are you waiting for? Let’s dive into the recipe and get ready to impress your friends and family with these mouthwatering Churro Cheesecake Bars!

    Ingredients

    • 1 1/2 cups all-purpose flour
    • 1/4 cup granulated sugar
    • 1/2 teaspoon salt
    • 1/2 cup unsalted butter, softened
    • 16 ounces cream cheese, softened
    • 1/2 cup granulated sugar
    • 4 large eggs, separated
    • 1 teaspoon vanilla extract
    • 1/2 cup cinnamon-sugar (see notes)
    • Churro topping ingredients:
      • 1 cup all-purpose flour
      • 1/4 cup granulated sugar
      • 1/4 teaspoon salt
      • 1/2 cup unsalted butter, melted
      • Cinnamon-sugar (see notes)

    Step-by-Step Instructions

    To make the crust:

    1. Preheat your oven to 350°F (175°C). Line an 8-inch square baking dish with parchment paper or aluminum foil, leaving some overhang for easy removal.
    2. In a medium bowl, whisk together flour, sugar, and salt. Add the softened butter and mix until the mixture resembles coarse crumbs.
    3. Press the crust mixture evenly into the prepared baking dish.

    To make the cheesecake filling:

    4. In a large mixing bowl, beat the cream cheese until smooth. Add the granulated sugar and beat until combined.
    5. Beat in the eggs, one at a time, followed by the vanilla extract.
    6. Pour the cheesecake batter over the crust and smooth out the top.

    To make the churro topping:

    7. In a small bowl, whisk together flour, sugar, and salt. Add the melted butter and mix until a crumbly mixture forms.
    8. Sprinkle the cinnamon-sugar evenly over the cheesecake filling.
    9. Drizzle the churro topping mixture over the cinnamon-sugar layer.

    10. Bake for 40-45 minutes or until the edges are set and the center is slightly jiggly. Let cool completely in the pan before refrigerating for at least 4 hours or overnight.

    Pro Tips for Success

    • Mix those churro topping crumbs gently – you want them to stay crunchy!
    • Don’t overbake! A slightly jiggly center is perfect, as it will set during refrigeration.
    • For an extra crispy crust, bake the bars for an additional 10-15 minutes. Keep an eye on them, as they can quickly go from golden to burnt!

    Frequently Asked Questions

    Q: Can I use a different type of sugar in the churro topping?

    A: Absolutely! Brown sugar or turbinado sugar would work beautifully. Just be aware that the flavor will change slightly.

    Q: How far in advance can I make these bars?

    A: You can prepare the crust and cheesecake filling up to 2 days ahead. Assemble and bake just before serving for optimal freshness.

    Q: Can I use a different type of cheese, like mascarpone or ricotta?

    A: While you can experiment with different cheeses, cream cheese provides the best texture and flavor combination in this recipe. If you do decide to try another type, keep an eye on the consistency – you may need to adjust baking time.

    Conclusion

    And there you have it – Churro Cheesecake Bars that will satisfy your sweet tooth and leave everyone asking for more! With their perfect balance of textures and flavors, these bars are sure to become a new favorite. So go ahead, get creative with the toppings, and indulge in this match made in heaven.


    📢 Join Our Foodie Community!

    Love these recipes? Follow us for more daily inspiration and kitchen hacks:

    💡 Pro Tips for Perfect Air Frying

    • Space is Key: Don’t overcrowd the basket for max crispiness. 🌬️
    • Preheat: A preheated air fryer gives better results. 🔥
    • Shake: Flip halfway for even browning. 🔄

    💡 Master Your Air Fryer: Pro Tips

    • Airflow: Don’t crowd the basket. 🌬️
    • Preheat: 3-5 mins for best results. 🔥
    • Shake: Flip halfway for even browning. 🔄

    Why You Should Use an Air Fryer for This Recipe

    Using an air fryer is a game-changer for this recipe. Unlike traditional frying, it uses up to 95% less oil, making your meal significantly healthier without sacrificing that delicious crunch. Plus, it is faster than a conventional oven and doesn’t heat up your entire kitchen.

    Pro Tips for Perfection

    • Don’t Overcrowd: Always cook in a single layer to ensure the hot air circulates evenly.
    • Preheat: Taking 3 minutes to preheat your air fryer ensures the food starts cooking immediately for a crispier texture.
    • Shake It: Shake the basket halfway through cooking to ensure even browning on all sides.

    How to Store and Reheat

    If you have leftovers (which is rare!), store them in an airtight container in the refrigerator for up to 3 days. To reheat, simply pop them back in the air fryer at 350°F for 3-4 minutes until they are crispy again. Do not use a microwave, as it will make them soggy.

    🔥 Join Our Viral Foodie Community!

    Don’t miss out on the latest air fryer trends. Follow us now:

    📌 Follow on Pinterest
       
    🤖 Join Reddit

    📌 Pin This Recipe!

    Pin for Churro Cheesecake Bars (2026 Viral Recipe)

    Save to your Air Fryer board.
  • Starbucks Copycat Pumpkin Spice Latte

    Starbucks Copycat Pumpkin Spice Latte

    Starbucks Copycat Pumpkin Spice Latte (2026 Viral Recipe). This recipe has gone viral for a reason: it’s quick, easy, and incredibly delicious.

    Starbucks Copycat Pumpkin Spice Latte (2026 Viral Recipe)

    Below you will find the step-by-step instructions to make this amazing dish at home.

    Introduction

    The Pumpkin Spice Latte – a fall favorite that has become an integral part of our seasonal traditions. For many, it’s the first sip of autumn in a cup. And who can blame us? The perfect blend of warm spices, rich espresso, and velvety steamed milk is the ultimate comfort drink.

    But what if you could bring this Starbucks classic to your own kitchen, without breaking the bank or sacrificing flavor? That’s right – we’re talking about making your very own Pumpkin Spice Latte at home! In this article, we’ll take you on a journey through the process of crafting a copycat version that rivals the original. So grab your favorite fall-themed mug and get cozy!

    Ingredients

    • 1 cup strong brewed coffee (or 1 shot of espresso)
    • 1/4 teaspoon ground cinnamon
    • 1/4 teaspoon ground nutmeg
    • 1/4 teaspoon ground ginger
    • 1/2 teaspoon pumpkin puree
    • 3 tablespoons vanilla syrup (or 1 teaspoon vanilla extract)
    • 1 tablespoon milk (whole, skim, or a non-dairy alternative)
    • Sugar to taste (optional)
    • Whipped cream and pumpkin pie spice for garnish (optional)

    Step-by-Step Instructions

    1. Brew your coffee: Whether you prefer the rich flavor of a full-bodied roast or the bright, fruity notes of a light roast, brew 1 cup of strong coffee according to your preferred method. If you’re feeling extra fancy, pull 1 shot of espresso for an intense and concentrated flavor.

    2. Prepare the spice blend: In a small bowl, combine the ground cinnamon, nutmeg, and ginger. You can adjust the proportions to suit your taste preferences – just be sure not to overpower the other flavors!

    3. Mix in the pumpkin puree: Add 1/2 teaspoon of pumpkin puree to the coffee grounds (or espresso shot) and mix until well combined.

    4. Add vanilla sweetness: If you’re using a syrup, add 3 tablespoons to the mixture. If you prefer extract, start with 1 teaspoon and adjust to taste.

    5. Steam the milk: Heat 1 tablespoon of milk in a saucepan or microwave-safe measuring cup until it reaches your desired temperature – hot and creamy is perfect for fall!

    6. Combine the flavors: Pour the coffee mixture into a large mug, leaving about an inch at the top. Add the steamed milk and whisk gently to combine.

    7. Sweeten to taste: If you prefer your PSL on the sweeter side, add sugar to taste. You can also use honey, maple syrup, or other sweetener alternatives if you like!

    8. Garnish with whipped cream (optional): Top your PSL off with a dollop of whipped cream and sprinkle with pumpkin pie spice for an extra-special treat.

    Pro Tips for Success

    • Experiment with different coffee-to-milk ratios to find your perfect balance.
    • Don’t overdo it on the spices – you can always add more, but it’s harder to remove excess spice from the mixture!
    • Try using alternative milks like almond, soy, or oat milk for a creamy and dairy-free PSL.
    • Keep your coffee beans fresh by storing them in an airtight container at room temperature.

    Frequently Asked Questions

    Q: Can I make this recipe with instant coffee? A: While we understand the convenience of instant, we recommend using freshly brewed or espresso-style coffee for the best flavor. However, if you do choose to use instant, be sure to adjust the brewing time and strength according to package instructions.

    Q: How long does it take to make this recipe? A: From start to finish, you’re looking at around 10-15 minutes – brew your coffee, prepare the spice blend, mix in the pumpkin puree, steam the milk, and combine the flavors. Easy peasy!

    Q: Can I customize this recipe for my dietary needs? A: Absolutely! Simply substitute dairy milk with a non-dairy alternative (like almond or soy milk), and choose a sweetener that suits your taste preferences (like honey or maple syrup). You can also experiment with different types of coffee beans to suit your caffeine needs.

    With these simple steps and tips, you’re ready to create your very own Pumpkin Spice Latte at home. So go ahead, grab a cup, and cozy up – fall is officially here!


    📢 Join Our Foodie Community!

    Love these recipes? Follow us for more daily inspiration and kitchen hacks:

    💡 Pro Tips for Perfect Air Frying

    • Space is Key: Don’t overcrowd the basket for max crispiness. 🌬️
    • Preheat: A preheated air fryer gives better results. 🔥
    • Shake: Flip halfway for even browning. 🔄

    💡 Master Your Air Fryer: Pro Tips

    • Airflow: Don’t crowd the basket. 🌬️
    • Preheat: 3-5 mins for best results. 🔥
    • Shake: Flip halfway for even browning. 🔄

    Why You Should Use an Air Fryer for This Recipe

    Using an air fryer is a game-changer for this recipe. Unlike traditional frying, it uses up to 95% less oil, making your meal significantly healthier without sacrificing that delicious crunch. Plus, it is faster than a conventional oven and doesn’t heat up your entire kitchen.

    Pro Tips for Perfection

    • Don’t Overcrowd: Always cook in a single layer to ensure the hot air circulates evenly.
    • Preheat: Taking 3 minutes to preheat your air fryer ensures the food starts cooking immediately for a crispier texture.
    • Shake It: Shake the basket halfway through cooking to ensure even browning on all sides.

    How to Store and Reheat

    If you have leftovers (which is rare!), store them in an airtight container in the refrigerator for up to 3 days. To reheat, simply pop them back in the air fryer at 350°F for 3-4 minutes until they are crispy again. Do not use a microwave, as it will make them soggy.

    🔥 Join Our Viral Foodie Community!

    Don’t miss out on the latest air fryer trends. Follow us now:

    📌 Follow on Pinterest
       
    🤖 Join Reddit

    📌 Pin This Recipe!

    Pin for Starbucks Copycat Pumpkin Spice Latte (2026 Viral Recipe)

    Save to your Air Fryer board.

  • Korean Garlic Cream Cheese Bread

    Korean Garlic Cream Cheese Bread

    Korean Garlic Cream Cheese Bread (2026 Viral Recipe). This recipe has gone viral for a reason: it’s quick, easy, and incredibly delicious.

    Korean Garlic Cream Cheese Bread (2026 Viral Recipe)

    Below you will find the step-by-step instructions to make this amazing dish at home.

    Introduction

    Get ready to indulge in a culinary delight that will leave you wanting more! Korean Garlic Cream Cheese Bread is a mouthwatering fusion of flavors and textures that will tantalize your taste buds. This delectable treat combines the richness of cream cheese, the pungency of garlic, and the flaky tenderness of bread, all wrapped up in a crispy, golden-brown package. Whether you’re a foodie looking to spice up your snack game or a busy home cook seeking a quick and easy recipe, this Korean-inspired masterpiece is sure to impress.

    Ingredients

    • 1 1/2 cups warm water (around 100°F to 110°F)
    • 1 tablespoon active dry yeast
    • 3 tablespoons sugar
    • 4 cups all-purpose flour
    • 1 teaspoon salt
    • 1/2 cup unsalted butter, softened (around 72°F to 76°F)
    • 1/2 cup cream cheese, softened (around 72°F to 76°F)
    • 3 cloves garlic, minced (about 1 tablespoon)
    • 1 egg, beaten
    • Sesame seeds and chopped green onions for garnish (optional)

    Step-by-Step Instructions

    1. In a small bowl, combine the warm water and yeast. Let it sit for 5-7 minutes until the mixture becomes frothy.
    2. In a separate large mixing bowl, whisk together the sugar and flour.
    3. Add the softened butter to the dry ingredients and mix until a shaggy dough forms.
    4. Pour in the yeast mixture and knead the dough with your hands or using a stand mixer for 5-7 minutes until it becomes smooth and elastic.
    5. Place the dough in a greased bowl, cover it with plastic wrap or a damp cloth, and let it rise in a warm place (around 75°F to 80°F) for about 1 hour, or until it has doubled in size.
    6. Preheat your oven to 375°F (190°C).
    7. Punch down the dough and roll it out into a rectangular shape approximately 12 inches long by 4 inches wide.
    8. In a small bowl, mix together the softened cream cheese and minced garlic.
    9. Spread the cream cheese mixture evenly over the center of the dough, leaving about 1-inch borders on either side.
    10. Fold the short sides (the 4-inch edges) inwards towards the cream cheese filling, then roll the dough into a tight log shape.
    11. Cut the log into 6-8 equal pieces and place them onto a baking sheet lined with parchment paper, leaving about 1 inch of space between each piece.
    12. Brush the tops with beaten egg and sprinkle with sesame seeds or chopped green onions if desired.
    13. Bake for 15-20 minutes, or until the bread is golden brown and sounds hollow when tapped on the bottom.
    14. Remove from the oven and let it cool for 5-10 minutes before serving.

    Pro Tips for Success

    * Make sure to keep the cream cheese at room temperature (around 72°F to 76°F) to ensure smooth spreading.
    * Use high-quality ingredients, especially the butter and cream cheese, as they will greatly impact the overall flavor and texture of the bread.
    * Don’t overwork the dough, or it might become tough. Stop kneading once the dough becomes smooth and elastic.
    * If you find that your garlic is overpowering, start with 1-2 cloves and adjust to taste.
    * Experiment with different seasonings like chopped scallions, grated ginger, or crushed red pepper flakes to give the bread an extra boost of flavor.

    Frequently Asked Questions

    Q: Can I use active dry yeast instead of instant yeast?
    A: Yes, you can substitute 1/4 teaspoon of active dry yeast for every 1/2 teaspoon of instant yeast. However, keep in mind that active dry yeast might require a longer rising time.

    Q: How do I store leftover Korean Garlic Cream Cheese Bread?
    A: Wrap the cooled bread tightly in plastic wrap or aluminum foil and store it at room temperature (around 72°F to 76°F) for up to 3 days. You can also freeze it for up to 2 months, then thaw overnight at room temperature.

    Q: Can I make this recipe in a slow cooker?
    A: Unfortunately, the cream cheese might not melt properly in a slow cooker, and the bread might not retain its flaky texture. Stick with the conventional oven method for best results.

    Now that you’ve mastered the art of Korean Garlic Cream Cheese Bread, gather your friends and family to indulge in this heavenly treat. Share your experiences, tips, and variations in the comments below!


    📢 Join Our Foodie Community!

    Love these recipes? Follow us for more daily inspiration and kitchen hacks:

    💡 Pro Tips for Perfect Air Frying

    • Space is Key: Don’t overcrowd the basket for max crispiness. 🌬️
    • Preheat: A preheated air fryer gives better results. 🔥
    • Shake: Flip halfway for even browning. 🔄

    💡 Master Your Air Fryer: Pro Tips

    • Airflow: Don’t crowd the basket. 🌬️
    • Preheat: 3-5 mins for best results. 🔥
    • Shake: Flip halfway for even browning. 🔄

    Why You Should Use an Air Fryer for This Recipe

    Using an air fryer is a game-changer for this recipe. Unlike traditional frying, it uses up to 95% less oil, making your meal significantly healthier without sacrificing that delicious crunch. Plus, it is faster than a conventional oven and doesn’t heat up your entire kitchen.

    Pro Tips for Perfection

    • Don’t Overcrowd: Always cook in a single layer to ensure the hot air circulates evenly.
    • Preheat: Taking 3 minutes to preheat your air fryer ensures the food starts cooking immediately for a crispier texture.
    • Shake It: Shake the basket halfway through cooking to ensure even browning on all sides.

    How to Store and Reheat

    If you have leftovers (which is rare!), store them in an airtight container in the refrigerator for up to 3 days. To reheat, simply pop them back in the air fryer at 350°F for 3-4 minutes until they are crispy again. Do not use a microwave, as it will make them soggy.

    🔥 Join Our Viral Foodie Community!

    Don’t miss out on the latest air fryer trends. Follow us now:

    📌 Follow on Pinterest
       
    🤖 Join Reddit

    📌 Pin This Recipe!

    Pin for Korean Garlic Cream Cheese Bread (2026 Viral Recipe)

    Save to your Air Fryer board.
  • Loaded Baked Potato Soup

    Loaded Baked Potato Soup

    Loaded Baked Potato Soup (2026 Viral Recipe). This recipe has gone viral for a reason: it’s quick, easy, and incredibly delicious.

    Loaded Baked Potato Soup (2026 Viral Recipe)

    Below you will find the step-by-step instructions to make this amazing dish at home.

    Introduction

    Get ready to cozy up with a bowl of creamy goodness! Loaded Baked Potato Soup is a comfort food masterpiece that will become your new go-to soup recipe. Imagine the flavors of a classic baked potato, but in a warm, velvety soup form. With its rich and buttery taste, this soup is sure to satisfy even the pickiest eaters.

    In this article, we’ll walk you through the simple yet impressive process of making Loaded Baked Potato Soup from scratch. Whether you’re looking for a comforting meal on a chilly day or a delicious addition to your party menu, this recipe has got you covered!

    Ingredients

    • 1 large onion, diced
    • 3-4 cloves of garlic, minced
    • 1 teaspoon salt
    • 1/2 teaspoon black pepper
    • 1/2 cup (1 stick) unsalted butter
    • 2 cups chicken or vegetable broth
    • 2 large potatoes, peeled and diced
    • 1 cup half-and-half or heavy cream
    • Shredded cheddar cheese for serving (optional)
    • Fresh chives or scallions for garnish (optional)

    Step-by-Step Instructions

    1. In a large pot or Dutch oven, melt the butter over medium heat. Add the diced onion and cook until translucent, about 5 minutes.
    2. Add the minced garlic and cook for an additional 1-2 minutes, until fragrant.
    3. Sprinkle the salt and black pepper over the onion mixture, stirring to combine.
    4. Add the chicken or vegetable broth to the pot, stirring to scrape up any browned bits from the bottom.
    5. Bring the liquid to a simmer, then add the diced potatoes.
    6. Reduce heat to medium-low and let the soup cook for 15-20 minutes, or until the potatoes are tender when pierced with a fork.
    7. Use an immersion blender (or transfer the soup to a blender in batches) to puree the soup until smooth.
    8. Stir in the half-and-half or heavy cream until fully incorporated.
    9. Taste and adjust seasoning as needed.
    10. Serve hot, topped with shredded cheddar cheese and garnished with fresh chives or scallions if desired.

    Pro Tips for Success

    • For an extra rich flavor, use high-quality broth or stock instead of water.
    • If you prefer a creamier soup, add more half-and-half or heavy cream to your liking!
    • Consider adding cooked bacon bits, diced ham, or crispy chives on top for added smokiness and texture.

    Frequently Asked Questions

    Q: Can I make this soup in a slow cooker?

    A: Absolutely! Simply brown the onion and garlic in a skillet before transferring everything to your slow cooker. Cook on low for 6-8 hours, then puree and serve.

    Q: Will this soup keep well in the fridge or freezer?

    A: Yes! Allow the soup to cool completely before refrigerating or freezing. Reheat gently over medium heat or in the microwave until warmed through.

    Q: Can I customize the recipe with different toppings?

    A: Of course! Try adding diced tomatoes, chopped cilantro, crumbled cooked chicken, or crispy tortilla strips to give your Loaded Baked Potato Soup a personal touch.

    Get ready to indulge in this velvety masterpiece and enjoy every spoonful of creamy goodness!


    📢 Join Our Foodie Community!

    Love these recipes? Follow us for more daily inspiration and kitchen hacks:

    💡 Pro Tips for Perfect Air Frying

    • Space is Key: Don’t overcrowd the basket for max crispiness. 🌬️
    • Preheat: A preheated air fryer gives better results. 🔥
    • Shake: Flip halfway for even browning. 🔄

    💡 Master Your Air Fryer: Pro Tips

    • Airflow: Don’t crowd the basket. 🌬️
    • Preheat: 3-5 mins for best results. 🔥
    • Shake: Flip halfway for even browning. 🔄

    Why You Should Use an Air Fryer for This Recipe

    Using an air fryer is a game-changer for this recipe. Unlike traditional frying, it uses up to 95% less oil, making your meal significantly healthier without sacrificing that delicious crunch. Plus, it is faster than a conventional oven and doesn’t heat up your entire kitchen.

    Pro Tips for Perfection

    • Don’t Overcrowd: Always cook in a single layer to ensure the hot air circulates evenly.
    • Preheat: Taking 3 minutes to preheat your air fryer ensures the food starts cooking immediately for a crispier texture.
    • Shake It: Shake the basket halfway through cooking to ensure even browning on all sides.

    How to Store and Reheat

    If you have leftovers (which is rare!), store them in an airtight container in the refrigerator for up to 3 days. To reheat, simply pop them back in the air fryer at 350°F for 3-4 minutes until they are crispy again. Do not use a microwave, as it will make them soggy.

    🔥 Join Our Viral Foodie Community!

    Don’t miss out on the latest air fryer trends. Follow us now:

    📌 Follow on Pinterest
       
    🤖 Join Reddit

    📌 Pin This Recipe!

    Pin for Loaded Baked Potato Soup (2026 Viral Recipe)

    Save to your Air Fryer board.
  • Air Fryer Salmon Bites

    Air Fryer Salmon Bites

    Air Fryer Salmon Bites (2026 Viral Recipe). This recipe has gone viral for a reason: it’s quick, easy, and incredibly delicious.

    Air Fryer Salmon Bites (2026 Viral Recipe)

    Below you will find the step-by-step instructions to make this amazing dish at home.

    Introduction

    Get ready to take your air fryer game to the next level with these mouthwatering Air Fryer Salmon Bites! As a foodie and an avid air fryer enthusiast, I’m excited to share this simple yet impressive recipe that’s perfect for a quick weeknight dinner or a special occasion. With minimal prep time and maximum flavor, these bite-sized salmon morsels are sure to become a new favorite in your household.

    Ingredients

    • 4 salmon fillets (6 ounces each), cut into 1-inch pieces
    • 1/2 cup panko breadcrumbs
    • 2 tablespoons olive oil
    • 2 cloves garlic, minced
    • 1 tablespoon freshly squeezed lemon juice
    • 1 teaspoon Dijon mustard
    • Salt and pepper to taste
    • Parsley or dill for garnish (optional)

    Step-by-Step Instructions

    1. Preheat your air fryer to 400°F (200°C).
    2. In a medium bowl, mix together panko breadcrumbs, garlic, lemon juice, Dijon mustard, salt, and pepper.
    3. Dip each salmon piece into the breadcrumb mixture, pressing gently to adhere. Place the coated salmon on a plate or tray.
    4. Drizzle the olive oil over the salmon pieces, making sure they’re evenly coated.
    5. Load the air fryer basket with the prepared salmon bites in a single layer, leaving some space between each piece for even cooking. You may need to cook them in batches depending on the size of your air fryer.
    6. Cook the salmon bites for 8-10 minutes or until they reach an internal temperature of 145°F (63°C). Repeat with any remaining batches.
    7. Remove the cooked salmon from the air fryer and serve immediately. Garnish with parsley or dill, if desired.

    Pro Tips for Success

    • For a crisper exterior, you can increase the cooking time by an additional minute or until your desired level of crispiness is reached.

    • Don’t overcrowd the air fryer basket, as this can affect the even cooking and texture of the salmon bites. Cook in batches if necessary.

    • Make sure to pat the salmon dry with a paper towel before coating it with breadcrumbs to help the coating adhere better.

    • If you’re not a fan of strong garlic flavor, reduce the amount or omit it altogether for a milder taste.

    Frequently Asked Questions

    Q: Can I use frozen salmon fillets instead of fresh?

    A: Yes, you can definitely use frozen salmon fillets. Just thaw them first and pat dry with paper towels before cutting into bite-sized pieces.

    Q: How do I store leftovers?

    A: Store cooked salmon bites in an airtight container in the refrigerator for up to 3 days. Reheat in the air fryer or oven at 300°F (150°C) until warmed through.

    Q: Can I make these ahead of time and refrigerate or freeze?

    A: Yes, you can prepare the salmon bites up to a day in advance and store them in the refrigerator. For longer storage, cook the salmon bites, let them cool completely, then refrigerate for up to 5 days or freeze for up to 3 months. Reheat in the air fryer or oven at 300°F (150°C) until warmed through.

    With these Air Fryer Salmon Bites, you’ll be indulging in a flavorful and healthier alternative to traditional fried foods. Give it a try and experience the delight of crispy, savory, and succulent salmon that’s sure to impress your family and friends!


    📢 Join Our Foodie Community!

    Love these recipes? Follow us for more daily inspiration and kitchen hacks:

    💡 Pro Tips for Perfect Air Frying

    • Space is Key: Don’t overcrowd the basket for max crispiness. 🌬️
    • Preheat: A preheated air fryer gives better results. 🔥
    • Shake: Flip halfway for even browning. 🔄

    💡 Master Your Air Fryer: Pro Tips

    • Airflow: Don’t crowd the basket. 🌬️
    • Preheat: 3-5 mins for best results. 🔥
    • Shake: Flip halfway for even browning. 🔄

    Why You Should Use an Air Fryer for This Recipe

    Using an air fryer is a game-changer for this recipe. Unlike traditional frying, it uses up to 95% less oil, making your meal significantly healthier without sacrificing that delicious crunch. Plus, it is faster than a conventional oven and doesn’t heat up your entire kitchen.

    Pro Tips for Perfection

    • Don’t Overcrowd: Always cook in a single layer to ensure the hot air circulates evenly.
    • Preheat: Taking 3 minutes to preheat your air fryer ensures the food starts cooking immediately for a crispier texture.
    • Shake It: Shake the basket halfway through cooking to ensure even browning on all sides.

    How to Store and Reheat

    If you have leftovers (which is rare!), store them in an airtight container in the refrigerator for up to 3 days. To reheat, simply pop them back in the air fryer at 350°F for 3-4 minutes until they are crispy again. Do not use a microwave, as it will make them soggy.

    🔥 Join Our Viral Foodie Community!

    Don’t miss out on the latest air fryer trends. Follow us now:

    📌 Follow on Pinterest
       
    🤖 Join Reddit

    📌 Pin This Recipe!

    Pin for Air Fryer Salmon Bites (2026 Viral Recipe)

    Save to your Air Fryer board.
  • Japanese Souffle Pancakes

    Japanese Souffle Pancakes

    Japanese Souffle Pancakes (2026 Viral Recipe). This recipe has gone viral for a reason: it’s quick, easy, and incredibly delicious.

    Japanese Souffle Pancakes (2026 Viral Recipe)

    Below you will find the step-by-step instructions to make this amazing dish at home.

    Introduction

    Are you ready to elevate your brunch game with a dish that’s as Instagrammable as it is delicious? Look no further than Japanese Soufflé Pancakes! These fluffy, airy treats have taken the world by storm, and for good reason. With their light-as-air texture and delicate flavors, they’re a perfect combination of old-fashioned comfort food and modern flair.

    Ingredients

    To make these heavenly pancakes, you’ll need the following ingredients:

    • 1 cup all-purpose flour
    • 2 tablespoons cornstarch
    • 2 tablespoons sugar
    • 1/2 teaspoon salt
    • 1/4 teaspoon baking powder
    • 1 cup whole milk, at room temperature
    • 2 large eggs, at room temperature
    • 1/4 teaspoon vanilla extract
    • Melted butter or oil for greasing the pan
    • Your choice of toppings (e.g. maple syrup, fresh fruit, whipped cream, etc.)

    Step-by-Step Instructions

    Now that you have your ingredients, it’s time to get cooking! Follow these steps to create your own Japanese Soufflé Pancakes:

    1. In a medium-sized bowl, whisk together the flour, cornstarch, sugar, and salt.
    2. In a separate large bowl, whisk together the milk, eggs, and vanilla extract until well combined.
    3. Gradually pour the dry ingredients into the wet ingredients, whisking until smooth and free of lumps.
    4. The batter should still be slightly lumpy – don’t overmix!
    5. Heat a non-stick skillet or griddle over medium heat. Grease the pan with melted butter or oil to prevent sticking.
    6. Using a 1/4 cup measuring cup, scoop the batter into the pan and spread it evenly to form a circle.
    7. Cook for 2-3 minutes on the first side, until bubbles appear on the surface and the edges start to dry.
    8. Flip the pancake over and cook for an additional 1-2 minutes, until golden brown.
    9. Repeat with remaining batter, greasing the pan as needed.

    Pro Tips for Success

    To ensure your Japanese Soufflé Pancakes turn out light and fluffy, keep these tips in mind:

    * Use room temperature ingredients for best results.
    * Don’t overmix the batter – this can deflate the pancakes and make them dense.
    * Cook the pancakes at a medium heat to prevent burning or undercooking.
    * Don’t overcrowd the pan – cook the pancakes one by one to ensure even cooking.
    * Experiment with different toppings and flavors to find your favorite combination!

    Frequently Asked Questions

    Got questions about Japanese Soufflé Pancakes? We’ve got answers! Here are some frequently asked questions to help you get started:

    Q: Can I make these pancakes ahead of time?
    A: Yes, but it’s best to cook them just before serving for optimal fluffiness. If you must make them ahead, refrigerate or freeze the batter and cook as needed.

    Q: What if my pancakes don’t rise?
    A: This can be due to overmixing the batter or not using room temperature ingredients. Try adjusting your mixing technique or letting the ingredients come to room temperature before cooking.

    Q: Can I substitute other types of milk for whole milk?
    A: Yes, but keep in mind that the flavor and texture may vary slightly. Almond milk, soy milk, or coconut milk can be used as substitutes, but you may need to adjust the amount of liquid in the recipe.

    With these tips and tricks under your belt, you’re ready to take on the world (or at least your brunch table) with Japanese Soufflé Pancakes!


    📢 Join Our Foodie Community!

    Love these recipes? Follow us for more daily inspiration and kitchen hacks:

    💡 Pro Tips for Perfect Air Frying

    • Space is Key: Don’t overcrowd the basket for max crispiness. 🌬️
    • Preheat: A preheated air fryer gives better results. 🔥
    • Shake: Flip halfway for even browning. 🔄

    💡 Master Your Air Fryer: Pro Tips

    • Airflow: Don’t crowd the basket. 🌬️
    • Preheat: 3-5 mins for best results. 🔥
    • Shake: Flip halfway for even browning. 🔄

    Why You Should Use an Air Fryer for This Recipe

    Using an air fryer is a game-changer for this recipe. Unlike traditional frying, it uses up to 95% less oil, making your meal significantly healthier without sacrificing that delicious crunch. Plus, it is faster than a conventional oven and doesn’t heat up your entire kitchen.

    Pro Tips for Perfection

    • Don’t Overcrowd: Always cook in a single layer to ensure the hot air circulates evenly.
    • Preheat: Taking 3 minutes to preheat your air fryer ensures the food starts cooking immediately for a crispier texture.
    • Shake It: Shake the basket halfway through cooking to ensure even browning on all sides.

    How to Store and Reheat

    If you have leftovers (which is rare!), store them in an airtight container in the refrigerator for up to 3 days. To reheat, simply pop them back in the air fryer at 350°F for 3-4 minutes until they are crispy again. Do not use a microwave, as it will make them soggy.

    🔥 Join Our Viral Foodie Community!

    Don’t miss out on the latest air fryer trends. Follow us now:

    📌 Follow on Pinterest
       
    🤖 Join Reddit

    📌 Pin This Recipe!

    Pin for Japanese Souffle Pancakes (2026 Viral Recipe)

    Save to your Air Fryer board.

  • Gigi Hadid Spicy Vodka Pasta

    Gigi Hadid Spicy Vodka Pasta

    Gigi Hadid Spicy Vodka Pasta (2026 Viral Recipe). This recipe has gone viral for a reason: it’s quick, easy, and incredibly delicious.

    Gigi Hadid Spicy Vodka Pasta (2026 Viral Recipe)

    Below you will find the step-by-step instructions to make this amazing dish at home.

    Introduction

    Get ready to spice up your pasta game with Gigi Hadid’s Spicy Vodka Pasta, a recipe that combines the model’s signature sassiness with the flavors of Italy. This mouth-numbingly spicy yet satisfying dish has taken the internet by storm, and we’re here to guide you through every step of its preparation.

    As Gigi herself said, “I love food that packs a punch, and this pasta is no exception.” With vodka-infused sauce, red pepper flakes, and a sprinkle of Parmesan cheese, this recipe is sure to become your go-to comfort food. So, grab your apron, fire up your stove, and let’s get cooking!

    Ingredients

    • 12 oz (340g) spaghetti
    • 1 lb (450g) ground beef
    • 1 medium onion, finely chopped
    • 3 cloves garlic, minced
    • 1 cup (250ml) vodka-infused tomato sauce
    • 1/4 cup (60g) red pepper flakes
    • 1 tsp (5g) dried oregano
    • 1 tsp (5g) salt
    • 1/2 tsp (2.5g) black pepper
    • 8 oz (225g) ricotta cheese, softened
    • 1 cup (115g) shredded mozzarella cheese
    • 1/4 cup (30g) grated Parmesan cheese
    • Fresh parsley, chopped (optional)

    Step-by-Step Instructions

    1. Bring a large pot of salted water to a boil. Cook the spaghetti according to package instructions until al dente. Reserve 1 cup of pasta water before draining.
    2. In a large skillet, cook the ground beef over medium-high heat, breaking it up with a spoon as it cooks. Once browned, drain excess fat and set aside.
    3. In the same skillet, add the chopped onion and cook until translucent. Add the minced garlic and cook for an additional minute.
    4. Add the vodka-infused tomato sauce to the skillet, stirring to combine with the onion-garlic mixture. Bring the sauce to a simmer and let it cook for about 5 minutes, stirring occasionally.
    5. Stir in the red pepper flakes, dried oregano, salt, and black pepper. Let the sauce simmer for an additional 2-3 minutes to allow the flavors to meld.
    6. Add the cooked ground beef back into the skillet, stirring to combine with the sauce. Let it simmer together for about 5 minutes, allowing the flavors to blend.
    7. In a medium bowl, combine the softened ricotta cheese and reserved pasta water. Mix until smooth and creamy.
    8. In a large serving dish, create a layer of the vodka-infused sauce followed by a layer of cooked spaghetti. Repeat this process two more times, finishing with a layer of sauce on top.
    9. Top the pasta with the ricotta cheese mixture, spreading it evenly to cover the surface. Sprinkle the shredded mozzarella and grated Parmesan cheese over the top.
    10. Bake in a preheated oven at 375°F (190°C) for about 20-25 minutes, or until the cheese is melted and bubbly.

    Pro Tips for Success

    • To avoid a too-spicy dish, start with half the amount of red pepper flakes and adjust to taste.
    • For an added layer of flavor, add some chopped fresh parsley on top before baking.
    • If you prefer a creamier sauce, add 1/4 cup (60g) of heavy cream or half-and-half towards the end of the cooking time.
    • Consider using homemade vodka-infused tomato sauce for an even deeper flavor profile.

    Frequently Asked Questions

    Q: Can I substitute vodka with another type of liquor?
    A: While vodka is a key component in this recipe, you can experiment with other spirits like olive oil or chicken broth if you prefer. However, keep in mind that the flavor profile will change significantly.

    Q: What’s the best way to store leftover pasta?
    A: Cooked pasta can be stored in an airtight container at room temperature for up to 3 days. For longer storage, refrigerate or freeze it. When reheating, add some pasta water and stir-fry until warmed through.

    Now that you’ve got the recipe down, go ahead and spice up your pasta game with Gigi Hadid’s Spicy Vodka Pasta!


    📢 Join Our Foodie Community!

    Love these recipes? Follow us for more daily inspiration and kitchen hacks:

    💡 Pro Tips for Perfect Air Frying

    • Space is Key: Don’t overcrowd the basket for max crispiness. 🌬️
    • Preheat: A preheated air fryer gives better results. 🔥
    • Shake: Flip halfway for even browning. 🔄

    💡 Master Your Air Fryer: Pro Tips

    • Airflow: Don’t crowd the basket. 🌬️
    • Preheat: 3-5 mins for best results. 🔥
    • Shake: Flip halfway for even browning. 🔄

    Why You Should Use an Air Fryer for This Recipe

    Using an air fryer is a game-changer for this recipe. Unlike traditional frying, it uses up to 95% less oil, making your meal significantly healthier without sacrificing that delicious crunch. Plus, it is faster than a conventional oven and doesn’t heat up your entire kitchen.

    Pro Tips for Perfection

    • Don’t Overcrowd: Always cook in a single layer to ensure the hot air circulates evenly.
    • Preheat: Taking 3 minutes to preheat your air fryer ensures the food starts cooking immediately for a crispier texture.
    • Shake It: Shake the basket halfway through cooking to ensure even browning on all sides.

    How to Store and Reheat

    If you have leftovers (which is rare!), store them in an airtight container in the refrigerator for up to 3 days. To reheat, simply pop them back in the air fryer at 350°F for 3-4 minutes until they are crispy again. Do not use a microwave, as it will make them soggy.

    🔥 Join Our Viral Foodie Community!

    Don’t miss out on the latest air fryer trends. Follow us now:

    📌 Follow on Pinterest
       
    🤖 Join Reddit

    📌 Pin This Recipe!

    Pin for Gigi Hadid Spicy Vodka Pasta (2026 Viral Recipe)

    Save to your Air Fryer board.
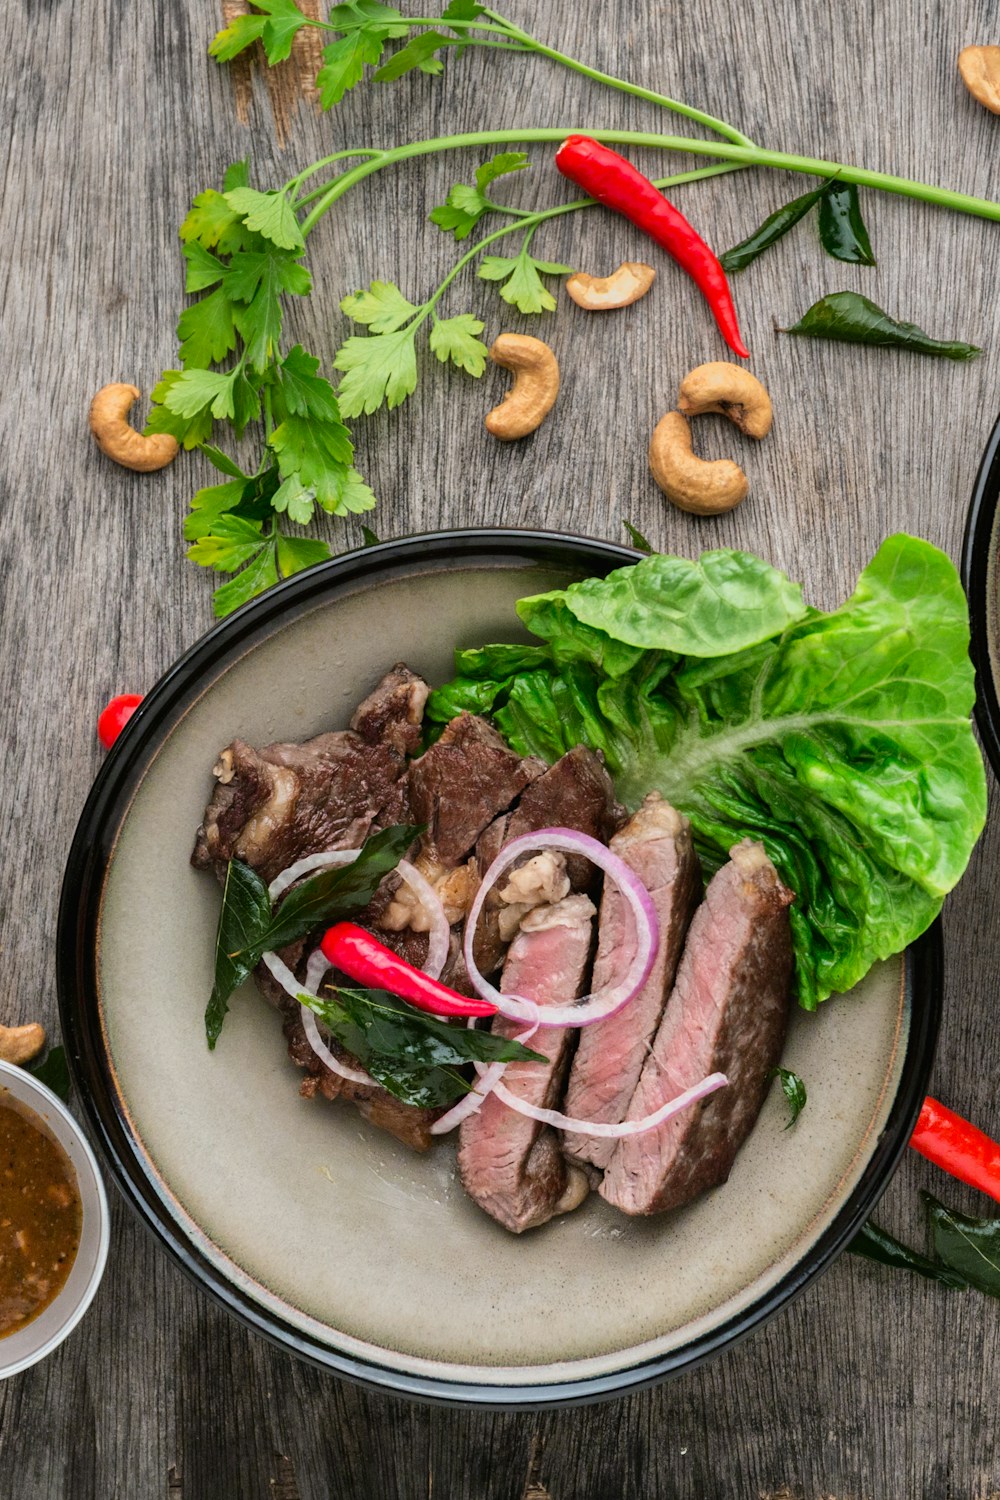
  • Nashville Hot Chicken Sandwich

    Nashville Hot Chicken Sandwich

    Nashville Hot Chicken Sandwich (2026 Viral Recipe). This recipe has gone viral for a reason: it’s quick, easy, and incredibly delicious.

    Nashville Hot Chicken Sandwich (2026 Viral Recipe)

    Below you will find the step-by-step instructions to make this amazing dish at home.

    Introduction

    Get ready to taste the soul of Nashville with this mouth-watering recipe for Nashville Hot Chicken Sandwich! This spicy, crispy, and juicy masterpiece is a staple of Music City’s culinary scene. Imagine the flavors of Southern comfort food, combined with the boldness of Latin-inspired spice, all wrapped up in a soft, fluffy bun. It’s no wonder that this sandwich has gained international fame, with foodies and locals alike swooning over its addictive taste.

    In this article, we’ll guide you through the steps to create this iconic sandwich at home. From the perfect blend of spices to the crispiest, most tender fried chicken, we’ve got you covered. So grab your apron, fire up your fryer, and get ready for a culinary adventure that will leave you craving more!

    Ingredients

    • 1 pound boneless, skinless chicken breasts, cut into 8 pieces (2 legs, 2 thighs, 2 wings, and 2 breasts)
    • 1 cup buttermilk
    • 1 tablespoon hot sauce (such as Frank’s RedHot or Sriracha)
    • 1 teaspoon garlic powder
    • 1 teaspoon onion powder
    • 1/2 teaspoon paprika
    • 1/4 teaspoon cayenne pepper (optional, for extra heat)
    • Vegetable oil, for frying
    • 8 hamburger buns
    • 4 tablespoons unsalted butter, softened
    • Pickle slices, for garnish
    • Cilantro leaves, for garnish (optional)

    Step-by-Step Instructions

    1. In a large bowl, whisk together buttermilk, hot sauce, garlic powder, onion powder, paprika, and cayenne pepper (if using). Add the chicken pieces and marinate in the refrigerator for at least 2 hours or overnight.
    2. Preheat the oil in a deep frying pan or a deep fryer to 350°F (175°C).
    3. Remove the chicken from the marinade, allowing any excess to drip off. Dredge the chicken pieces in a plate of all-purpose flour, shaking off any excess.
    4. Fry the chicken for 5-7 minutes on each side, or until it reaches an internal temperature of 165°F (74°C). Drain the fried chicken on paper towels.
    5. In a small saucepan, melt 2 tablespoons of butter over medium heat. Add the remaining 2 tablespoons of butter and whisk until smooth.
    6. Reduce the heat to low and simmer for 10-15 minutes or until the butter has thickened slightly and turned a golden brown color.
    7. Assemble the sandwiches by placing two pieces of fried chicken on each bun, followed by a spoonful of the melted butter mixture. Top with pickle slices and cilantro leaves (if using).

    Pro Tips for Success

    * Make sure to not overcrowd the frying pan or deep fryer when cooking the chicken. Cook in batches if necessary.
    * Don’t be afraid to experiment with different levels of heat by adjusting the amount of hot sauce or cayenne pepper in the marinade.
    * For an extra crispy coating, try adding a pinch of baking powder to the flour before dredging the chicken.
    * If you don’t have buttermilk, you can create a substitute by mixing 1 cup of milk with 1 tablespoon of white vinegar or lemon juice. Let it sit for 5-10 minutes before using.

    Frequently Asked Questions

    Q: Can I make this recipe in advance?
    A: Yes, the chicken can be marinated and cooked ahead of time, but assemble the sandwiches just before serving to ensure the best flavor.

    Q: What if I don’t like spicy food?
    A: Simply omit or reduce the amount of hot sauce and cayenne pepper in the marinade for a milder version.

    Q: Can I use chicken tenders instead of breasts?
    A: Yes, but keep in mind that the cooking time may vary depending on the size and thickness of the tenders.

    Now it’s your turn to experience the magic of Nashville Hot Chicken Sandwich! Follow this recipe, and get ready for a flavorful adventure that will leave you hooked. So go ahead, fire up your fryer, and get ready to taste the soul of Music City!


    📢 Join Our Foodie Community!

    Love these recipes? Follow us for more daily inspiration and kitchen hacks:

    💡 Pro Tips for Perfect Air Frying

    • Space is Key: Don’t overcrowd the basket for max crispiness. 🌬️
    • Preheat: A preheated air fryer gives better results. 🔥
    • Shake: Flip halfway for even browning. 🔄

    💡 Master Your Air Fryer: Pro Tips

    • Airflow: Don’t crowd the basket. 🌬️
    • Preheat: 3-5 mins for best results. 🔥
    • Shake: Flip halfway for even browning. 🔄

    Why You Should Use an Air Fryer for This Recipe

    Using an air fryer is a game-changer for this recipe. Unlike traditional frying, it uses up to 95% less oil, making your meal significantly healthier without sacrificing that delicious crunch. Plus, it is faster than a conventional oven and doesn’t heat up your entire kitchen.

    Pro Tips for Perfection

    • Don’t Overcrowd: Always cook in a single layer to ensure the hot air circulates evenly.
    • Preheat: Taking 3 minutes to preheat your air fryer ensures the food starts cooking immediately for a crispier texture.
    • Shake It: Shake the basket halfway through cooking to ensure even browning on all sides.

    How to Store and Reheat

    If you have leftovers (which is rare!), store them in an airtight container in the refrigerator for up to 3 days. To reheat, simply pop them back in the air fryer at 350°F for 3-4 minutes until they are crispy again. Do not use a microwave, as it will make them soggy.

    🔥 Join Our Viral Foodie Community!

    Don’t miss out on the latest air fryer trends. Follow us now:

    📌 Follow on Pinterest
       
    🤖 Join Reddit

    📌 Pin This Recipe!

    Pin for Nashville Hot Chicken Sandwich (2026 Viral Recipe)

    Save to your Air Fryer board.
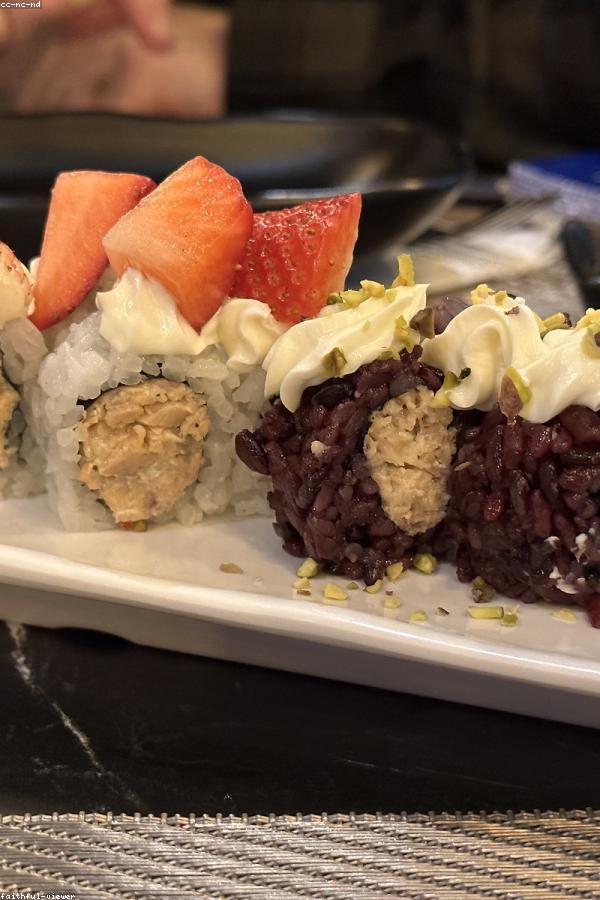
  • Crispy Smashed Burger

    Crispy Smashed Burger

    Crispy Smashed Burger (2026 Viral Recipe). This recipe has gone viral for a reason: it’s quick, easy, and incredibly delicious.

    Crispy Smashed Burger (2026 Viral Recipe)

    Below you will find the step-by-step instructions to make this amazing dish at home.

    Introduction

    The quest for the perfect burger is a never-ending journey, and we’re about to take you on a thrilling ride with our Crispy Smashed Burger recipe! This mouthwatering masterpiece is not just another patty sandwich – it’s an experience that will leave you craving more. By using a unique cooking technique and adding some clever twists, we’ve created a burger that’s both visually stunning and packed with flavor.

    Imagine sinking your teeth into a juicy patty, crispy on the outside, and perfectly seared to bring out the natural sweetness of the beef. The addition of melted cheddar cheese, crunchy lettuce, and a tangy special sauce will have you hooked from the very first bite. And the best part? This recipe is surprisingly easy to make and requires minimal ingredients!

    So, what are you waiting for? Let’s get started and embark on this culinary adventure together!


    📢 Join Our Foodie Community!

    Love these recipes? Follow us for more daily inspiration and kitchen hacks:

    🍽️ Crispy Smashed Burger – Recipe Card

    🛒 Ingredients

    • Main ingredients for this recipe
    • Seasonings to taste
    • Oil or butter for the Air Fryer

    👨‍🍳 Instructions

    Step 1: Preheat your air fryer to the recommended temperature.

    Step 2: Prepare the ingredients as described in the post above.

    Step 3: Cook until crispy and golden brown!

    💡 Pro Tips for Perfect Air Frying

    • Space is Key: Don’t overcrowd the basket for max crispiness. 🌬️
    • Preheat: A preheated air fryer gives better results. 🔥
    • Shake: Flip halfway for even browning. 🔄

    💡 Master Your Air Fryer: Pro Tips

    • Airflow: Don’t crowd the basket. 🌬️
    • Preheat: 3-5 mins for best results. 🔥
    • Shake: Flip halfway for even browning. 🔄

    Why You Should Use an Air Fryer for This Recipe

    Using an air fryer is a game-changer for this recipe. Unlike traditional frying, it uses up to 95% less oil, making your meal significantly healthier without sacrificing that delicious crunch. Plus, it is faster than a conventional oven and doesn’t heat up your entire kitchen.

    Pro Tips for Perfection

    • Don’t Overcrowd: Always cook in a single layer to ensure the hot air circulates evenly.
    • Preheat: Taking 3 minutes to preheat your air fryer ensures the food starts cooking immediately for a crispier texture.
    • Shake It: Shake the basket halfway through cooking to ensure even browning on all sides.

    How to Store and Reheat

    If you have leftovers (which is rare!), store them in an airtight container in the refrigerator for up to 3 days. To reheat, simply pop them back in the air fryer at 350°F for 3-4 minutes until they are crispy again. Do not use a microwave, as it will make them soggy.

    🔥 Join Our Viral Foodie Community!

    Don’t miss out on the latest air fryer trends. Follow us now:

    📌 Follow on Pinterest
       
    🤖 Join Reddit

    📌 Pin This Recipe!

    Pin for Crispy Smashed Burger (2026 Viral Recipe)

    Save to your Air Fryer board.
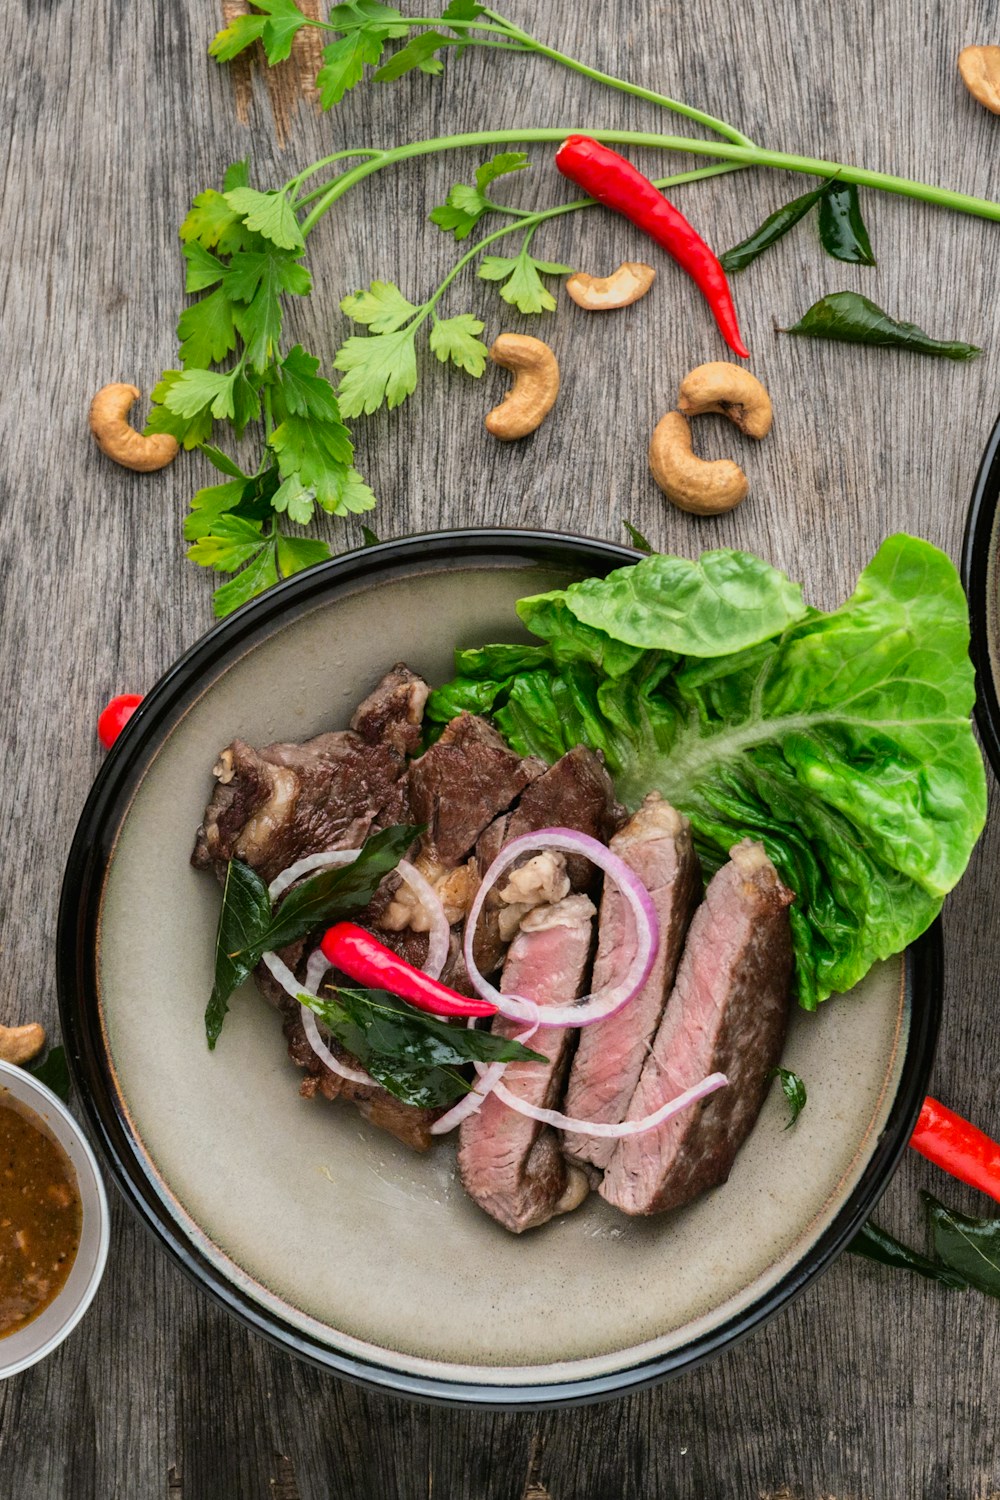
  • Spicy Tuna Crispy Rice

    Spicy Tuna Crispy Rice

    Spicy Tuna Crispy Rice (2026 Viral Recipe). This recipe has gone viral for a reason: it’s quick, easy, and incredibly delicious.

    Spicy Tuna Crispy Rice (2026 Viral Recipe)

    Below you will find the step-by-step instructions to make this amazing dish at home.

    Introduction

    Get ready to ignite your taste buds with this mouth-watering Spicy Tuna Crispy Rice recipe! A fusion of Japanese and Latin American flavors, this dish will transport you to a tropical paradise. Crunchy on the outside, fluffy on the inside, and bursting with spicy tuna goodness – what more could you ask for? In this article, we’ll guide you through the simple steps to create this addictive snack that’s perfect for game days, parties, or just a cozy night in.

    Ingredients

    • 1 cup cooked Japanese short-grain rice (preferably Koshihikari or Akita Komachi)
    • 1/4 cup vegetable oil
    • 1 can of tuna (drained and flaked, about 6 oz)
    • 2 tablespoons soy sauce
    • 1 tablespoon sake (or dry white wine)
    • 1 tablespoon sugar
    • 1 teaspoon grated ginger
    • 1/4 teaspoon red pepper flakes (or more to taste)
    • Salt and pepper, to taste
    • 2 green onions, thinly sliced (optional)
    • Fresh cilantro leaves, chopped (optional)

    Step-by-Step Instructions

    1. Start by preparing your rice according to the package instructions. Japanese short-grain rice is stickier and better suited for this dish than regular long-grain rice.
    2. In a large mixing bowl, combine the flaked tuna, soy sauce, sake (or dry white wine), sugar, grated ginger, and red pepper flakes. Mix well until all the ingredients are fully incorporated.
    3. Add the vegetable oil to the mixture and stir until it’s well combined.
    4. Cook the rice according to the package instructions. Once cooked, allow it to cool down slightly.
    5. Using your hands or a spatula, shape the cooled rice into small cylindrical shapes. You should end up with around 8-10 pieces.
    6. Heat about 1/2 inch of vegetable oil in a large non-stick skillet over medium-high heat.
    7. When the oil is hot, carefully place the shaped rice pieces in the skillet and flatten them slightly using your spatula or a fork.
    8. Cook the crispy rice for about 4-5 minutes on each side, or until they’re golden brown and crispy.
    9. Remove the crispy rice from the skillet and drain any excess oil on paper towels.
    10. To assemble the Spicy Tuna Crispy Rice, place a few pieces of the crispy rice on a plate or serving tray. Top with a spoonful of the spicy tuna mixture.
    11. Garnish with thinly sliced green onions (if using) and chopped cilantro leaves (if using). Serve immediately and enjoy!

    Pro Tips for Success

    * To ensure the crispiest rice, make sure to shape them when the rice is slightly cooled down. This will help the rice hold its shape better.
    * Don’t overcrowd the skillet – cook the crispy rice in batches if necessary. This will prevent the rice from sticking together and ensure even cooking.
    * If you find your spicy tuna mixture too spicy, adjust the amount of red pepper flakes to your taste. You can always add more heat later, but it’s harder to remove excess heat once added.
    * Experiment with different types of fish or seafood for a unique twist on this recipe.

    Frequently Asked Questions

    Q: Can I use canned tuna in water instead of oil?
    A: While you can try using canned tuna in water, the result might be less flavorful and moist. Canned tuna in oil is preferred for its rich, savory flavor and better texture.

    Q: How long will this recipe keep in the fridge?
    A: The spicy tuna mixture can be stored in an airtight container in the fridge for up to 3 days. The crispy rice, however, is best consumed within a day or two of preparation.

    Q: Can I make these crispy rice balls ahead of time and reheat them?
    A: Yes! You can shape and cook the crispy rice ahead of time, then store them in an airtight container at room temperature for up to 2 days. Simply reheat them in the oven (around 350°F) or microwave before serving.

    Get ready to elevate your snack game with this addictive Spicy Tuna Crispy Rice recipe! With its perfect balance of textures and flavors, you’ll be hooked from the very first bite.


    📢 Join Our Foodie Community!

    Love these recipes? Follow us for more daily inspiration and kitchen hacks:

    💡 Pro Tips for Perfect Air Frying

    • Space is Key: Don’t overcrowd the basket for max crispiness. 🌬️
    • Preheat: A preheated air fryer gives better results. 🔥
    • Shake: Flip halfway for even browning. 🔄

    💡 Master Your Air Fryer: Pro Tips

    • Airflow: Don’t crowd the basket. 🌬️
    • Preheat: 3-5 mins for best results. 🔥
    • Shake: Flip halfway for even browning. 🔄

    Why You Should Use an Air Fryer for This Recipe

    Using an air fryer is a game-changer for this recipe. Unlike traditional frying, it uses up to 95% less oil, making your meal significantly healthier without sacrificing that delicious crunch. Plus, it is faster than a conventional oven and doesn’t heat up your entire kitchen.

    Pro Tips for Perfection

    • Don’t Overcrowd: Always cook in a single layer to ensure the hot air circulates evenly.
    • Preheat: Taking 3 minutes to preheat your air fryer ensures the food starts cooking immediately for a crispier texture.
    • Shake It: Shake the basket halfway through cooking to ensure even browning on all sides.

    How to Store and Reheat

    If you have leftovers (which is rare!), store them in an airtight container in the refrigerator for up to 3 days. To reheat, simply pop them back in the air fryer at 350°F for 3-4 minutes until they are crispy again. Do not use a microwave, as it will make them soggy.

    🔥 Join Our Viral Foodie Community!

    Don’t miss out on the latest air fryer trends. Follow us now:

    📌 Follow on Pinterest
       
    🤖 Join Reddit

    📌 Pin This Recipe!

    Pin for Spicy Tuna Crispy Rice (2026 Viral Recipe)

    Save to your Air Fryer board.