Author: Chef Sarah

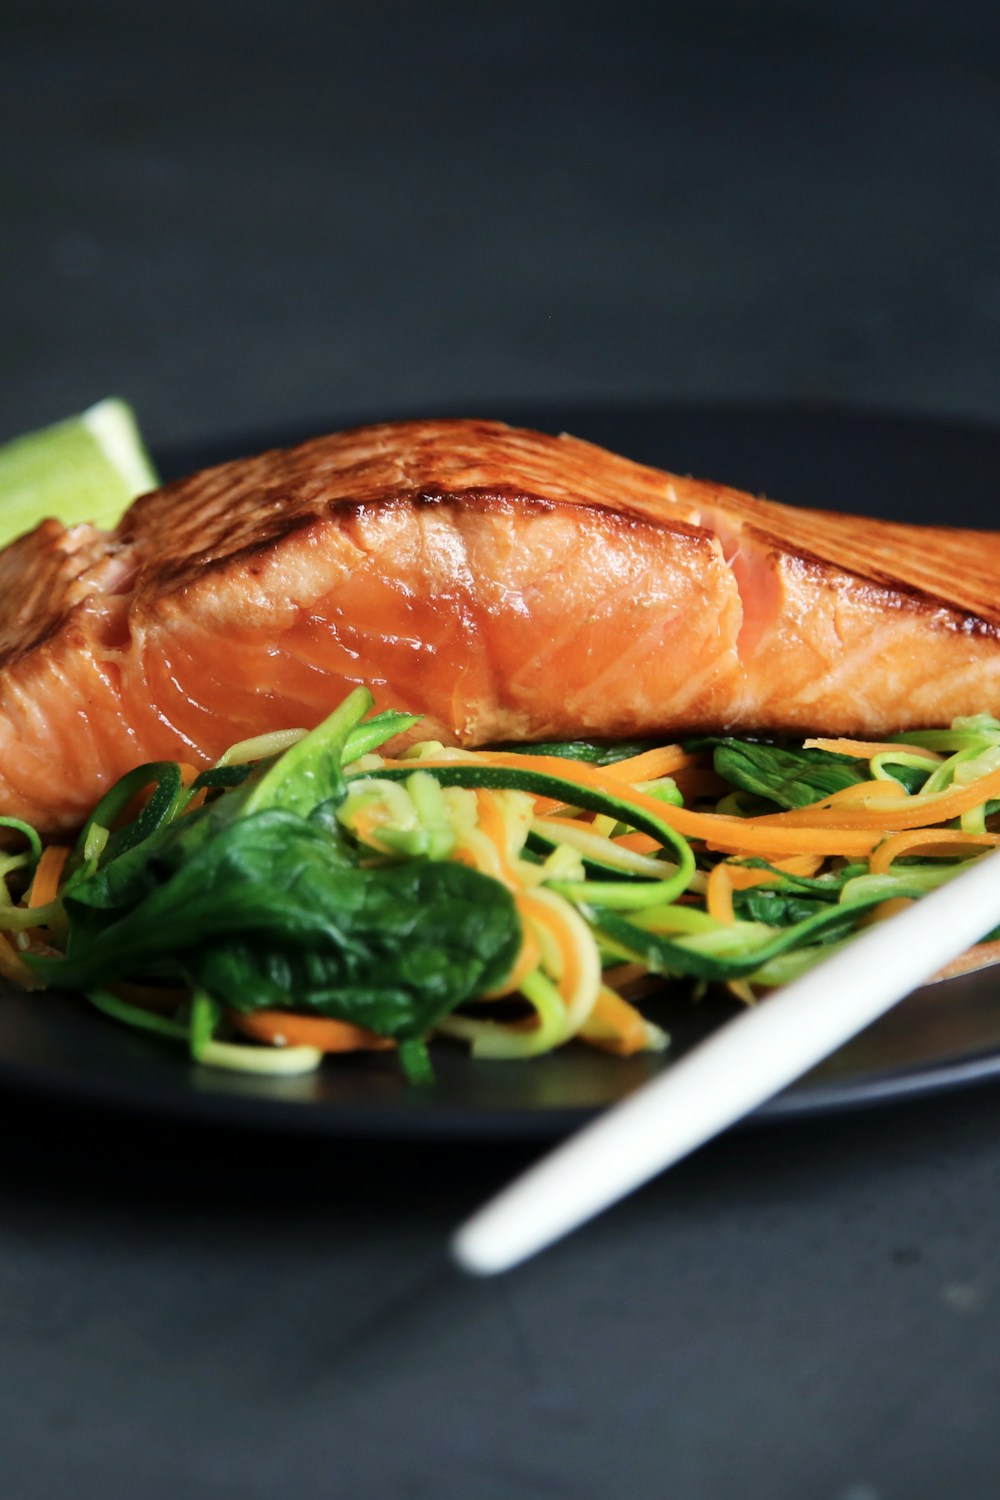
  • Pan Seared Tuscan Butter Salmon

    Pan Seared Tuscan Butter Salmon

    Pan Seared Tuscan Butter Salmon (2026 Viral Recipe). This recipe has gone viral for a reason: it’s quick, easy, and incredibly delicious.
    Pan Seared Tuscan Butter Salmon (2026 Viral Recipe)

    Below you will find the step-by-step instructions to make this amazing dish at home.

    Introduction

    Indulge in the rich flavors of Tuscany with this delectable Pan Seared Tuscan Butter Salmon recipe! As the sun sets over the rolling hills of Italy, the aroma of buttery goodness wafts through the air, beckoning you to take a bite. This mouthwatering dish is sure to become a staple in your kitchen, impressing even the most discerning palates.

    Ingredients

    • 4 salmon fillets (6 oz each)
    • 1/4 cup Tuscan butter (or regular butter with 1 tsp dried thyme and 1 tsp chopped fresh parsley)
    • 2 tbsp olive oil
    • 2 cloves garlic, minced
    • 1 lemon, zested and juiced
    • 1/4 cup white wine (optional)
    • Salt and pepper to taste
    • Fresh parsley leaves for garnish

    Step-by-Step Instructions

    1. **Preheat your skillet**: Heat a large cast-iron or stainless steel skillet over medium-high heat until it reaches 400°F (200°C).
    2. **Season the salmon**: Sprinkle both sides of the salmon fillets with salt and pepper.
    3. **Add olive oil**: Carefully place 1 tablespoon of olive oil in the preheated skillet, allowing it to coat the bottom evenly.
    4. **Sear the salmon**: Place the salmon fillets in the skillet, skin side up (if they have skin). Cook for 2-3 minutes on the first side, or until a nice crust forms. Flip the salmon and cook for an additional 2-3 minutes, or until cooked through to your desired level of doneness.
    5. **Melt Tuscan butter**: Remove the skillet from the heat and add the Tuscan butter (or regular butter with thyme and parsley). Let it melt and infuse with the aromatic flavors.
    6. **Add aromatics**: Stir in the minced garlic, lemon zest, and lemon juice. If using white wine, add it to the skillet and stir to combine.
    7. **Simmer and reduce**: Reduce the heat to medium-low and let the butter mixture simmer for 2-3 minutes, allowing the flavors to meld together and the sauce to slightly thicken.
    8. **Serve**: Place the cooked salmon fillets on a serving plate, spoon some of the Tuscan butter sauce over them, and garnish with fresh parsley leaves.

    Pro Tips for Success

    * Make sure your skillet is hot enough before adding the olive oil to prevent the salmon from sticking.
    * Don’t overcrowd the skillet; cook the salmon fillets in batches if necessary.
    * For a crispy crust on the salmon, make sure it’s at room temperature before cooking.
    * If you prefer a more golden-brown crust, add 1-2 tablespoons of butter or olive oil to the skillet with the salmon.
    * Experiment with different herbs and spices in the Tuscan butter sauce to suit your taste.

    Frequently Asked Questions

    Q: Can I use other types of fish instead of salmon?
    A: Absolutely! This recipe works well with other fatty fish like tilapia, cod, or mahi-mahi. Just adjust the cooking time according to their thickness and your desired level of doneness.

    Q: How do I store leftover Pan Seared Tuscan Butter Salmon?
    A: Refrigerate leftovers in an airtight container for up to 3 days or freeze for up to 2 months. Reheat gently in the skillet with some added butter or olive oil, if needed.

    Indulge in this mouthwatering Pan Seared Tuscan Butter Salmon recipe and transport your taste buds straight to the Tuscan countryside!


    📢 Join Our Foodie Community!

    Love these recipes? Follow us for more daily inspiration and kitchen hacks:

    💡 Pro Tips for Perfect Air Frying

    • Space is Key: Don’t overcrowd the basket for max crispiness. 🌬️
    • Preheat: A preheated air fryer gives better results. 🔥
    • Shake: Flip halfway for even browning. 🔄

    💡 Master Your Air Fryer: Pro Tips

    • Airflow: Don’t crowd the basket. 🌬️
    • Preheat: 3-5 mins for best results. 🔥
    • Shake: Flip halfway for even browning. 🔄

    Why You Should Use an Air Fryer for This Recipe

    Using an air fryer is a game-changer for this recipe. Unlike traditional frying, it uses up to 95% less oil, making your meal significantly healthier without sacrificing that delicious crunch. Plus, it is faster than a conventional oven and doesn’t heat up your entire kitchen.

    Pro Tips for Perfection

    • Don’t Overcrowd: Always cook in a single layer to ensure the hot air circulates evenly.
    • Preheat: Taking 3 minutes to preheat your air fryer ensures the food starts cooking immediately for a crispier texture.
    • Shake It: Shake the basket halfway through cooking to ensure even browning on all sides.

    How to Store and Reheat

    If you have leftovers (which is rare!), store them in an airtight container in the refrigerator for up to 3 days. To reheat, simply pop them back in the air fryer at 350°F for 3-4 minutes until they are crispy again. Do not use a microwave, as it will make them soggy.

    🔥 Join Our Viral Foodie Community!

    Don’t miss out on the latest air fryer trends. Follow us now:

    📌 Follow on Pinterest
       
    🤖 Join Reddit

    📌 Pin This Recipe!

    Pin for Pan Seared Tuscan Butter Salmon (2026 Viral Recipe)

    Save to your Air Fryer board.
  • Cinnamon Roll Breakfast Casserole

    Cinnamon Roll Breakfast Casserole

    Cinnamon Roll Breakfast Casserole (2026 Viral Recipe). This recipe has gone viral for a reason: it’s quick, easy, and incredibly delicious.

    Cinnamon Roll Breakfast Casserole (2026 Viral Recipe)

    Below you will find the step-by-step instructions to make this amazing dish at home.

    Introduction

    Are you tired of the same old breakfast routine? Wake up to a sweet surprise with our Cinnamon Roll Breakfast Casserole! This mouthwatering dish combines the warmth of cinnamon rolls with the ease of a morning casserole. Imagine sinking your teeth into a fluffy, buttery blanket of goodness, infused with the comforting aroma of freshly baked cinnamon. It’s the perfect way to start your day, and it’s sure to become a family favorite.

    Ingredients

    • 1 (16 oz) package of sweet bread dough (homemade or store-bought)
    • 1/4 cup granulated sugar
    • 1/2 teaspoon ground cinnamon
    • 1/4 teaspoon ground nutmeg
    • 1/8 teaspoon salt
    • 1/2 cup unsalted butter, melted
    • 2 large eggs
    • 1 cup heavy cream
    • 1 cup milk
    • 1 teaspoon vanilla extract
    • Fresh fruit and whipped cream for topping (optional)

    Step-by-Step Instructions

    1. Preheat your oven to 350°F (180°C). Grease a 9×13-inch baking dish with butter or cooking spray.
    2. Roll out the sweet bread dough on a floured surface to about 1/4 inch thickness. Brush the dough with the melted butter, making sure to cover the entire surface.
    3. In a small bowl, whisk together the granulated sugar, ground cinnamon, nutmeg, and salt. Sprinkle this mixture evenly over the dough, leaving a 1-inch border around the edges.
    4. Roll the dough into a tight log, starting from one of the long sides. Cut the log into 12-15 equal pieces.
    5. In a large bowl, whisk together the eggs, heavy cream, milk, and vanilla extract until smooth.
    6. Add the cinnamon roll pieces to the wet ingredients and toss until they’re evenly coated.
    7. Pour the mixture into the prepared baking dish and spread it out evenly.
    8. Cover the dish with aluminum foil and bake for 30 minutes. Remove the foil and continue baking for an additional 20-25 minutes, or until a golden brown crust forms on top.
    9. Remove the casserole from the oven and let it cool for 10-15 minutes before serving. If desired, top with fresh fruit and whipped cream.

    Pro Tips for Success

    • Use a high-quality sweet bread dough that’s designed to rise well, as this will give your casserole the best texture.
    • To ensure even cooking, make sure the cinnamon roll pieces are evenly coated with the wet ingredients and spread out in a single layer.
    • If you’re short on time, you can prepare the casserole the night before and bake it in the morning. Just keep it refrigerated overnight and let it come to room temperature before baking.
    • Experiment with different toppings, such as chopped nuts or chocolate chips, to give your casserole a unique twist.

    Frequently Asked Questions

    If you’re new to making cinnamon roll casseroles, you might have some questions. Here are the answers:

    • Q: Can I use store-bought cinnamon rolls instead of making my own dough? A: Yes! Simply thaw the rolls according to package instructions and cut them into bite-sized pieces before adding them to the casserole.
    • Q: How do I keep the casserole fresh for a longer period? A: Let it cool completely before refrigerating or freezing. When reheating, make sure to cover it with foil to prevent drying out.
    • Q: Can I customize this recipe for a specific diet or preference? A: Absolutely! You can substitute the heavy cream with non-dairy alternatives and use egg substitutes if needed. Additionally, you can adjust the amount of sugar to suit your taste.

    With these simple steps and pro tips, you’ll be well on your way to creating a Cinnamon Roll Breakfast Casserole that’s sure to impress your family and friends. So go ahead, get baking, and start your day off with a sweet and satisfying treat!


    📢 Join Our Foodie Community!

    Love these recipes? Follow us for more daily inspiration and kitchen hacks:

    💡 Pro Tips for Perfect Air Frying

    • Space is Key: Don’t overcrowd the basket for max crispiness. 🌬️
    • Preheat: A preheated air fryer gives better results. 🔥
    • Shake: Flip halfway for even browning. 🔄

    💡 Master Your Air Fryer: Pro Tips

    • Airflow: Don’t crowd the basket. 🌬️
    • Preheat: 3-5 mins for best results. 🔥
    • Shake: Flip halfway for even browning. 🔄

    Why You Should Use an Air Fryer for This Recipe

    Using an air fryer is a game-changer for this recipe. Unlike traditional frying, it uses up to 95% less oil, making your meal significantly healthier without sacrificing that delicious crunch. Plus, it is faster than a conventional oven and doesn’t heat up your entire kitchen.

    Pro Tips for Perfection

    • Don’t Overcrowd: Always cook in a single layer to ensure the hot air circulates evenly.
    • Preheat: Taking 3 minutes to preheat your air fryer ensures the food starts cooking immediately for a crispier texture.
    • Shake It: Shake the basket halfway through cooking to ensure even browning on all sides.

    How to Store and Reheat

    If you have leftovers (which is rare!), store them in an airtight container in the refrigerator for up to 3 days. To reheat, simply pop them back in the air fryer at 350°F for 3-4 minutes until they are crispy again. Do not use a microwave, as it will make them soggy.

    🔥 Join Our Viral Foodie Community!

    Don’t miss out on the latest air fryer trends. Follow us now:

    📌 Follow on Pinterest
       
    🤖 Join Reddit

    📌 Pin This Recipe!

    Pin for Cinnamon Roll Breakfast Casserole (2026 Viral Recipe)

    Save to your Air Fryer board.
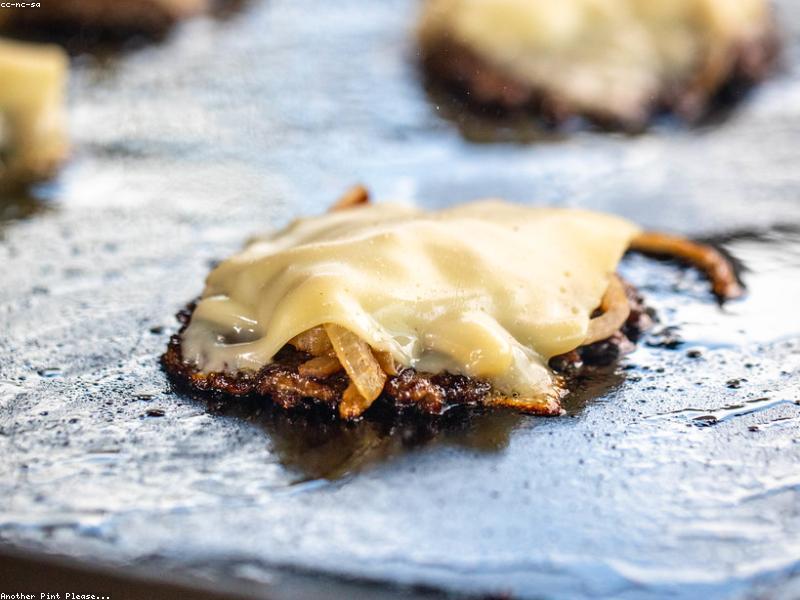
  • Big Mac Smash Tacos

    Big Mac Smash Tacos

    Big Mac Smash Tacos (2026 Viral Recipe). This recipe has gone viral for a reason: it’s quick, easy, and incredibly delicious.

    Big Mac Smash Tacos (2026 Viral Recipe)

    Below you will find the step-by-step instructions to make this amazing dish at home.

    Introduction

    Get ready to revolutionize your taco game with a twist that will make your taste buds do the cha cha slide – Big Mac Smash Tacos! Yes, you read that right. We’re talkin’ about takin’ the iconic Big Mac sandwich and turnin’ it into a crispy, cheesy, meaty masterpiece of a taco. It’s a game-changer, folks!

    Think about it: the perfect blend of juicy beef, tangy special sauce, melted American cheese, and crunchy lettuce on top of a toasted bun. Now, imagine that same magic in a taco shell. It’s a match made in culinary heaven! So, without further ado, let’s dive into the world of Big Mac Smash Tacos.

    Ingredients

    • 1 pound ground beef (80/20 lean to fat ratio)
    • 1 tablespoon vegetable oil
    • 2 tablespoons white onion, finely chopped
    • 2 cloves garlic, minced
    • 1 teaspoon paprika
    • 1 teaspoon salt
    • 1/4 teaspoon black pepper
    • 8 hamburger buns (for the “bun” part of the taco)
    • 16-20 corn tortillas (for the taco shells)
    • Special sauce (see below for recipe)
    • Cheese slices (American or cheddar work well)
    • Lettuce, shredded
    • Jalapeños, sliced (optional)
    • Tomatoes, diced (optional)

    **Special Sauce Recipe:**

    * 1 cup mayonnaise
    * 1/4 cup sweet pickle relish
    * 1 tablespoon yellow mustard
    * 1 teaspoon vinegar
    * 1/2 teaspoon paprika
    * Salt and pepper to taste

    Combine all ingredients in a bowl, whisk until smooth, and refrigerate for at least an hour before using.

    Step-by-Step Instructions

    1. **Brown the Beef:** Preheat your grill or grill pan to medium-high heat. Form the ground beef into 8 equal-sized patties. Season with paprika, salt, and pepper. Grill the patties for about 3-4 minutes per side, or until they reach your desired level of doneness.

    2. **Prepare the “Buns”:** Slice the hamburger buns in half lengthwise. You’ll be using these as the foundation for your tacos.

    3. **Assemble the Tacos:** Warm the tortillas by wrapping them in a damp paper towel and microwaving for 20-30 seconds. Place a cooked beef patty onto each tortilla, followed by a few slices of cheese, some shredded lettuce, and a dollop of special sauce (see above). Top with a “bun” half, pressing gently to adhere the filling.

    4. **Add the Crunch:** Sprinkle crushed jalapeños or diced tomatoes on top for added flavor and texture (if using).

    5. **Serve & Enjoy:** Serve your Big Mac Smash Tacos immediately, garnished with additional lettuce, cheese, or any other toppings you desire.

    Pro Tips for Success

    * Use high-quality ingredients: Fresh produce and real mayonnaise will elevate the flavor of your tacos.
    * Don’t overdo it: Keep the filling balanced – too much cheese or special sauce can overpower the beef.
    * Experiment with flavors: Add diced onions, pickle slices, or even crispy bacon to give your tacos a unique twist.

    Frequently Asked Questions

    **Q:** Can I use leftover Big Mac buns?
    A:** Yes! Just be sure they’re fresh and not stale. You can also toast them in the oven for a few minutes to revive their texture.

    **Q:** Is it possible to make these tacos vegan or vegetarian?
    A:** Absolutely! Substitute the beef with plant-based alternatives like black beans, mushrooms, or textured vegetable protein. You can also swap out the cheese for dairy-free or vegan options.

    **Q:** How do I store leftovers?
    A:** Store the assembled tacos in an airtight container at room temperature for up to 24 hours. Reheat gently before serving.

    There you have it – Big Mac Smash Tacos, the ultimate fusion of flavors and textures. Get ready to impress your friends and family with this game-changing recipe!


    📢 Join Our Foodie Community!

    Love these recipes? Follow us for more daily inspiration and kitchen hacks:

    💡 Pro Tips for Perfect Air Frying

    • Space is Key: Don’t overcrowd the basket for max crispiness. 🌬️
    • Preheat: A preheated air fryer gives better results. 🔥
    • Shake: Flip halfway for even browning. 🔄

    💡 Master Your Air Fryer: Pro Tips

    • Airflow: Don’t crowd the basket. 🌬️
    • Preheat: 3-5 mins for best results. 🔥
    • Shake: Flip halfway for even browning. 🔄

    Why You Should Use an Air Fryer for This Recipe

    Using an air fryer is a game-changer for this recipe. Unlike traditional frying, it uses up to 95% less oil, making your meal significantly healthier without sacrificing that delicious crunch. Plus, it is faster than a conventional oven and doesn’t heat up your entire kitchen.

    Pro Tips for Perfection

    • Don’t Overcrowd: Always cook in a single layer to ensure the hot air circulates evenly.
    • Preheat: Taking 3 minutes to preheat your air fryer ensures the food starts cooking immediately for a crispier texture.
    • Shake It: Shake the basket halfway through cooking to ensure even browning on all sides.

    How to Store and Reheat

    If you have leftovers (which is rare!), store them in an airtight container in the refrigerator for up to 3 days. To reheat, simply pop them back in the air fryer at 350°F for 3-4 minutes until they are crispy again. Do not use a microwave, as it will make them soggy.

    🔥 Join Our Viral Foodie Community!

    Don’t miss out on the latest air fryer trends. Follow us now:

    📌 Follow on Pinterest
       
    🤖 Join Reddit

    📌 Pin This Recipe!

    Pin for Big Mac Smash Tacos (2026 Viral Recipe)

    Save to your Air Fryer board.

  • Crack Chicken Noodle Soup

    Crack Chicken Noodle Soup

    Crack Chicken Noodle Soup (2026 Viral Recipe). This recipe has gone viral for a reason: it’s quick, easy, and incredibly delicious.

    Crack Chicken Noodle Soup (2026 Viral Recipe)

    Below you will find the step-by-step instructions to make this amazing dish at home.

    Introduction

    Get ready to crack open a pot of comfort with our mouthwatering Crack Chicken Noodle Soup recipe! This creamy, dreamy soup is a twist on the classic chicken noodle variety, and it’s packed with flavor. The secret ingredient? A special type of pasta that adds an extra layer of texture and satisfaction. Whether you’re looking for a quick weeknight dinner or a cozy weekend meal, this recipe has got you covered.

    Ingredients

    • 1 pound boneless, skinless chicken breast or thighs, cut into bite-sized pieces
    • 4 cups of chicken broth (low-sodium)
    • 1 medium onion, diced
    • 3 cloves of garlic, minced
    • 1 cup of small pasta shapes (such as bow-tie or fusilli)
    • 1 cup of frozen peas and carrots
    • 1 teaspoon dried thyme
    • 1/2 teaspoon paprika
    • Salt and pepper, to taste
    • 2 tablespoons olive oil
    • 1/4 cup of heavy cream (optional)

    Step-by-Step Instructions

    1. In a large pot or Dutch oven, heat the olive oil over medium-high heat. Add the diced onion and cook until translucent, about 5 minutes.

    2. Add the minced garlic and cook for an additional minute, stirring constantly to prevent burning.

    3. Add the chicken to the pot and cook until browned on all sides, about 5-7 minutes. Remove the chicken from the pot and set aside.

    4. Add the chicken broth, thyme, paprika, salt, and pepper to the pot. Stir to combine and bring the mixture to a boil.

    5. Reduce the heat to medium-low and add the small pasta shapes to the pot. Cook until al dente, about 8-10 minutes.

    6. Add the cooked chicken back into the pot and stir to combine.

    7. If using heavy cream, stir it in during the last minute of cooking to give the soup a rich and creamy texture.

    8. Taste and adjust the seasoning as needed.

    9. Serve hot, garnished with chopped fresh herbs or a sprinkle of grated cheese if desired.

    Pro Tips for Success

    * To make this recipe even more comforting, try adding some diced bell peppers or mushrooms to the pot along with the onion.
    * If you prefer a lighter soup, reduce the amount of heavy cream or omit it altogether.
    * For an extra boost of flavor, add 1-2 teaspoons of Dijon mustard to the pot during step 4.
    * This recipe makes about 6 servings. To freeze, let the soup cool completely and then transfer it to airtight containers or freezer bags.

    Frequently Asked Questions

    Q: Can I use leftover chicken or turkey instead of fresh?
    A: Absolutely! Just make sure to adjust the cooking time according to the temperature of your leftovers.

    Q: What if I don’t have small pasta shapes? Can I use regular noodles?
    A: Yes, you can definitely use regular noodles like egg noodles or spaghetti. The key is to cook them until they’re al dente and then add them to the pot with the chicken and broth.

    Q: Can I make this recipe in a slow cooker?
    A: Yes! Simply brown the chicken and cook the onion and garlic in a skillet, then transfer everything to the slow cooker with the remaining ingredients. Cook on low for 6-8 hours or high for 3-4 hours.


    📢 Join Our Foodie Community!

    Love these recipes? Follow us for more daily inspiration and kitchen hacks:

    💡 Pro Tips for Perfect Air Frying

    • Space is Key: Don’t overcrowd the basket for max crispiness. 🌬️
    • Preheat: A preheated air fryer gives better results. 🔥
    • Shake: Flip halfway for even browning. 🔄

    💡 Master Your Air Fryer: Pro Tips

    • Airflow: Don’t crowd the basket. 🌬️
    • Preheat: 3-5 mins for best results. 🔥
    • Shake: Flip halfway for even browning. 🔄

    Why You Should Use an Air Fryer for This Recipe

    Using an air fryer is a game-changer for this recipe. Unlike traditional frying, it uses up to 95% less oil, making your meal significantly healthier without sacrificing that delicious crunch. Plus, it is faster than a conventional oven and doesn’t heat up your entire kitchen.

    Pro Tips for Perfection

    • Don’t Overcrowd: Always cook in a single layer to ensure the hot air circulates evenly.
    • Preheat: Taking 3 minutes to preheat your air fryer ensures the food starts cooking immediately for a crispier texture.
    • Shake It: Shake the basket halfway through cooking to ensure even browning on all sides.

    How to Store and Reheat

    If you have leftovers (which is rare!), store them in an airtight container in the refrigerator for up to 3 days. To reheat, simply pop them back in the air fryer at 350°F for 3-4 minutes until they are crispy again. Do not use a microwave, as it will make them soggy.

    🔥 Join Our Viral Foodie Community!

    Don’t miss out on the latest air fryer trends. Follow us now:

    📌 Follow on Pinterest
       
    🤖 Join Reddit

    📌 Pin This Recipe!

    Pin for Crack Chicken Noodle Soup (2026 Viral Recipe)

    Save to your Air Fryer board.
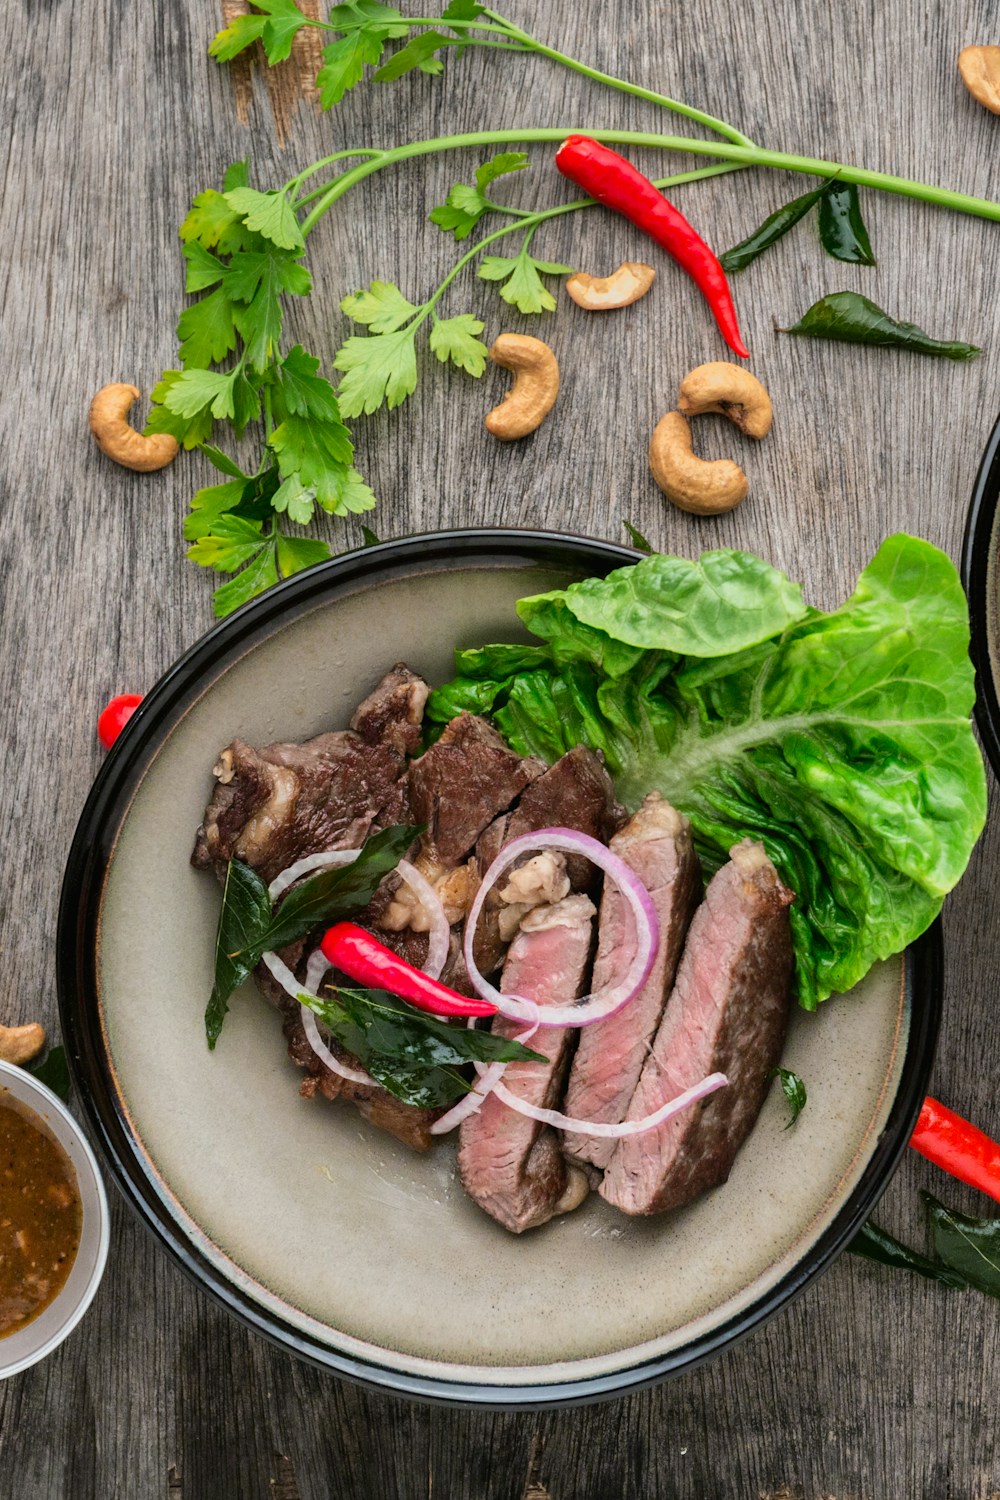
  • Green Goddess Salad (TikTok Viral)

    Green Goddess Salad (TikTok Viral)

    Green Goddess Salad (TikTok Viral) (2026 Viral Recipe). This recipe has gone viral for a reason: it’s quick, easy, and incredibly delicious.

    Green Goddess Salad (TikTok Viral) (2026 Viral Recipe)

    Below you will find the step-by-step instructions to make this amazing dish at home.

    Introduction

    Get ready to go green with the most epic salad trend taking over TikTok: the Green Goddess Salad! This vibrant, flavorful masterpiece has stolen hearts and taste buds worldwide. With its stunning combination of creamy avocado, crunchy romaine, and tangy citrus, it’s no wonder this salad has become a viral sensation.

    In this article, we’ll dive into the simplicity and magnificence of recreating this TikTok-famous dish in your own kitchen. From gathering the essential ingredients to expertly combining them, you’ll be hooked from the very first bite.

    So, what are you waiting for? Let’s get started on this culinary adventure!

    Ingredients

    • 4 cups romaine lettuce, chopped
    • 1 ripe avocado, diced
    • 1/2 cup freshly squeezed lemon juice
    • 1/2 cup plain Greek yogurt
    • 1 tablespoon Dijon mustard
    • 1 teaspoon honey
    • Salt and pepper to taste
    • Chopped fresh herbs (such as parsley, dill, or chives) for garnish (optional)

    Step-by-Step Instructions

    1. In a large bowl, combine the chopped romaine lettuce, diced avocado, and a pinch of salt and pepper to taste.

    Makes sure to massage that lettuce like it owes you money – just kidding! Simply toss everything together until well combined.

    2. In a small bowl, whisk together the lemon juice, Greek yogurt, Dijon mustard, and honey until smooth.

    This dressing is where the magic happens, folks! The tangy citrus, creamy yogurt, and hint of sweetness will tie everything together beautifully.

    3. Pour the dressing over the lettuce mixture and toss until everything is well coated.

    Get in there with your hands or a spoon – you know the drill!

    4. Taste and adjust seasoning as needed.

    This is where you can get creative! Add some red pepper flakes for an extra kick, a squeeze more lemon juice if you prefer it tangier, or maybe even some chopped nuts for added crunch.

    5. Cover and refrigerate for at least 30 minutes to allow the flavors to meld together.

    Patience is key here, my friends! Letting those flavors combine will make this salad truly unforgettable.

    6. Just before serving, garnish with chopped fresh herbs if desired.

    This adds a pop of color and freshness – perfect for special occasions or just a Tuesday

    Pro Tips for Success

    * Make sure to use ripe avocados – it makes all the difference in the creaminess.
    * Don’t be afraid to customize! Add your favorite protein (grilled chicken, salmon, or tofu work beautifully), some chopped bell peppers for extra crunch, or even a handful of spinach for an added nutritional boost.
    * For an extra creamy dressing, try adding a tablespoon or two of sour cream or crème fraîche – you won’t regret it!
    * To make this salad more substantial, serve it as a wrap with your favorite flatbread or crackers.

    Frequently Asked Questions

    Q: Can I substitute Greek yogurt with regular yogurt?
    A: Yes! You can use either regular or Greek yogurt – just keep in mind that the non-Greek version might not be as thick and creamy.

    Q: Is this salad suitable for vegans?
    A: Absolutely! Simply swap out the honey for maple syrup (or omit it altogether if you prefer), and use a vegan-friendly dressing alternative like hummus or tahini-based dressing.

    Q: Can I make this salad ahead of time?
    A: Yes, but keep in mind that the avocado might not hold up as well after 24 hours. It’s best to assemble everything just before serving for maximum freshness and creaminess.

    There you have it – a step-by-step guide to recreating the viral Green Goddess Salad! With its unbeatable combination of textures, flavors, and colors, this salad is sure to become your new go-to for any occasion. So, what are you waiting for? Get green, get creative, and join the TikTok-inspired salad revolution


    📢 Join Our Foodie Community!

    Love these recipes? Follow us for more daily inspiration and kitchen hacks:

    💡 Pro Tips for Perfect Air Frying

    • Space is Key: Don’t overcrowd the basket for max crispiness. 🌬️
    • Preheat: A preheated air fryer gives better results. 🔥
    • Shake: Flip halfway for even browning. 🔄

    💡 Master Your Air Fryer: Pro Tips

    • Airflow: Don’t crowd the basket. 🌬️
    • Preheat: 3-5 mins for best results. 🔥
    • Shake: Flip halfway for even browning. 🔄

    Why You Should Use an Air Fryer for This Recipe

    Using an air fryer is a game-changer for this recipe. Unlike traditional frying, it uses up to 95% less oil, making your meal significantly healthier without sacrificing that delicious crunch. Plus, it is faster than a conventional oven and doesn’t heat up your entire kitchen.

    Pro Tips for Perfection

    • Don’t Overcrowd: Always cook in a single layer to ensure the hot air circulates evenly.
    • Preheat: Taking 3 minutes to preheat your air fryer ensures the food starts cooking immediately for a crispier texture.
    • Shake It: Shake the basket halfway through cooking to ensure even browning on all sides.

    How to Store and Reheat

    If you have leftovers (which is rare!), store them in an airtight container in the refrigerator for up to 3 days. To reheat, simply pop them back in the air fryer at 350°F for 3-4 minutes until they are crispy again. Do not use a microwave, as it will make them soggy.

    🔥 Join Our Viral Foodie Community!

    Don’t miss out on the latest air fryer trends. Follow us now:

    📌 Follow on Pinterest
       
    🤖 Join Reddit

    📌 Pin This Recipe!

    Pin for Green Goddess Salad (TikTok Viral) (2026 Viral Recipe)

    Save to your Air Fryer board.
  • Slow Cooker Mississippi Pot Roast

    Slow Cooker Mississippi Pot Roast

    Slow Cooker Mississippi Pot Roast (2026 Viral Recipe). This recipe has gone viral for a reason: it’s quick, easy, and incredibly delicious.

    Slow Cooker Mississippi Pot Roast (2026 Viral Recipe)

    Below you will find the step-by-step instructions to make this amazing dish at home.

    Introduction

    Are you ready to experience the rich flavors of Southern comfort food in a slow cooker? Look no further than our Slow Cooker Mississippi Pot Roast recipe! This mouthwatering dish is perfect for a weeknight dinner, a family gathering, or even a potluck. With tender chunks of beef, melt-in-your-mouth potatoes, and a tangy BBQ sauce-based gravy, this Mississippi Pot Roast is sure to become a new favorite.

    Ingredients

    • 1 (3-4 pound) boneless beef chuck roast
    • 1 cup of pepperoncini peppers, sliced
    • 1 onion, sliced
    • 3 cloves of garlic, minced
    • 2 large potatoes, peeled and cubed
    • 1 cup of beef broth
    • 1 tablespoon of brown sugar
    • 1 teaspoon of Worcestershire sauce
    • 1 teaspoon of dried thyme
    • 1/2 teaspoon of salt
    • 1/4 teaspoon of black pepper
    • 1 cup of barbecue sauce (such as Sweet Baby Ray’s)
    • Chopped fresh parsley or chives, for garnish (optional)

    Step-by-Step Instructions

    1. Preheat your slow cooker to low heat.

    2. Season the beef chuck roast with salt and black pepper on all sides. Place it in the slow cooker.

    3. In a separate bowl, mix together the sliced onion, minced garlic, and sliced pepperoncini peppers. Spread this mixture evenly over the top of the beef.

    4. Add the cubed potatoes to the slow cooker, arranging them around the beef and onion mixture.

    5. In a small bowl, whisk together the brown sugar, Worcestershire sauce, and dried thyme. Pour this mixture over the beef and potatoes in the slow cooker.

    6. Pour the beef broth into the slow cooker, making sure that all of the ingredients are covered with liquid.

    7. Cook on low for 8-10 hours or high for 4-5 hours.

    8. About 30 minutes before serving, stir the barbecue sauce into the slow cooker and let it heat through.

    9. Remove the beef from the slow cooker and use two forks to shred it into bite-sized pieces. Return the shredded beef to the slow cooker and stir until everything is well coated with the BBQ sauce-based gravy.

    10. Serve hot, garnished with chopped fresh parsley or chives if desired. This Slow Cooker Mississippi Pot Roast is perfect for serving with crusty bread, mashed potatoes, or over a bed of creamy coleslaw.

    Pro Tips for Success

    • To prevent the beef from drying out during cooking, make sure to use a tender cut like chuck roast and not overcrowd the slow cooker.
    • If you prefer a thicker gravy, you can reduce the amount of beef broth or whisk in some cornstarch or flour before serving.
    • For added flavor, try adding other ingredients such as diced bell peppers, sliced mushrooms, or chopped fresh herbs to the slow cooker with the onion and garlic mixture.

    Frequently Asked Questions

    Q: Can I cook this recipe on high for a shorter amount of time?
    A: Yes, you can! Cooking on high for 4-5 hours will yield similar results. However, keep in mind that the beef may not be as tender if cooked for a shorter amount of time.

    Q: What type of barbecue sauce is best to use?
    A: Sweet Baby Ray’s is a popular choice, but feel free to experiment with different brands or flavors! Some people prefer sweeter sauces while others like them more tangy.

    Q: Can I make this recipe in a Dutch oven or Instant Pot instead of a slow cooker?
    A: Yes, you can! For the Dutch oven method, brown the beef and cook it covered at 300°F for about 2.5 hours. For the Instant Pot method, brown the beef, then add all ingredients except the barbecue sauce and cook on high pressure for 60-90 minutes.

    In conclusion, our Slow Cooker Mississippi Pot Roast recipe is a true Southern comfort food classic that’s easy to make and perfect for any occasion. With its rich flavors and tender texture, it’s sure to become a family favorite!


    📢 Join Our Foodie Community!

    Love these recipes? Follow us for more daily inspiration and kitchen hacks:

    💡 Pro Tips for Perfect Air Frying

    • Space is Key: Don’t overcrowd the basket for max crispiness. 🌬️
    • Preheat: A preheated air fryer gives better results. 🔥
    • Shake: Flip halfway for even browning. 🔄

    💡 Master Your Air Fryer: Pro Tips

    • Airflow: Don’t crowd the basket. 🌬️
    • Preheat: 3-5 mins for best results. 🔥
    • Shake: Flip halfway for even browning. 🔄

    Why You Should Use an Air Fryer for This Recipe

    Using an air fryer is a game-changer for this recipe. Unlike traditional frying, it uses up to 95% less oil, making your meal significantly healthier without sacrificing that delicious crunch. Plus, it is faster than a conventional oven and doesn’t heat up your entire kitchen.

    Pro Tips for Perfection

    • Don’t Overcrowd: Always cook in a single layer to ensure the hot air circulates evenly.
    • Preheat: Taking 3 minutes to preheat your air fryer ensures the food starts cooking immediately for a crispier texture.
    • Shake It: Shake the basket halfway through cooking to ensure even browning on all sides.

    How to Store and Reheat

    If you have leftovers (which is rare!), store them in an airtight container in the refrigerator for up to 3 days. To reheat, simply pop them back in the air fryer at 350°F for 3-4 minutes until they are crispy again. Do not use a microwave, as it will make them soggy.

    🔥 Join Our Viral Foodie Community!

    Don’t miss out on the latest air fryer trends. Follow us now:

    📌 Follow on Pinterest
       
    🤖 Join Reddit

    📌 Pin This Recipe!

    Pin for Slow Cooker Mississippi Pot Roast (2026 Viral Recipe)

    Save to your Air Fryer board.
  • Classic Texas Sheet Cake

    Classic Texas Sheet Cake

    Classic Texas Sheet Cake (2026 Viral Recipe). This recipe has gone viral for a reason: it’s quick, easy, and incredibly delicious.

    Classic Texas Sheet Cake (2026 Viral Recipe)

    Below you will find the step-by-step instructions to make this amazing dish at home.

    Introduction

    Ah, Texas Sheet Cake – the ultimate comfort food for any occasion. This classic recipe has been a staple in Southern households for generations, and for good reason. Moist, fluffy cake smothered in a rich, chocolatey frosting? Yes, please! In this article, we’ll dive into the world of Texas Sheet Cake and share our secrets for creating the perfect pan-sized delight.

    Ingredients

    • 1 1/2 cups all-purpose flour
    • 1 cup granulated sugar
    • 2 teaspoons baking powder
    • 1 teaspoon salt
    • 1/2 cup unsalted butter, softened
    • 1 cup whole milk
    • 2 large eggs
    • 1 teaspoon vanilla extract
    • Frosting (see below for recipe)

    Step-by-Step Instructions

    Here’s where the magic happens! Follow these simple steps to create your own Texas Sheet Cake:

    1. Preheat your oven to 350°F (175°C). Yes, it’s that easy!

    2. In a large mixing bowl, whisk together flour, sugar, baking powder, and salt.

    3. Add softened butter and mix until the batter resembles coarse crumbs. Don’t overmix!

    4. Pour in whole milk and mix until the batter is smooth and creamy.

    5. Beat in eggs one at a time, followed by vanilla extract.

    6. Pour the batter into a 15×10-inch jelly roll pan or a large half-sheet pan (9×13 inches).

    7. Bake for 20-25 minutes, or until a toothpick inserted into the center comes out clean.

    8. Remove from the oven and let cool completely.

    9. Once cooled, spread your favorite chocolate frosting over the entire cake. See our recipe below!

    10. Cut into squares and serve. Voilà! Your Texas Sheet Cake is ready to impress!

    Pro Tips for Success

    Want to take your Texas Sheet Cake game to the next level? Try these expert tips:

    * Use high-quality chocolate chips or chopped chocolate for a richer flavor.
    * Don’t overmix the batter – it’ll lead to a dense cake!
    * For an extra-crispy crust, bake the cake for 5-7 minutes longer than recommended. Keep an eye on it!

    Frequently Asked Questions

    Got questions? We’ve got answers! Here are some common queries about Texas Sheet Cake:

    Q: Can I use a different size pan?
    A: Yes, but adjust baking time accordingly. A smaller pan will take less time, while a larger one may require more.

    Q: How do I store leftover cake?
    A: Wrap tightly in plastic wrap or aluminum foil and keep at room temperature for up to 3 days.

    Q: Can I freeze the cake?
    A: Absolutely! Wrap individual squares in plastic wrap or aluminum foil and store in an airtight container for up to 2 months. Thaw overnight before serving.

    Frosting Recipe

    • 1 cup (2 sticks) unsalted butter, softened
    • 2 cups confectioners’ sugar
    • 1/2 cup whole milk
    • 2 teaspoons pure vanilla extract
    • 1 cup semi-sweet chocolate chips

    Combine softened butter and confectioners’ sugar in a large mixing bowl. Beat until smooth, then add milk and vanilla extract. Melt chocolate chips in the microwave or over low heat, stirring occasionally. Allow to cool slightly before whisking into the butter mixture. Voilà! Your Texas Sheet Cake is now complete!


    📢 Join Our Foodie Community!

    Love these recipes? Follow us for more daily inspiration and kitchen hacks:

    💡 Pro Tips for Perfect Air Frying

    • Space is Key: Don’t overcrowd the basket for max crispiness. 🌬️
    • Preheat: A preheated air fryer gives better results. 🔥
    • Shake: Flip halfway for even browning. 🔄

    💡 Master Your Air Fryer: Pro Tips

    • Airflow: Don’t crowd the basket. 🌬️
    • Preheat: 3-5 mins for best results. 🔥
    • Shake: Flip halfway for even browning. 🔄

    Why You Should Use an Air Fryer for This Recipe

    Using an air fryer is a game-changer for this recipe. Unlike traditional frying, it uses up to 95% less oil, making your meal significantly healthier without sacrificing that delicious crunch. Plus, it is faster than a conventional oven and doesn’t heat up your entire kitchen.

    Pro Tips for Perfection

    • Don’t Overcrowd: Always cook in a single layer to ensure the hot air circulates evenly.
    • Preheat: Taking 3 minutes to preheat your air fryer ensures the food starts cooking immediately for a crispier texture.
    • Shake It: Shake the basket halfway through cooking to ensure even browning on all sides.

    How to Store and Reheat

    If you have leftovers (which is rare!), store them in an airtight container in the refrigerator for up to 3 days. To reheat, simply pop them back in the air fryer at 350°F for 3-4 minutes until they are crispy again. Do not use a microwave, as it will make them soggy.

    🔥 Join Our Viral Foodie Community!

    Don’t miss out on the latest air fryer trends. Follow us now:

    📌 Follow on Pinterest
       
    🤖 Join Reddit

    📌 Pin This Recipe!

    Pin for Classic Texas Sheet Cake (2026 Viral Recipe)

    Save to your Air Fryer board.
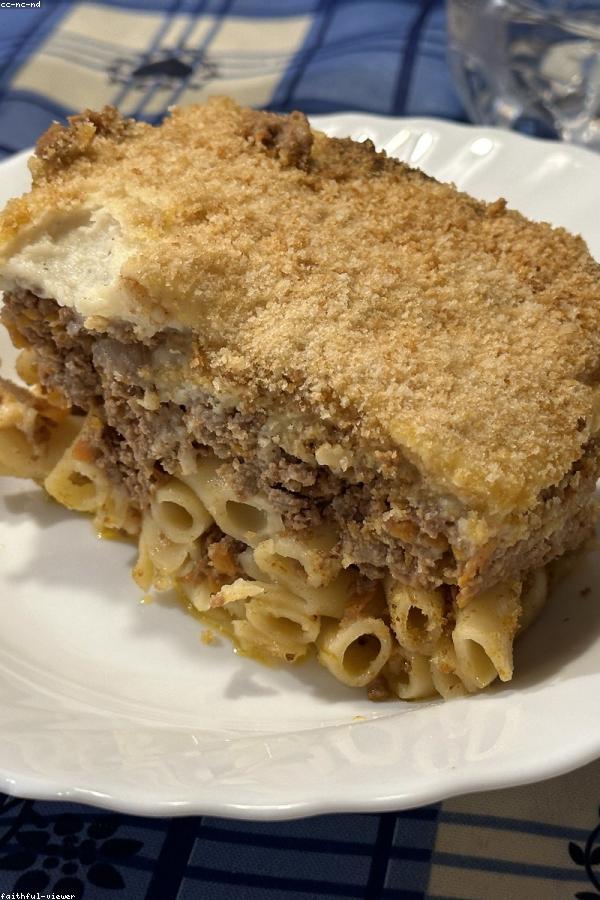
  • Million Dollar Baked Spaghetti

    Million Dollar Baked Spaghetti

    Million Dollar Baked Spaghetti (2026 Viral Recipe). This recipe has gone viral for a reason: it’s quick, easy, and incredibly delicious.

    Million Dollar Baked Spaghetti (2026 Viral Recipe)

    Below you will find the step-by-step instructions to make this amazing dish at home.

    Introduction

    Are you ready to elevate your comfort food game? Look no further than this mouthwatering recipe for Million Dollar Baked Spaghetti! This indulgent twist on a classic favorite is sure to become a family staple, impress your friends and neighbors, and leave everyone begging for more. With its rich, creamy sauce and perfectly cooked pasta, this dish is the ultimate comfort food experience.

    But don’t just take our word for it – Million Dollar Baked Spaghetti has earned its reputation as a crowd-pleaser due to its bold flavors and satisfying texture. Whether you’re hosting a casual dinner party or simply need a pick-me-up after a long week, this recipe is sure to hit the spot.

    So what are you waiting for? Let’s dive into the world of Million Dollar Baked Spaghetti and discover why it’s the ultimate comfort food indulgence!

    Ingredients

    • 1 pound spaghetti
    • 1 tablespoon olive oil
    • 1 onion, diced
    • 3 garlic cloves, minced
    • 1 pound ground beef
    • 1 cup grated cheddar cheese
    • 1/2 cup grated Parmesan cheese
    • 1 can (28 oz) crushed tomatoes
    • 1 cup heavy cream
    • 1 teaspoon dried oregano
    • Salt and pepper, to taste
    • Fresh parsley, chopped (optional)

    Step-by-Step Instructions

    1. Preheat your oven to 350°F (175°C).
    2. Cook the spaghetti according to package instructions until al dente. Drain and set aside.
    3. In a large skillet, heat the olive oil over medium-high heat. Add the diced onion and cook until translucent, about 5 minutes.
    4. Add the minced garlic and cook for an additional 1-2 minutes, or until fragrant.
    5. Add the ground beef to the skillet, breaking it up with a spoon as it cooks. Cook until browned, about 5-7 minutes.
    6. Stir in the crushed tomatoes, heavy cream, dried oregano, salt, and pepper. Bring the sauce to a simmer and let cook for 10-15 minutes, stirring occasionally, or until the sauce has thickened slightly.
    7. In a large mixing bowl, combine the cooked spaghetti, ground beef sauce, grated cheddar cheese, and grated Parmesan cheese. Mix well to combine.
    8. Transfer the pasta mixture to a 9×13-inch baking dish and top with additional grated cheddar cheese (optional).
    9. Bake for 25-30 minutes, or until the cheese is melted and bubbly.
    10. Remove from the oven and let cool for a few minutes before serving.

    Pro Tips for Success

    * To ensure the pasta cooks evenly, cook it in batches if necessary to avoid overcrowding the pot.
    * Don’t overcook the ground beef – you want it to still have a bit of pinkness to it for optimal flavor.
    * If using heavy cream, be sure to stir the sauce frequently while it’s cooking to prevent scorching.
    * For an extra-rich and creamy sauce, add 1-2 tablespoons of butter or cream cheese to the sauce before serving.

    Frequently Asked Questions

    Q: Can I use ground turkey or chicken instead of beef?
    A: Absolutely! Simply substitute the ground beef with an equal amount of ground turkey or chicken. Keep in mind that cooking times may vary depending on the type of poultry you choose.
    Q: What if I don’t have heavy cream? Can I substitute it with something else?
    A: Yes, you can substitute heavy cream with half-and-half or a combination of milk and cream. Keep in mind that the sauce may not be as rich and creamy, but it will still be delicious.
    Q: How long does Million Dollar Baked Spaghetti keep in the fridge?
    A: This dish is best served fresh, but it can be stored in an airtight container for up to 3-4 days. Reheat gently before serving.

    There you have it – Million Dollar Baked Spaghetti, the ultimate comfort food indulgence that’s sure to become a family favorite. With its rich flavors and satisfying texture, this dish is perfect for any occasion. So go ahead, get creative in the kitchen, and indulge in the pure bliss of this mouthwatering recipe!


    📢 Join Our Foodie Community!

    Love these recipes? Follow us for more daily inspiration and kitchen hacks:

    💡 Pro Tips for Perfect Air Frying

    • Space is Key: Don’t overcrowd the basket for max crispiness. 🌬️
    • Preheat: A preheated air fryer gives better results. 🔥
    • Shake: Flip halfway for even browning. 🔄

    💡 Master Your Air Fryer: Pro Tips

    • Airflow: Don’t crowd the basket. 🌬️
    • Preheat: 3-5 mins for best results. 🔥
    • Shake: Flip halfway for even browning. 🔄

    Why You Should Use an Air Fryer for This Recipe

    Using an air fryer is a game-changer for this recipe. Unlike traditional frying, it uses up to 95% less oil, making your meal significantly healthier without sacrificing that delicious crunch. Plus, it is faster than a conventional oven and doesn’t heat up your entire kitchen.

    Pro Tips for Perfection

    • Don’t Overcrowd: Always cook in a single layer to ensure the hot air circulates evenly.
    • Preheat: Taking 3 minutes to preheat your air fryer ensures the food starts cooking immediately for a crispier texture.
    • Shake It: Shake the basket halfway through cooking to ensure even browning on all sides.

    How to Store and Reheat

    If you have leftovers (which is rare!), store them in an airtight container in the refrigerator for up to 3 days. To reheat, simply pop them back in the air fryer at 350°F for 3-4 minutes until they are crispy again. Do not use a microwave, as it will make them soggy.

    🔥 Join Our Viral Foodie Community!

    Don’t miss out on the latest air fryer trends. Follow us now:

    📌 Follow on Pinterest
       
    🤖 Join Reddit

    📌 Pin This Recipe!

    Pin for Million Dollar Baked Spaghetti (2026 Viral Recipe)

    Save to your Air Fryer board.

  • Bang Bang Shrimp Pasta

    Bang Bang Shrimp Pasta

    Bang Bang Shrimp Pasta (2026 Viral Recipe). This recipe has gone viral for a reason: it’s quick, easy, and incredibly delicious.

    Bang Bang Shrimp Pasta (2026 Viral Recipe)

    Below you will find the step-by-step instructions to make this amazing dish at home.

    Introduction

    Get ready to ignite your taste buds with a dish that’s sure to become a new favorite: Bang Bang Shrimp Pasta! This creamy, spicy, and utterly irresistible recipe combines the flavors of China’s Szechuan province with the comfort of a classic pasta dish. With its bold and zesty sauce, succulent shrimp, and al dente noodles, this Bang Bang Shrimp Pasta is sure to become a staple in your kitchen.

    Ingredients

    • 1 pound large shrimp, peeled and deveined
    • 12 oz pasta of your choice (linguine or fettuccine work well)
    • 2 tablespoons vegetable oil
    • 2 cloves garlic, minced
    • 1 tablespoon grated fresh ginger
    • 1 teaspoon soy sauce
    • 1 teaspoon rice vinegar
    • 1/4 teaspoon red pepper flakes (or more to taste)
    • 1 cup heavy cream
    • 2 tablespoons butter
    • Salt and black pepper, to taste
    • Fresh cilantro or scallions, chopped (optional)

    Step-by-Step Instructions

    1. Bring a large pot of salted water to a boil. Cook the pasta according to package instructions until al dente. Reserve 1 cup of pasta water before draining.

    2. In a medium saucepan, heat the vegetable oil over medium-high heat. Add the garlic and ginger; cook for 30 seconds, or until fragrant.

    3. Add the soy sauce, rice vinegar, and red pepper flakes to the saucepan. Bring the mixture to a simmer and let cook for 1-2 minutes, or until slightly reduced.

    4. Stir in the heavy cream and butter. Reduce heat to medium-low and let the sauce simmer for 5-7 minutes, stirring occasionally, or until it thickens slightly.

    5. Add the cooked shrimp to the saucepan and toss to coat with the Bang Bang sauce. Cook for an additional 2-3 minutes, or until the shrimp are pink and fully cooked.

    6. Add the cooked pasta to the saucepan, tossing to combine with the shrimp and sauce. If the sauce seems too thick, add some of the reserved pasta water.

    7. Season the pasta with salt and black pepper to taste. Serve immediately, garnished with chopped cilantro or scallions if desired.

    Pro Tips for Success

    * To take this dish to the next level, use high-quality ingredients like fresh shrimp and real cream.
    * If you prefer a spicier sauce, add more red pepper flakes or use hot sauce of your choice.
    * For an added crunch, toss some toasted peanuts or crispy bacon bits into the pasta.
    * Consider using other types of protein, such as chicken or pork, for a different twist on the recipe.

    Frequently Asked Questions

    Q: Can I make this recipe ahead of time?
    A: Yes, you can cook the pasta and prepare the Bang Bang sauce up to 24 hours in advance. Store them separately in the refrigerator until ready to assemble and serve.

    Q: What type of pasta is best for this recipe?
    A: Fettuccine or linguine work well due to their flat shape and texture, which helps the sauce coat evenly. You can also use other long, thin pasta shapes like spaghetti or angel hair.

    Q: Can I substitute the heavy cream with a lighter alternative?
    A: Yes, you can try substituting the heavy cream with half-and-half, whole milk, or even Greek yogurt. Keep in mind that these alternatives will change the flavor and texture of the sauce slightly.

    In conclusion, Bang Bang Shrimp Pasta is a bold, zesty, and indulgent dish that’s sure to become a new favorite. With its unique blend of Asian-inspired flavors and comforting pasta, this recipe is perfect for special occasions or everyday meals. Give it a try and discover why this dish has earned a permanent spot on our table!


    📢 Join Our Foodie Community!

    Love these recipes? Follow us for more daily inspiration and kitchen hacks:

    💡 Pro Tips for Perfect Air Frying

    • Space is Key: Don’t overcrowd the basket for max crispiness. 🌬️
    • Preheat: A preheated air fryer gives better results. 🔥
    • Shake: Flip halfway for even browning. 🔄

    💡 Master Your Air Fryer: Pro Tips

    • Airflow: Don’t crowd the basket. 🌬️
    • Preheat: 3-5 mins for best results. 🔥
    • Shake: Flip halfway for even browning. 🔄

    Why You Should Use an Air Fryer for This Recipe

    Using an air fryer is a game-changer for this recipe. Unlike traditional frying, it uses up to 95% less oil, making your meal significantly healthier without sacrificing that delicious crunch. Plus, it is faster than a conventional oven and doesn’t heat up your entire kitchen.

    Pro Tips for Perfection

    • Don’t Overcrowd: Always cook in a single layer to ensure the hot air circulates evenly.
    • Preheat: Taking 3 minutes to preheat your air fryer ensures the food starts cooking immediately for a crispier texture.
    • Shake It: Shake the basket halfway through cooking to ensure even browning on all sides.

    How to Store and Reheat

    If you have leftovers (which is rare!), store them in an airtight container in the refrigerator for up to 3 days. To reheat, simply pop them back in the air fryer at 350°F for 3-4 minutes until they are crispy again. Do not use a microwave, as it will make them soggy.

    🔥 Join Our Viral Foodie Community!

    Don’t miss out on the latest air fryer trends. Follow us now:

    📌 Follow on Pinterest
       
    🤖 Join Reddit

    📌 Pin This Recipe!

    Pin for Bang Bang Shrimp Pasta (2026 Viral Recipe)

    Save to your Air Fryer board.

  • Texas Cowboy Caviar Dip

    Texas Cowboy Caviar Dip

    Texas Cowboy Caviar Dip (2026 Viral Recipe). This recipe has gone viral for a reason: it’s quick, easy, and incredibly delicious.

    Texas Cowboy Caviar Dip (2026 Viral Recipe)

    Below you will find the step-by-step instructions to make this amazing dish at home.

    Introduction

    Get ready to rustle up some serious flavor with our Texas Cowboy Caviar Dip! This addictive, chunky dip is a staple at any Texas-themed gathering or backyard BBQ. Imagine a rich, savory blend of black beans, tomatoes, and spices, mixed with a hint of tanginess from the lime juice and a crunch from the fresh cilantro. It’s the perfect combination to please both cowboys and cowgirls alike!

    Ingredients

    • 1 (15 ounce) can black beans, drained and rinsed
    • 1 cup diced fresh tomatoes (such as Roma or grape tomatoes)
    • 1/2 cup chopped red onion
    • 1 jalapeño pepper, seeded and finely chopped
    • 2 cloves garlic, minced
    • 1 teaspoon ground cumin
    • 1/2 teaspoon smoked paprika (optional, for a smoky flavor)
    • 1/4 teaspoon salt
    • 1/4 teaspoon black pepper
    • 2 tablespoons fresh lime juice
    • 1/4 cup chopped fresh cilantro
    • 1 cup shredded cheddar cheese (optional, for an extra burst of flavor)

    Step-by-Step Instructions

    1. In a medium bowl, combine the black beans, diced tomatoes, red onion, jalapeño pepper, garlic, cumin, smoked paprika (if using), salt, and black pepper.
    2. Stir until all the ingredients are well combined.
    3. Squeeze the lime juice over the mixture and stir again to distribute the acidity evenly.
    4. Sprinkle the chopped cilantro over the top of the dip and gently fold it in.
    5. Taste the dip and adjust the seasoning if needed (keep in mind that the flavors will meld together as it sits).
    6. Cover the bowl with plastic wrap and refrigerate for at least 30 minutes to allow the flavors to meld.
    7. Just before serving, stir in the shredded cheddar cheese (if using).

    Pro Tips for Success

    • For an extra boost of flavor, let the dip sit at room temperature for about 30 minutes before refrigerating it. This will help the lime juice penetrate deeper into the ingredients.
    • Use fresh, ripe tomatoes for the best flavor. You can also substitute in some diced bell peppers or chopped scallions if you prefer.
    • To make this dip more substantial, serve it with a bag of crispy tortilla chips or pita bread. You could also use it as a topping for tacos, grilled meats, or vegetables.
    • Consider making this dip ahead of time and storing it in the refrigerator for up to 3 days. The flavors will only get better with time!

    Frequently Asked Questions

    Q: Can I make this dip without jalapeños?

    A: Absolutely! If you prefer a milder flavor, omit the jalapeño pepper or substitute in some diced bell peppers for added sweetness.

    Q: How long does it take to prepare this dip?

    A: With its simple ingredients and easy-to-follow instructions, you can have this Texas Cowboy Caviar Dip ready to go in about 20 minutes. Just be sure to let it chill for at least 30 minutes before serving.

    Q: Can I customize the recipe to suit my taste?

    A: This dip is a blank canvas just waiting for your personal touch! Feel free to add or subtract ingredients to make it your own. Maybe you’ll want to try adding some diced avocado for creaminess, or a sprinkle of crumbled bacon for smokiness. The possibilities are endless!

    There you have it – the ultimate Texas Cowboy Caviar Dip recipe! Whether you’re hosting a backyard BBQ or just need a tasty snack to satisfy your cravings, this addictive dip is sure to hit the spot. So grab some friends, gather ’round, and get ready to rustle up some serious flavor with our Texas Cowboy Caviar Dip!


    📢 Join Our Foodie Community!

    Love these recipes? Follow us for more daily inspiration and kitchen hacks:

    💡 Pro Tips for Perfect Air Frying

    • Space is Key: Don’t overcrowd the basket for max crispiness. 🌬️
    • Preheat: A preheated air fryer gives better results. 🔥
    • Shake: Flip halfway for even browning. 🔄

    💡 Master Your Air Fryer: Pro Tips

    • Airflow: Don’t crowd the basket. 🌬️
    • Preheat: 3-5 mins for best results. 🔥
    • Shake: Flip halfway for even browning. 🔄

    Why You Should Use an Air Fryer for This Recipe

    Using an air fryer is a game-changer for this recipe. Unlike traditional frying, it uses up to 95% less oil, making your meal significantly healthier without sacrificing that delicious crunch. Plus, it is faster than a conventional oven and doesn’t heat up your entire kitchen.

    Pro Tips for Perfection

    • Don’t Overcrowd: Always cook in a single layer to ensure the hot air circulates evenly.
    • Preheat: Taking 3 minutes to preheat your air fryer ensures the food starts cooking immediately for a crispier texture.
    • Shake It: Shake the basket halfway through cooking to ensure even browning on all sides.

    How to Store and Reheat

    If you have leftovers (which is rare!), store them in an airtight container in the refrigerator for up to 3 days. To reheat, simply pop them back in the air fryer at 350°F for 3-4 minutes until they are crispy again. Do not use a microwave, as it will make them soggy.

    🔥 Join Our Viral Foodie Community!

    Don’t miss out on the latest air fryer trends. Follow us now:

    📌 Follow on Pinterest
       
    🤖 Join Reddit

    📌 Pin This Recipe!

    Pin for Texas Cowboy Caviar Dip (2026 Viral Recipe)

    Save to your Air Fryer board.